Case Study: Lean Manufacturing 101
Case Study:
Lean Manufacturing 101
Talented quality personnel and engineers from a leading manufacturer of metrology products share their quality process improvements. By Catherine M. Phillips
Optikos Corp. is Clearly Focused on Process Improvement
Careful implementation of optimal tools and techniques is a focus of Optikos Corp. (Wakefield, MA), an optical engineering and manufacturing company working to eliminate waste in product movement, downtime, and product defects. It’s not just a growth-focused endeavor, but one that can offer monetary benefits as well.
Optikos is home to the largest independent optical engineering group in the world. They specialize in the engineering design, product development and manufacture of complex optical and opto-mechanical products for a wide variety of clients. Additionally, they have their own standard lineup of metrology test systems for measuring lens, camera and ophthalmic systems. Optikos serves the life science, medical, automotive, aerospace, defense, VR/AR, semiconductor, and consumer industries—you’ll find them Anywhere Light Goes.
The company has grown by focusing on quality processes, whether it be advanced metrology product development in the R&D group, in-house lens and camera testing through their IQ Lab services, or product design and development through their engineering services and contract manufacturing. Optikos manufacturing produces products in quantities ranging from hundreds to tens of thousands of units each year in their ISO 9001 and ISO 13485 certified facility.
The groundbreaking problem solving of the Optikos engineering team sets them apart from their competitors. Their expertise is clearly reflected in their attention to internal quality and production processes, from manufacturing, to their ISO class 6 clean rooms, work cells and even the use of optimal inspection in their quality inspection lab. Lean and highly efficient practices eliminate waste, prevent lost profits and protect the reputation of this growing company.
Fixturing the Quality Inspection Lab to Improve the Entire Process
One of the easiest and most affordable quality improvements a company can undergo is the speed at which a quality inspector can return results back to manufacturing and engineering. Optikos has focused on this process within their inspection team.
“By looking at inspection on the CMM from the table up, like a machinist does in designing ideal setups and fixturing, I’m able to return inspection data to engineering much faster than ever before,” says William Begin, quality control technician at Optikos.
Like most inspection labs, Optikos supports a variety of requests, from engineers performing R&D, requests from the shop floor, customer commissioned inspection, and incoming inspection of critical components. With the help of proper work holding and modular, fast-swap fixture plates, shifting from one part to another or checking alternate dimensions on a part for an engineer happens fast. The inspector has the ability to quickly re-orient the part, close down the routine, open a new one, and put on a new plate within minutes. Parts are re-fixtured without a relocating routine, providing efficient production. These same fixtured parts can also move from one piece of inspection equipment to another.
“I was able to stay on the ‘Z’ axis, I didn’t have to change a tool or a tip angle,” Begin said of the Inspection Arsenal tools. “This happens regularly in my work and is quite a time saver. I went back to the job I was working on previously without any program, tool or tip angle changes.”
The lean technique of modular, fast-swap fixturing of Inspection Arsenal was introduced by one of Optikos preferred metrology suppliers - LF O’Leary, located in Weymouth, MA.
“Optikos had just purchased a CMM from a leading OEM,” said Nick Mastrocola, quality manager at Optikos. “We were discussing designing fixtures for the table and I suggested Inspection Arsenal. Based on previous experience, I knew we would immediately hit the ground running with the modular fixtures and that the speed and precision would be exceptional.”
When Begin sets up a production inspection run with multiple measurements and detailed reporting, there are two primary concerns: the initial set-up time, and the unload-reload times that are critical to production efficiency. With the Spring-Load Chuck and Inspection Arsenal preconfigured fixture kit, initial set-up time is essentially eliminated.
“I don’t have to make fixtures and I don’t have to ‘imagine’ a fixture setup every time a piece comes in the room,” Begin said. “If I can reload the parts with precise repeatability and eliminate re-locating the part each time then I’m able to focus on the results.”
Companies today are monetizing inspection steps to better improve efficiency. Calculating the savings at the probe is straightforward; there is a direct comparison between the use of fixturing versus forgoing fixtures. There is also a marked value to all affected departments; however, the total savings are not as easily quantified.
In traditional fixturing, it can take an hour for prep and fixture setup. With modular fixturing, the same step takes 15 minutes. Just one production run of this particular part had an 11-minute routine and a three-minute unload-reload time. In addition to the preliminary time savings, swap time was improved by two and half minutes per load. In the end, 120 parts total were run with a 300 minute time savings. Significant savings can be evidenced for all parts running through the lab throughout the day.
A Solution to a Specific Problem with Broad Benefits.
The implementation of the Spring-Load Chuck was twofold: it helped uncover undetected defects and lowered the cost of lost time by engineering and production waiting for setup. The Spring-Load Chuck is designed to hold parts tightly, yet with the control to not over tighten. The chuck is self-centering with tension springs moving in tandem for even tension and a through hole for full access and to provide backlighting when used on vision systems.
Dennis Fantone, director of operations at Optikos, detailed how his team uncovered and subverted a potentially disruptive defect in some vendor-supplied components. In building a custom microscope for one customer with a critical feature being microscope repeatability of the different objective locations (20x, 100x, etc.), it’s critical to rotate the turretfeature to the same location every time with a precise level of accuracy and repeatability.
The team was having issues with repeatability with the bearing that fits in the mechanical pocket that impacts the rotation. The problem was exposed through a scan of the pocket while part was being held in the Spring-Load Chuck, and showed a trilobal effect, which could be missed if only spot checking the diameter of the pocket, rather than scanning. This trilobal geometry put tension on the bearing and caused the team to miss the repeatability specification. Finding this issue early in the process saved the team time in troubleshooting and impacted the entire production pipeline.
Not only did the function of the Spring-Load Chuck help discover the trilobal effect, it was the perfect solution for speeding the inspection of the two notched companion rings. To switch from the turret component (with trilobal issue) to rings, a routine was created to measure the angles of the notches in the outer diameters. The routine itself is simple, and only checks the repeatability of the angles of the notches – thus accommodating two ring designs with different numbers of notches. For all part routines, the chuck remains in place while minor adjustments in the jaws are made to accept parts. Because of the basic similarities, the two parts can be precisely loaded and quickly switched between routines in CMM software to produce data. When troubles arise, this increased speed of inspection is critical.


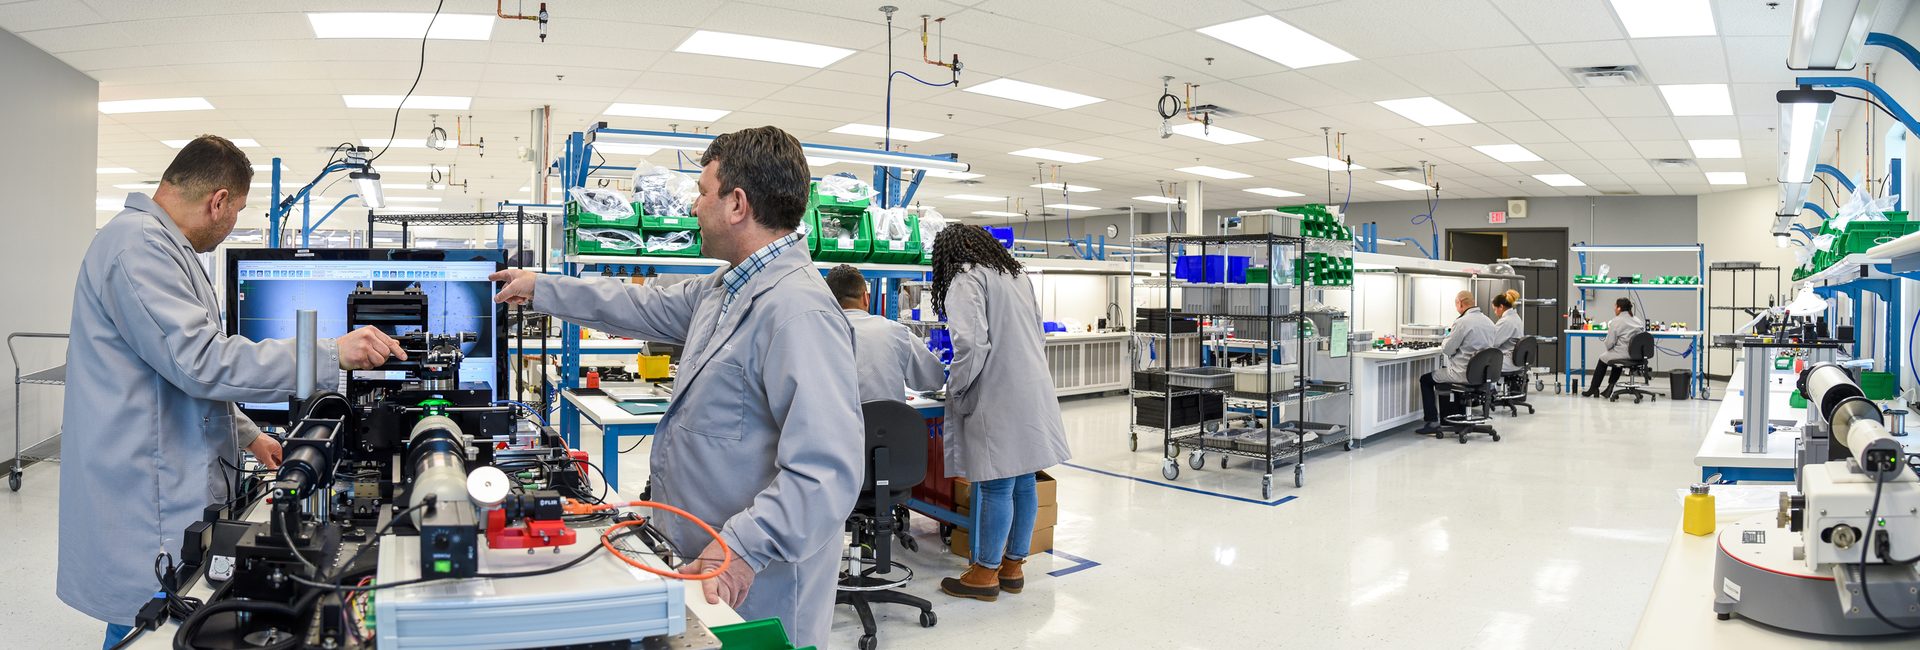
Manufacturing at Optikos employs lean process improvement practices for inspection through assembly and delivery. Within each cell at Optikos are multiple work stations each addressing an assembly procedure based on lean manufacturing concepts. Each cell has been created for assemblers to move seamlessly between cells, and every work station includes detailed customized work instructions, tooling, fixturing and any inspection tools that might be required for that particular procedure. Using just in time concepts for kitting the assemblies for each cell eliminates overproduction and extra processing. Inventory specialists closely monitor each cell to manage the inventory for each cell accordingly so that only necessary product is on the floor, eliminating unused inventory on the assembly floor. By systematically identifying the optimal control of the Optikos product lines, the processes and cells have been successfully designed to be scaled for growth.
“We’re pretty excited about our expanded optical assembly and contract manufacturing capabilities, the clients who have grown along with us, and those who are newly introduced to everything Optikos can do,” said Optikos President and CEO Stephen D. Fantone, Ph.D. “With new engineering, R&D, and IQ Lab space; clean assembly environments; and production staff, Optikos is well-positioned to take on any project and see it through.”
“Our innovation in product and engineering development is directly linked to meeting our customers’ needs. We love a challenge and take pride in giving our clients a competitive edge.”
