A NASCAR engine typically has 857 components, so some are bound to have geometries that are problematic to measure and inspect. By The L.S. Starrett Company
Vision for the Win …
Noncontact Measurement Tops Traditional CMM
Case Study
H2 Deck Info By Paragraph Style Bold
Headline
CMM touch probing surely has its place in measurement and inspection processes, however it is not always an optimal solution for certain part geometries and applications. Roush Yates Engines (RYE) of Mooresville, NC, and its manufacturing division, Roush Yates Manufacturing Solutions (RYMS), recognized there were better options for QC on shims and bushings it manufactures for NASCAR’s “Next Gen” Car.
Stringent Precision Requirements
RYE is the exclusive engine builder of Ford Performance for the top levels of NASCAR including the NASCAR Cup and Xfinity Series, as well as the IMSA Michelin Pilot Challenge. In addition, RYMS is a precision CNC contract manufacturing organization with expertise in multi-axis machining of metal and plastic parts with complex geometries. RYMS’ in-house production includes machined parts for the Ford FR9 V8 NASCAR and Xfinity Engine for Ford Performance programs, the Ford Mustang 5.2L V8, and contract CNC manufacturing for other motorsports, aerospace, defense, space, and medical markets. They also supply parts for the new NASCAR “Next Gen” Car to Ford Performance, Chevy and Toyota Teams.
RYMS’ quality management system is AS9100 Rev D and ISO 13485 certified by NSF-ISR, as well as International Traffic in Arms (ITAR) and Cybersecurity Maturity Model Certification (CMMC) compliant.
To help achieve its demanding performance and company goals, RYE chose Starrett precision metrology systems and precision tools to ensure that critical design specifications are being met at the level expected and required by engineering. Motorsports require strict standards to achieve consistent quality. Add in complex requirements for high-performance and reliable parts, and the test and measurement processes are even more demanding.
RYMS has two well-equipped quality labs which have the tools necessary to measure and inspect a wide variety of parts being manufactured and supplied for its racing engines as well as for external customers.
AdCreative Missing.
(double-click to add)
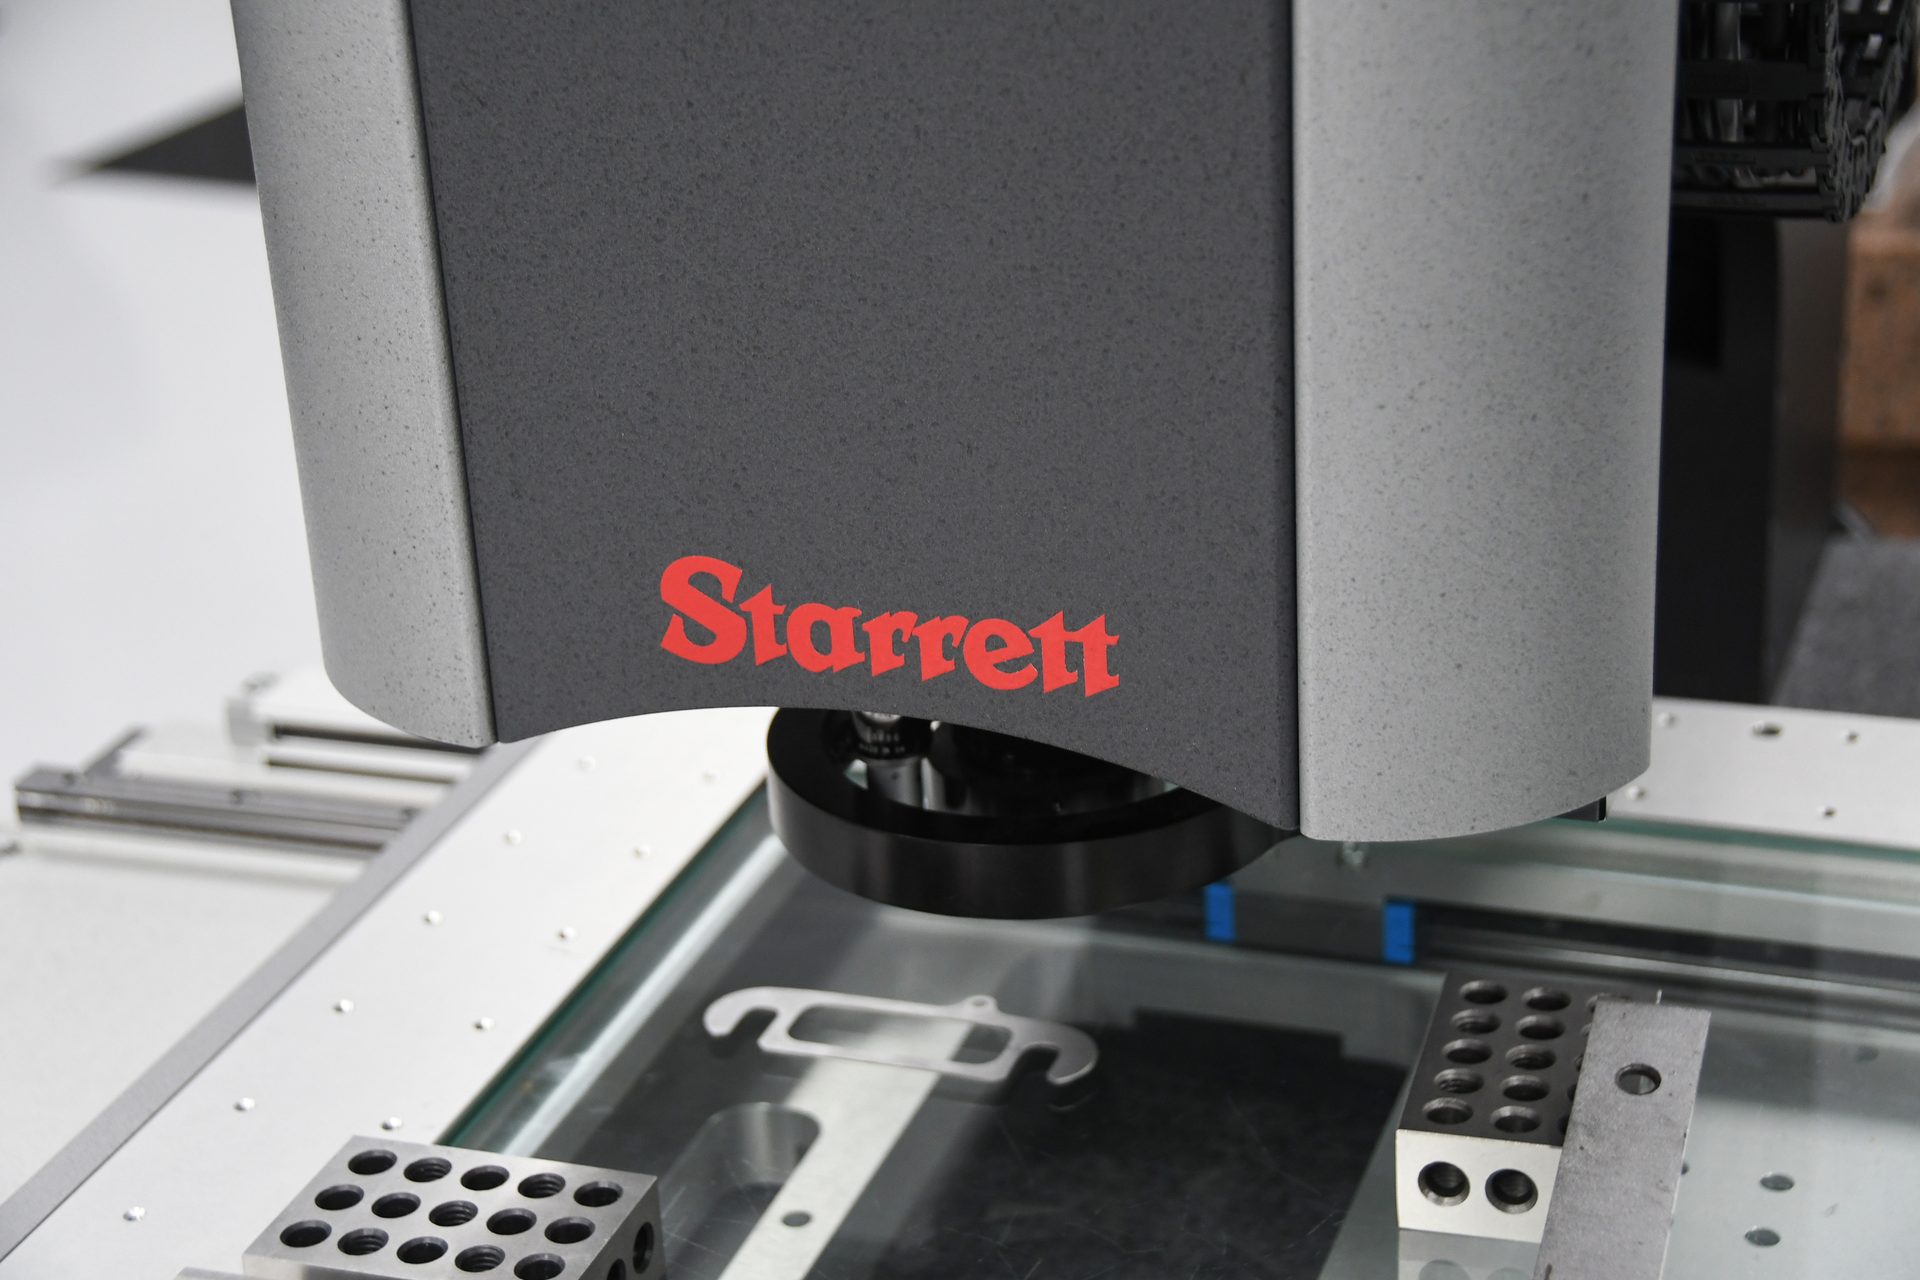
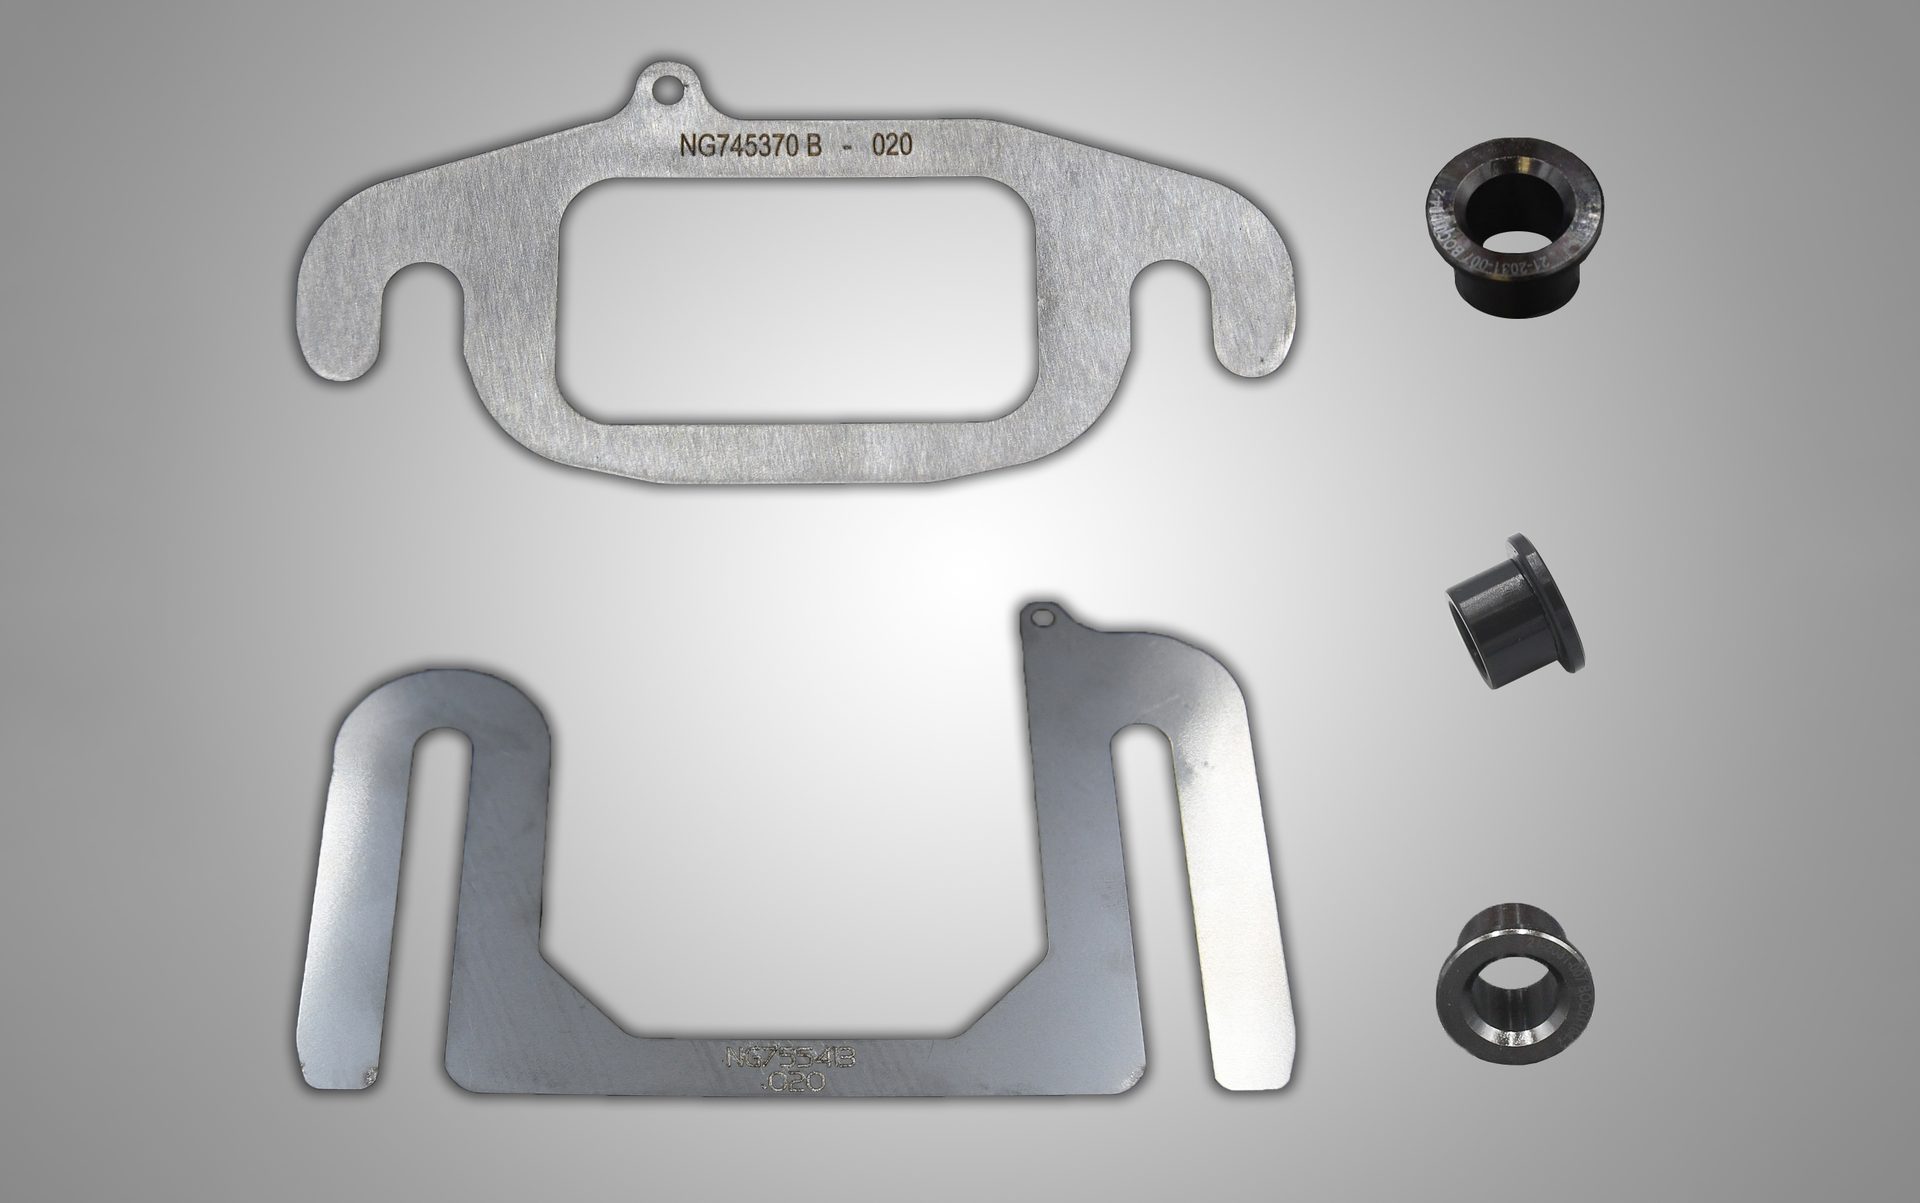
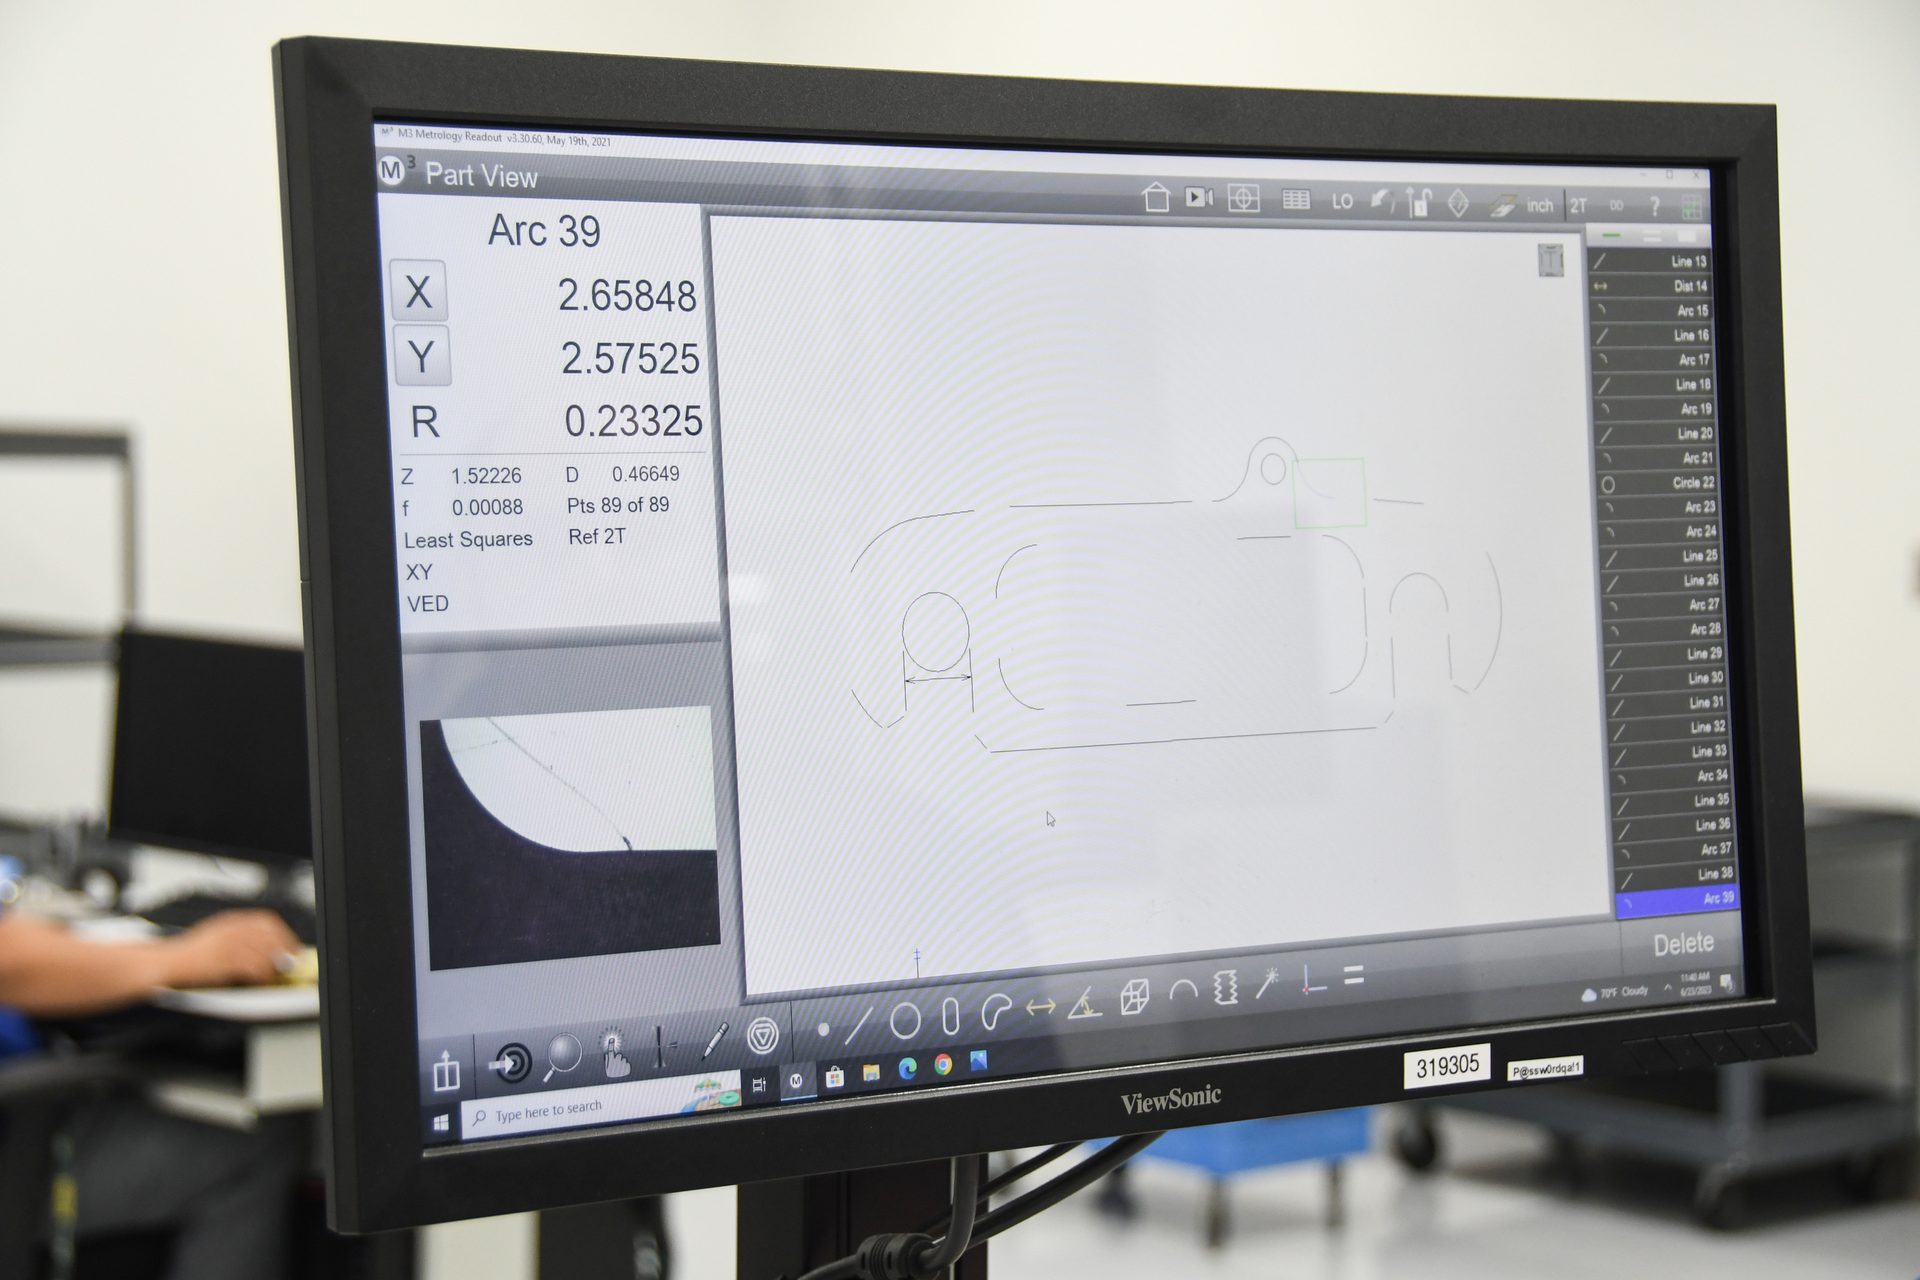


The Starrett AV450 vision system provides RYMS with a versatile, easy-to-use and accurate solution for quickly checking measurements on NASCAR “Next Gen” shims and bushings.
RYMS manufactures over 12,000 shims and bushings annually, combined, for NASCAR “Next Gen” cars.
The Starrett AV450 vision system has multiple optic zoom levels enabling RYMS to clearly see the tangent lines of the radii.
Application Challenges
A NASCAR engine typically has 857 components, so some are bound to have geometries that are problematic to measure and inspect. In the case of the NASCAR “Next Gen” car’s bushing, using a touch probe to measure the radii on the undercut presented several challenges which increased inspection time and costs.
Todd English, vice president, strategic partnerships & marketing at RYE, explained, “To get a clear picture of the role of the undercut, it is useful to know that the undercut of the bushing serves two purposes.” First, it allows for minimal chamfer on the hole in the mating part to maximize the bearing area under the bushing flange. Also, the undercut enables a large radius which reduces the stress concentration factor in the bushing.
RYMS Quality Control Manager Ryan Osborne said, “The undercut was almost impossible to check accurately with a touch trigger CMM. The radii size as well as tool offset issues were difficult to see and determine.” English concurred that traditional CMM measurement was not working well, resulting in inconsistent results.
In another racecar part example, measuring a NASCAR “Next Gen” shim to meet specifications presented challenges when probing with a CMM due to the part’s size and flatness. Osborne said, “Similar to sheet metal, it can be tricky to measure edges with touch trigger CMMs. The size and thickness of the shim was difficult to measure with the CMM.” He continued, “We tried to use a micrometer as well, but it would distort the OD.” For both the bushing and shim, RYE needs to meet tolerances of +/- 0.13mm.
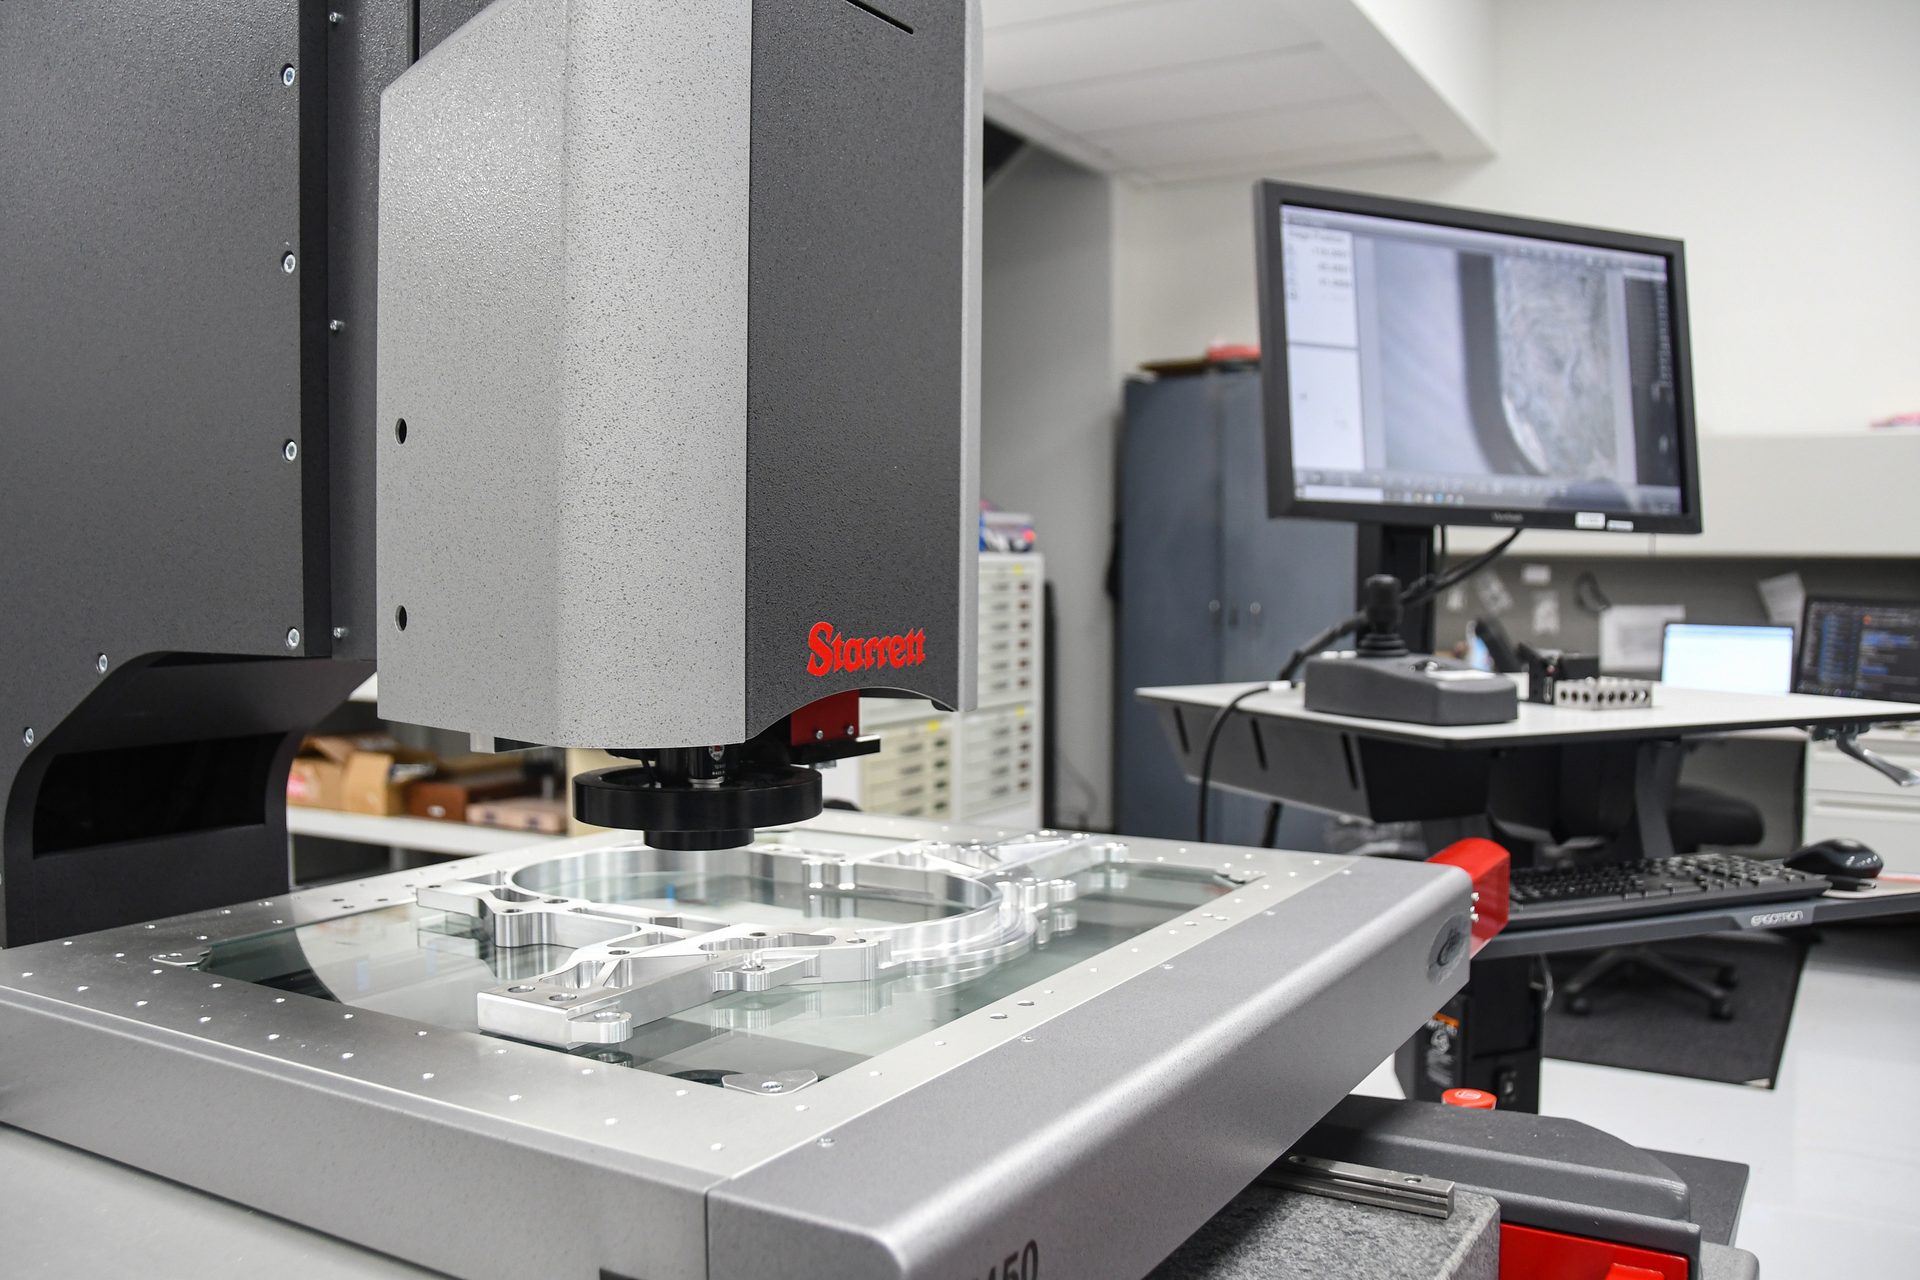
For checking small radii, RYMS has found the Starrett AV450 noncontact vision system is far superior to traditional touch trigger CMMs.

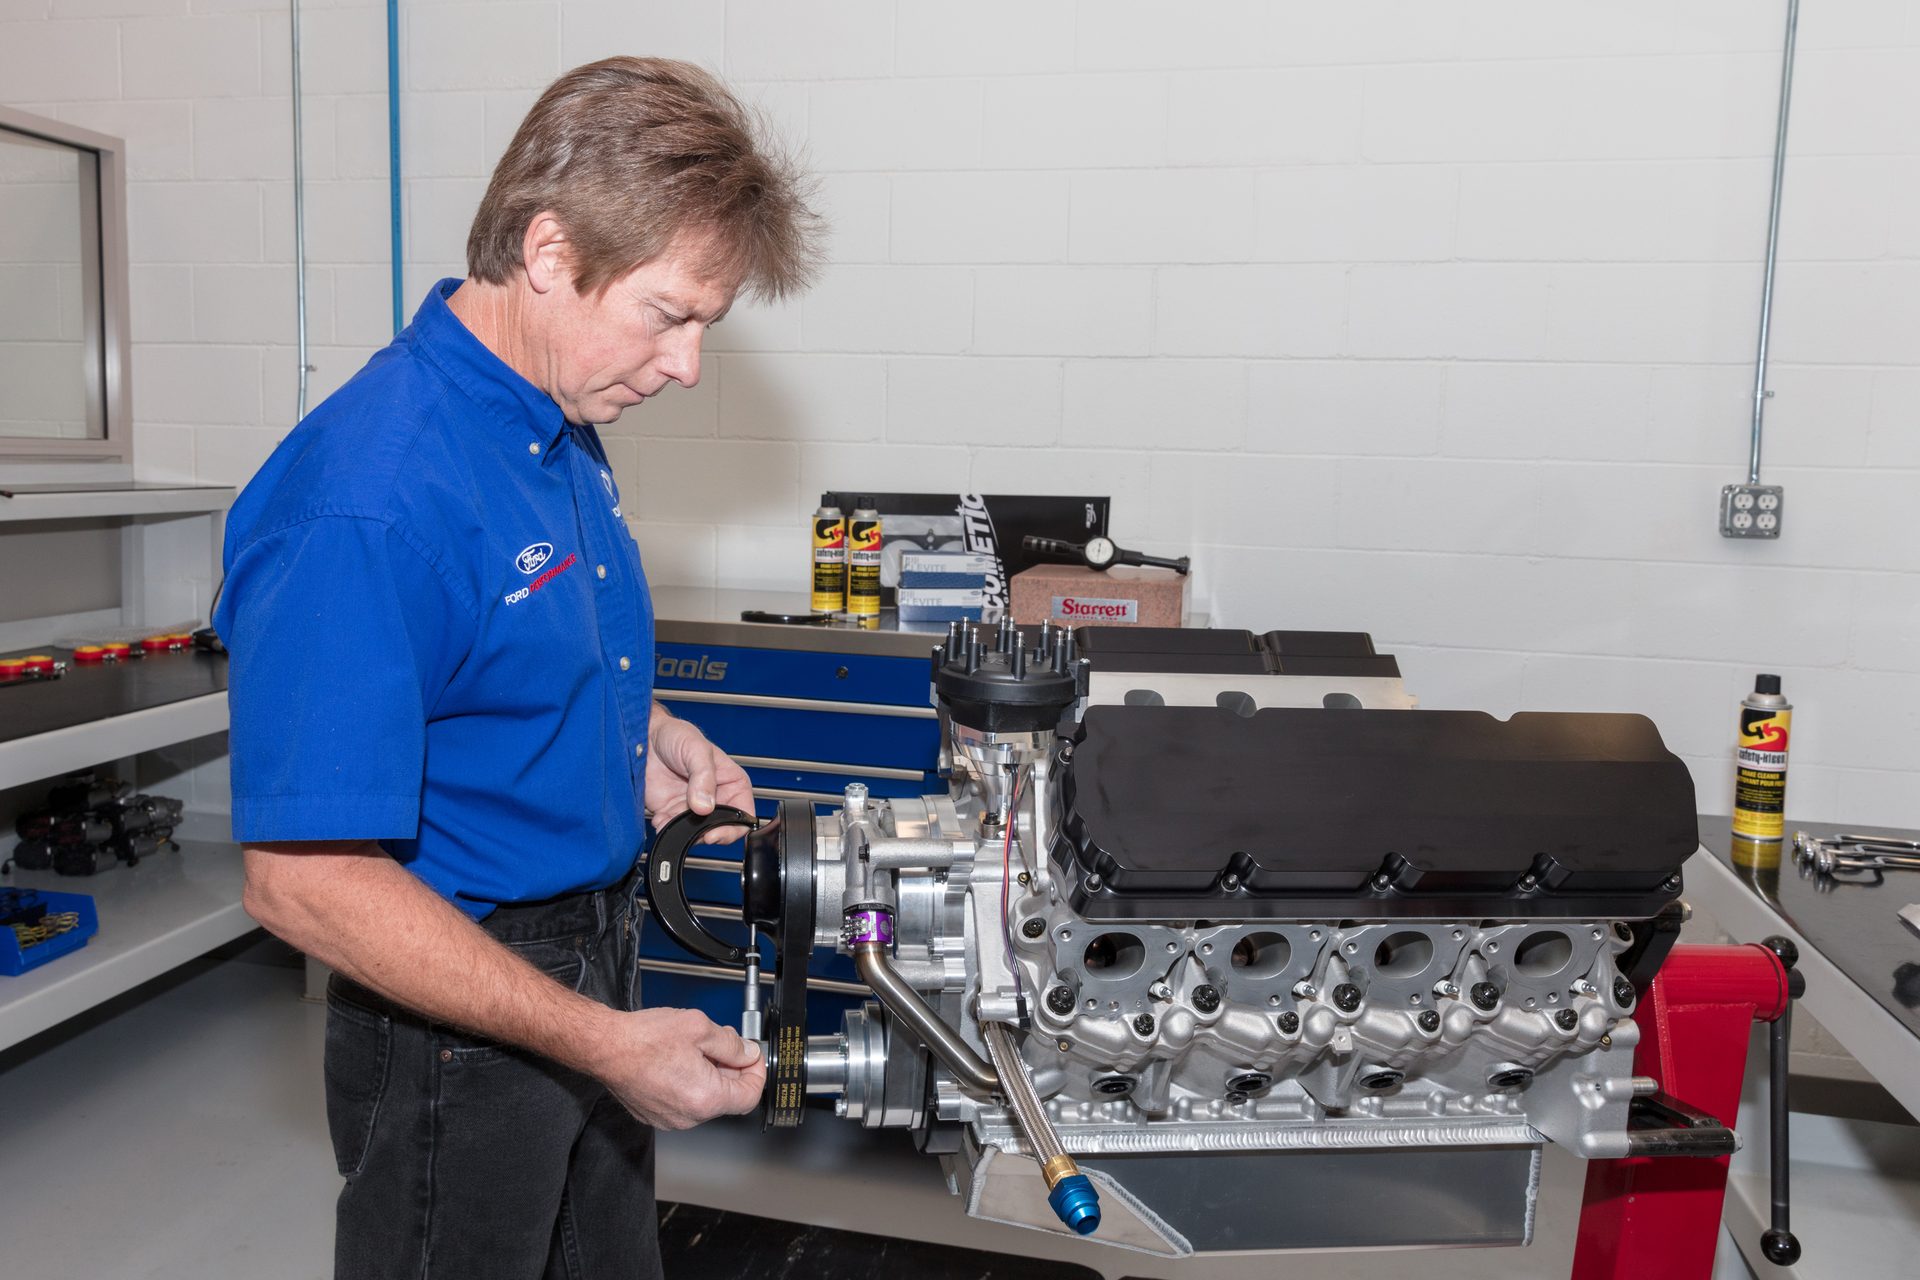
RYE uses a range of Starrett tools to ensure top FORD engine performance – pictured here is an engine builder checking a pulley with a Starrett micrometer.

Noncontact Vision Provides Solution
RYMS looked at several vision systems to determine what system was best to meet customer requirements. Included in the search was technology from RYE’s long-time partner, The L.S. Starrett Company (metrology division in Laguna Hills, CA, and headquarters in Athol, MA).
RYMS reviewed how the Starrett AV450 vision system could provide the first line of defense for ensuring they were making parts right, the first time. Important criteria for the vision system included accuracy, speed, and the ability to measure challenging geometries. “The Starrett system checked all the boxes and was especially flexible and easy-to-use, so we selected the AV450 and implemented it in our QC lab,” Osborne said.
The 3-axis AV450 vision system offers a cost-effective solution for achieving high throughput inspections, and is ideal for both repetitive, larger part-run applications and routine quality assurance. Featuring a larger X,Y,Z measuring envelope of 18” x 14” x 8” (457 mm x 356 mm x 203 mm), the Starrett AV450 has high-resolution video zoom optics and it can be pre-programmed (CNC) for repetitive part inspection, or driven manually via a trackball for individual measurements. With its highly stable mechanical design, precision linear bearings, and smooth stage motion, maximum performance and throughput is easily attainable. Throughput is further enhanced by MetLogix™ M3 software that controls video edge detection and multiple-channel fiber optic or LED illumination. Computer-controlled Quadrant (LED) ring lighting, sub-stage lighting, and optional through-the-lens lighting meets the most challenging illumination requirements.
Accuracy of the Starrett AV450 Automatic Vision System is 2.5 + 5L/1000 and reading resolution is 4 µin (0.1µm). Magnification on a 24” monitor, 1:1 pixel setting is 31x to 198x 6.5:1 zoom and 26x to 310x with a 12:1 zoom. The system has a 1.3 mega-pixel color digital video camera and a precision granite base.
The AV450 also has an external motion control unit and includes a Windows®-based operating system with an operator interface via a desktop PC with a 24” touchscreen monitor, as well as Wi-Fi network connectivity. CAD files can be imported/ exported, and reports can be generated and archived. M3 metrology software supports 3-axis measurements and 2D geometric constructs (such as points, lines, angles, rectangles and slots) and corrections for level, skew and datum origin. Touch-screen functionality with a pinch, swipe and touch provides intuitive operation for all users.
English said, “The Starrett vision system was able to measure the bushing undercut in an accurate, efficient and timely manner.” Osborne agreed: “When it comes to checking the small radii, the vision system is far superior to traditional touch trigger CMMs. Multiple optic zoom levels allow us to clearly see the tangent lines of the radii, giving our machinists critical feedback on challenging features.” Osborne also noted that alternatively they could have used an optical comparator to measure the bushing, but the vision system is superior in terms of speed and ease-of-use.
“The speed and ease of use allowed us to quickly determine what machine adjustments were needed. The vision technology allows us to measure the size of the undercut as well as pick up on any small mismatches we had on the flange,” Osborne continued.
For measuring the shim, the benefits of using the vision system are just as impressive, especially for achieving accuracy and repeatability. The camera on the vision system focuses on the part without needing to touch it, ensuring that the dimensions are within specifications. Osborne said, “By using the vision system, we eliminated the need and time for a CMM to check the part. Also, we no longer need to use manual measurement methods to check the OD, which removed operator error.” Since obtaining accurate OD measurements on thin shims by using a CMM or micrometer can be challenging, the vision system provides several benefits. Results are repeatable, and RYMS can quickly select measurement points across the entire OD of the part, ensuring comprehensive data results.
Setup time has been reduced, part quality has been enhanced and delivery times are being met. Osborne said, “The AV450 is saving time inspecting the first piece by obtaining good measurements right away, instead of having to go back and forth with production on whether the dimension is good or not. We have saved hundreds of hours since implementing the system.” At annual part volumes of over 12,000 for both the shims and the bushings combined, getting the job done correctly right out of the gate is a tremendous win for RYMS.
Sidebar
On May 26th, 2023, NASCAR’s CEO Jim France presented Roush Yates Manufacturing Solutions (RYMS) with the 2022 NASCAR “Next Gen” Supplier of the Year Award. This recognition was a unanimous decision among all teams out of over thirty single-source suppliers to the Cup Series. This award is the culmination of a project that began in 2019 and represents countless hours of hard work and dedication that RYMS employees and strategic suppliers have contributed.
RYMS has supplied thousands of uprights, anti-roll bars, shifter linkages, transaxle mounts, hardware and accessories to the NASCAR Cup Series starting in 2021 and continuing today. They provide some of the most reliable parts on the car, with zero failures to date.

