Products
the latest products to help you improve your manufacturing process

LK Metrology Horizontal Arm CMMs
To supplement its super-high-accuracy HC-90 ceramic horizontal arm coordinate measuring machines (CMMs), British manufacturer LK Metrology has introduced three additional models of technically advanced design based on an aluminum construction. They provide users with multiple affordable alternatives for dimensional inspection of large components typically found in the automotive, land transport and heavy industries.
The new, horizontal arm CMMs are supplied in three ranges – the LY-90T table version, LY-90R rail version with single or twin arms, and the shop floor ready HD-90 rail version with single or twin arms, which has been developed specifically for quality control of vehicle bodies and sub-assemblies in car plants.
Of rail design, the HD-90R single-rail and HD-90TR twin-rail models offer superior dynamics and accuracy and are designed for use in production areas. They are encapsulated in protective covers to ensure thermal insulation against environmental changes and to protect the system from airborne contaminants typically found in a workshop environment.
The CMM rails can be installed on the floor without the need for a special foundation or may be recessed with heavy duty walk-on covers protecting the X-axis slideways. The open structure guarantees maximum accessibility to the measurement area, simplifying manual or automated component loading and unloading in a production area, including those employing roll-on/roll-off pallet transfer and in-line/line-side automation.
Air bearings mounted on both the Y-axis and Z-axis are the key element of this high-performance measurement solution. For the twin-arm version, the measurement volumes of the two horizontal arms overlap each other by 100 mm to ensure access to all component features. Ten sizes of HD-90 are available with axis travels from 4,000 x 1,600 x 2,000 mm to 8,000 x 1,600 x 3,000 mm.
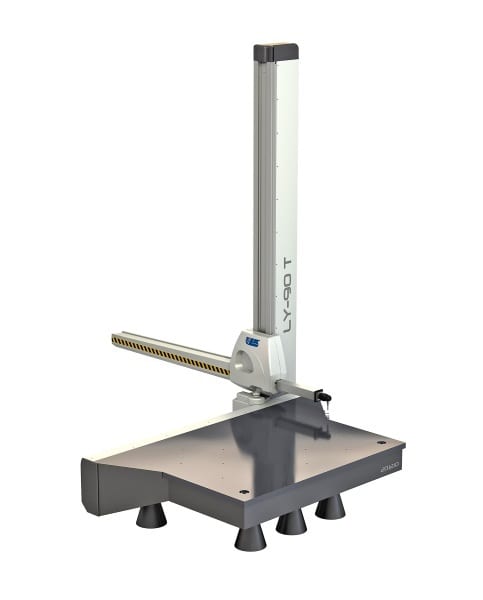
Typically used in line-side metrology applications, the LY-90T table CMM has the horizontal arm installed on guideways side-mounted onto a cast iron surface plate for the measurement of small, medium and large sheet metal and plastic components, for example. The table and special three-point support system eliminate the need for expensive dedicated foundations. The LY-90T is available in 21 standard models with axis travels ranging from 2,000 x 1,200 x 1,000 mm to 6,000 x 1,600 x 2,500 mm.
The LY-90R single-rail and LY-90TR twin-rail CMMs offer a similarly technically advanced, cost-effective, typically in-line metrology solution for the dimensional control of large, heavy components found in vehicle manufacture and heavy engineering. The rails can be installed flush at floor level, with heavy duty walk-on covers protecting the X-axis slideways. The open design provides full access for part loading/unloading, including within in-line/line-side automated inspection cells with roll-on/roll-off transfer systems. The LY-90R is available in 17 standard models with axis travels ranging from 2,500 x 1,500 x 1,500 mm to 6,000 x 1,600 mm x 2,500 mm.
LY-90 machines are modular in construction and easy to configure, with Y- and Z-axis air bearings, double recirculating X-axis bearing guideways (LY-90R/TR) or X-axis air bearings (LY-90T), counterbalance with safety brake, super high resolution linear encoders and DC servo motor drives. This design combines the flexibility and automation of a CMM with the speed and intuitive use of traditional measurement gages.
A full range of probing options is offered to suit all types of metrology application, including motorized indexing probe heads and touch trigger probes, infinite positioning servo wrist heads with long reach probe builds, scanning probes, and single- or triple-stripe laser scanners. On offer also is an advanced array of software, including LK CAMIO measurement, programming, analysis and reporting software and ArcoCAD metrology software from Metrostaff. The Industry 4.0 Metrology Gate portal provides remote access to quality data and CMM status from any internet connected device anywhere in the world. LK Metrology's offering is rounded off by a vast array of automation options.
LK Metrology
www.lkmetrology.com
Creaform VXelements 9.0
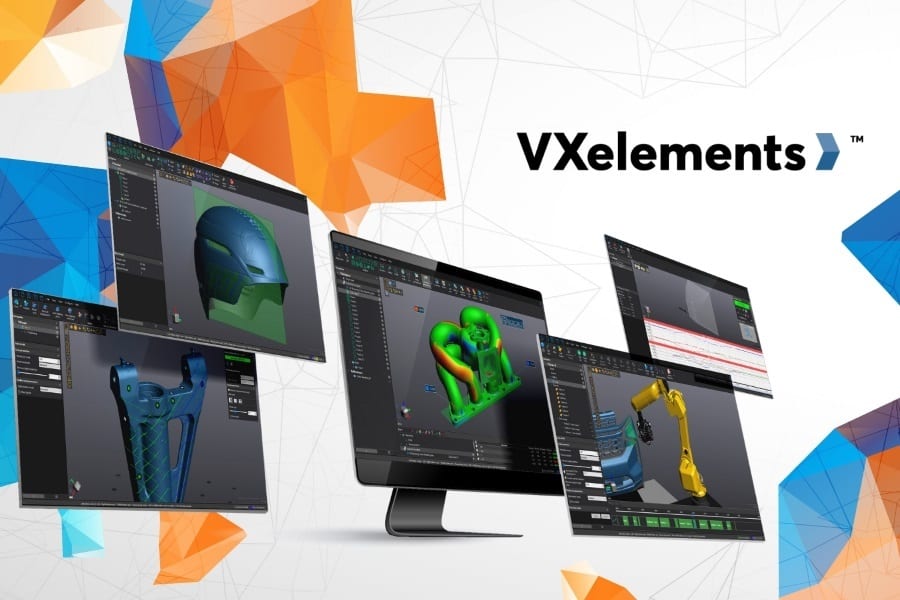
Creaform announced the release of the latest version of its VXelements platform. Several new features as well as existing features enhancements were developed to provide improvements. Whether in VXscan, VXinspect, VXmodel, or VXscan-R, experts and beginners alike will discover tools that will make their work much easier, faster, and profitable.

In a desire to perfect VXelements and the synergy between the software and hardware, each VX module was upgraded to meet the ever-changing needs of the users and today’s constantly evolving industries. Here are some of the important advantages of this latest version:
New - VXelements viewer: Used for data sharing, this free version of the platform will enable customers or colleagues outside the team to visualize the data firsthand, making collaborative projects simpler and faster.
Smart resolution: Available for the latest generation of Creaform 3D scanners, this new feature allows users to generate scans from multiple resolution levels to better reproduce details, edges and high curvatures. Higher levels of resolution can be automatically created in several ways: by software intelligence; by being triggered from the scanner; and by being generated from a selection on the mesh or from a template.
VXmodel: With the addition of the Flatten mesh, the Extrude boundaries and the Extend boundaries features, this module will enable users to carry out post-treatment operations on 3D scan data simply and effortlessly.
VXinspect: Quick inspection tools – such as One-click entity creation, new construction methods for geometrical entities, and new reporting capabilities – are just a few of the improvements that will add simplicity and flexibility to the 3D inspection software.
VXscan-R: A new and improved Surface feature combined with the Smart resolution feature will make it easier for users to generate robot trajectories and get the most out of their automated quality control solutions.
Creaform
www.creaform3d.com
Fluke Process Instruments, Boston Dynamics Industrial Acoustic Imaging
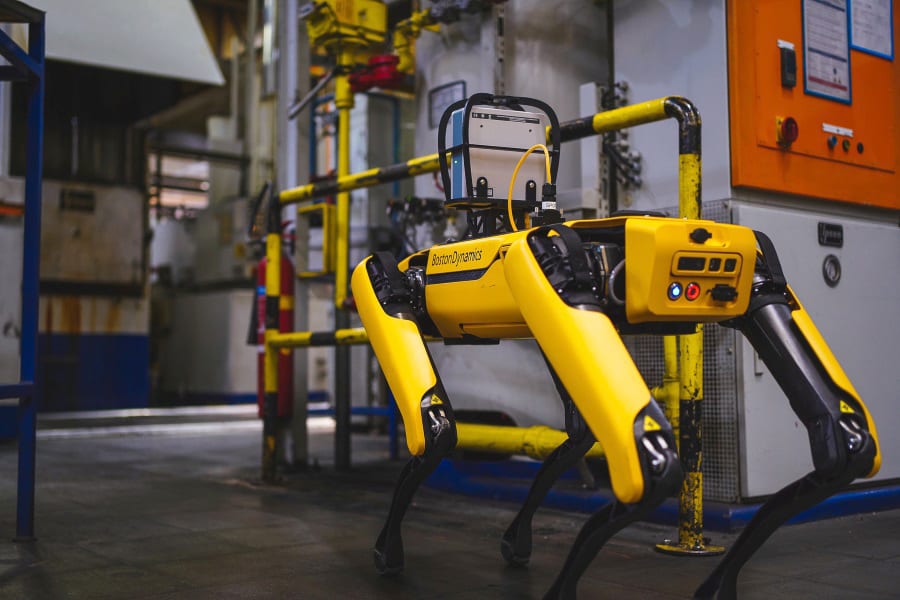
Fluke Process Instruments has partnered with Boston Dynamics to bring Fluke Process Instruments’ new SV600 Fixed Acoustic Imager capabilities to Boston Dynamics’ agile mobile robot Spot®.
In a video released by Fluke Process Instruments, the SV600 Fixed Acoustic Imager can be seen mounted on Spot with payload accessories that will be available to order from Fluke Process Instruments.

The SV600 Fixed Acoustic Imager enables users to detect, locate and visualize air and gas leaks or changes in mechanical sound signatures across their process and equipment in real-time before they become costly problems. By using an array of sophisticated sound sensors and powerful SoundMap™ technology, the SV600 translates the sounds that it hears into a visual representation so you can quickly locate problem areas.
Spot takes inspection to the next level. Designed to go where other robots can’t go and to perform a broad number of tasks, Spot traverses unstructured terrain to automate industrial inspections, monitor remote or hazardous environments and provide situational awareness in remote settings. The robot can also be reconfigured for various use cases to increase efficiency and greatly reduce safety risks. With the SV600 payload Spot will now be able to automate air and gas leak detection and identify mechanical sound signatures.
Fluke
http://www.flukeprocessinstruments.com/SV600Spot
Boston Dynamics
www.BostonDynamics.com
FLIR T865 Thermal Camera
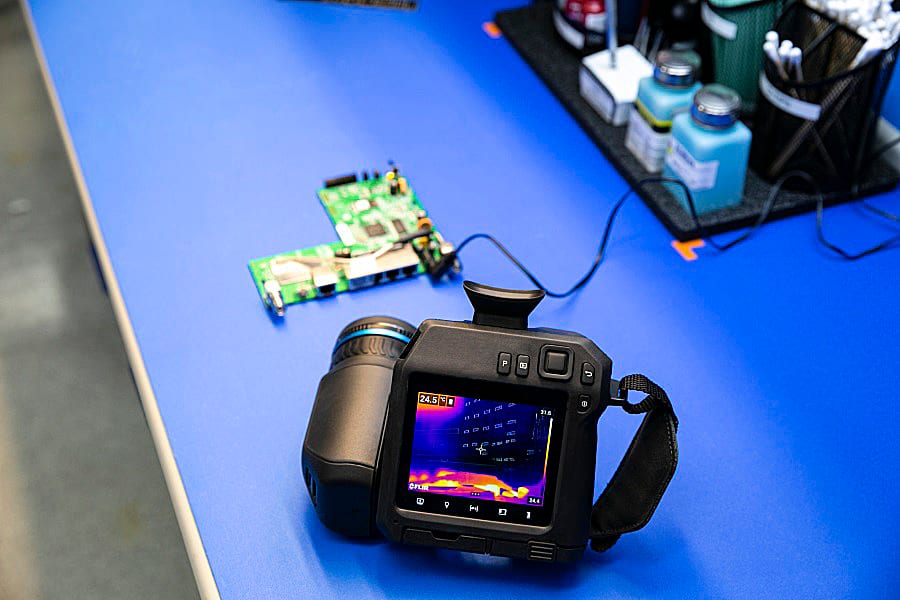
FLIR Systems announced the latest T-Series high-performance thermal camera, the FLIR T865. Built for electrical condition and mechanical equipment inspection, and for use in research and development applications, the T865 provides ±1 °C (±1.6 °F) or ±1% temperature measurement accuracy, a wider temperature range between –40 °C to 120 °C (-40 °F to 248 °F), and more on-camera tools for improved analysis. A free 3-month subscription to FLIR Thermal Studio Pro and FLIR Route Creator, and a 1-month subscription to FLIR Research Studio is included with purchase.

With ±1 °C (±1.6 °F) or ±1% temperature measurement accuracy, professionals can more confidently inspect and assess equipment health regardless of the time between inspections or changes in environment conditions. By reducing measurement variation, companies can reliably prevent equipment breakdowns and outages in utility substations, power generation and distribution, data centers, manufacturing plants, or facility electrical and mechanical systems. For those in research and development, the improved accuracy provides the temperature measurement detail required to eliminate any guesswork in research, science, and design that uses the visualization of heat.
The T865 offers professionals versatility with portable and handheld fixed mount options for inside and outside work in harsh conditions, and multiple lens options to inspect objects both near and far. The available 6° telephoto lens provides the required magnification for those routinely inspecting the condition of small targets at a distance, such as overhead power lines.
For inspections through an IR window, the available 42° wide-angle lens and on-camera transmission adjustment ensures safe and accurate measurement of targets within enclosures. For those needing even more detail of small componentry, the available macro lens, along with the new macro-mode, provides 2x magnification compared to the standard lens. Further, the 640 x 480 detector resolution, offering 307,200 pixels or the UltraMax™ 1280 x 960 resolution, offering up to 1,228,800 pixels in FLIR Thermal Studio Standard and Thermal Studio Pro, allows professionals to see images clearly.
Scroll Down
Scroll Down
