Software & Analysis
Reverse Engineering
Enterprise approach using model-based metrology.
By Ernie Husted
Before we can talk about reverse engineering as an application, it is important to understand how and why it has emerged as a critical metrology tool for manufacturers, and how it fits in the rapidly evolving digital workflow. Just a few years ago, the term ‘reverse engineering’ was associated more with industrial espionage, stealing designs, or product features from competitors. What has changed?
Reverse engineering has found its place in a different manufacturing world. Today’s manufacturers are engaged in trying to better manage processes, lower costs, reduce supply chains, improve quality, and realize end-to-end traceability. That is a heck of a wish list, but not farfetched; not anymore. Technology, or more appropriately, the accessibility and adoption of technology, has finally made its way to the fingers of industry, the all-import tiered supply chain, including the indispensable job shop.
Many people like to refer to this heightened state of digital control and information access as Industry 4.0, a term introduced in Europe ten years ago. In short, the idea behind the concept is the emergence of Cyber Physical Production Systems (CPPS), the merging of real and virtual worlds within the manufacturing space. The implications are vast requiring adoption of smart machines, seamless exchange of information, triggered autonomous actions, supply chain interactions, and an overall shift in Product Lifecycle Management (PLM).
It has taken ten years to see these concepts take root across mainstream manufacturing, but they are here to stay, so if you have not already done so, it is time to get onboard. Adoption of the concept and associated practices is right on schedule and can be compared to other technology adoption trends. Ten years has proven itself as an effective timeline for the acceptance of technology, from early adoption to mainstream use by more than 50% of the market, as evident by VCRs, PCs, the internet, and cell phones. Critical Industry 4.0 infrastructure that was lagging in 2011 has now caught up, specifically data capture, communications, and storage. Data capture devices have improved becoming more connected and flexible in format to accommodate practical workflow. Communications between devices and software platforms has become much more open, and the speed at which data can be transmitted and shared via the internet and the cloud is now an equalizer for everyone to participate.

Reverse Engineering Connection
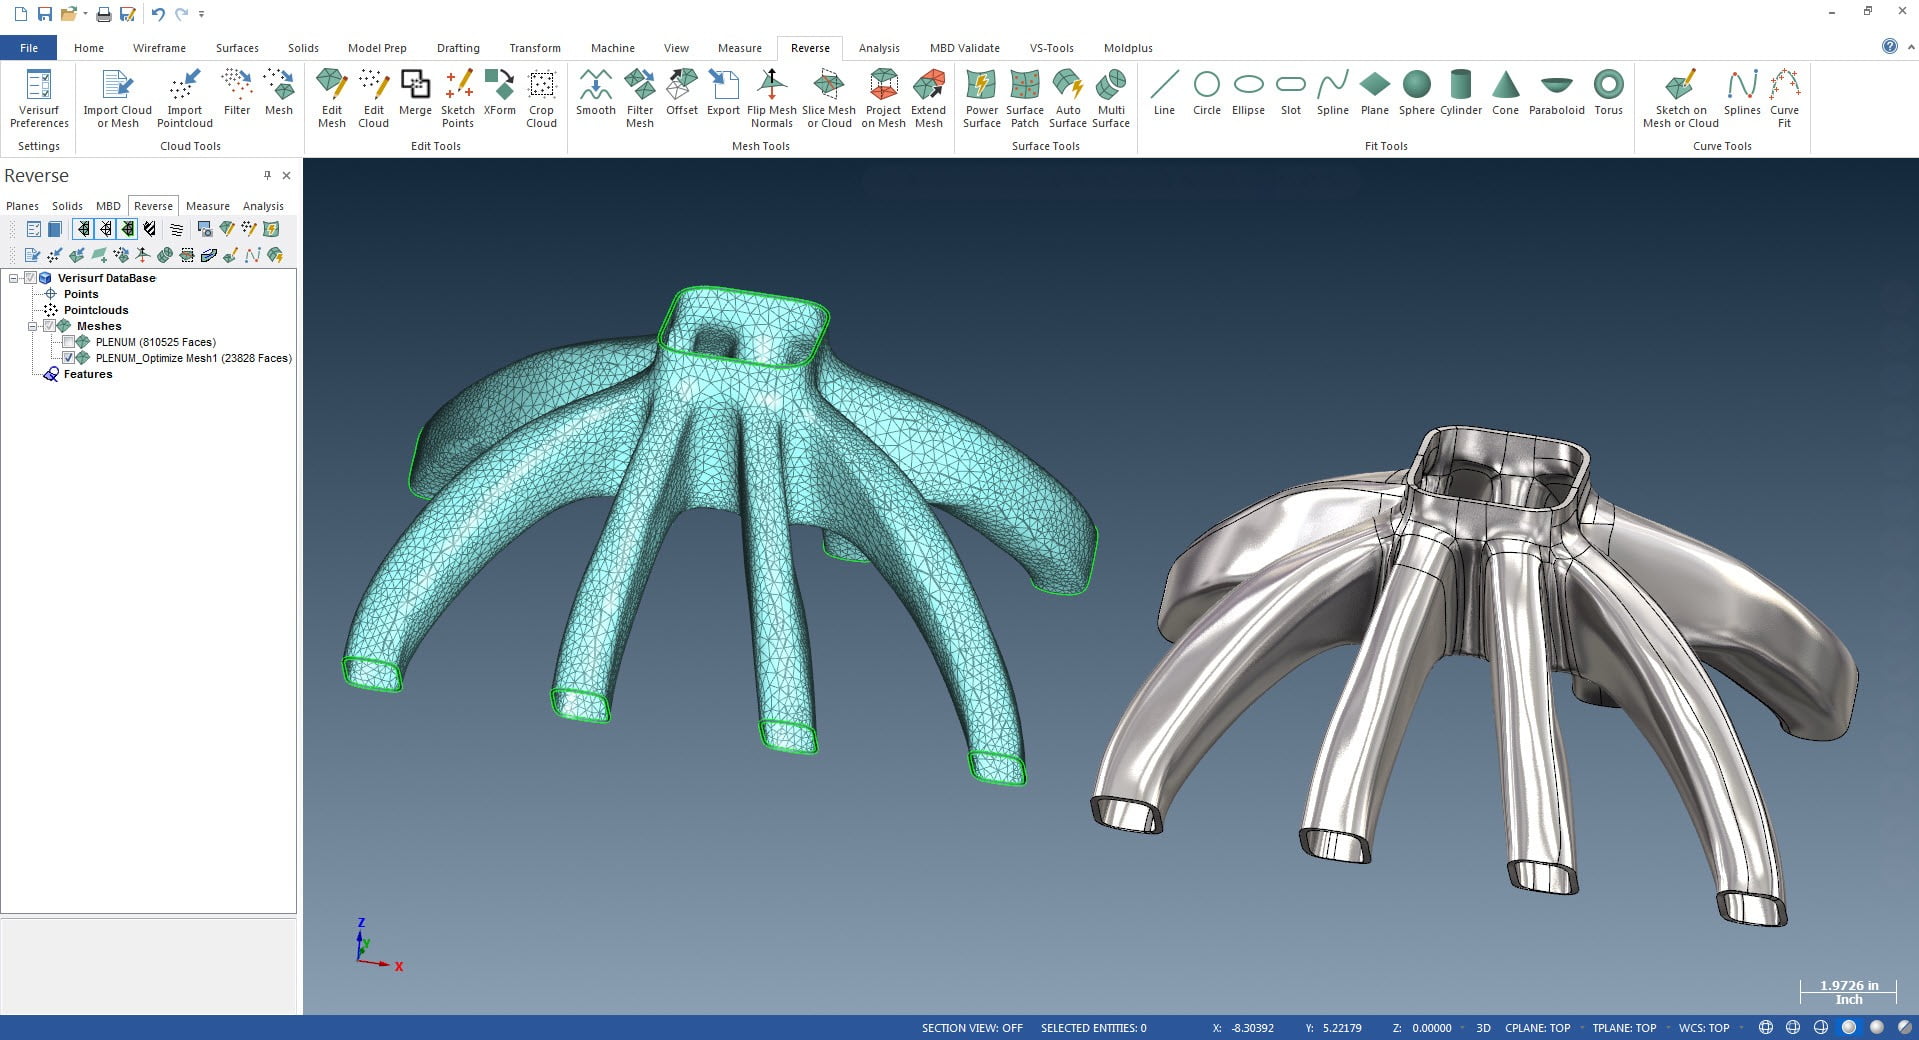
Reverse engineering can be an ambiguous term when applied across the design/build process as it comes into play in multiple ways and at various points in the process, whether for a complete part, a missing feature, or as underlying support for manufacturing. Reverse engineering practices are applied during the product design process, when determining best fit, engineering tooling and fixtures, and more. From a digital and practical perspective, reverse engineering is a subset of model-based metrology. It is the process of collecting and connecting points of data (measurements) to a comprehensive and extensible CAD environment referred to as Model-Based Definition (MBD).
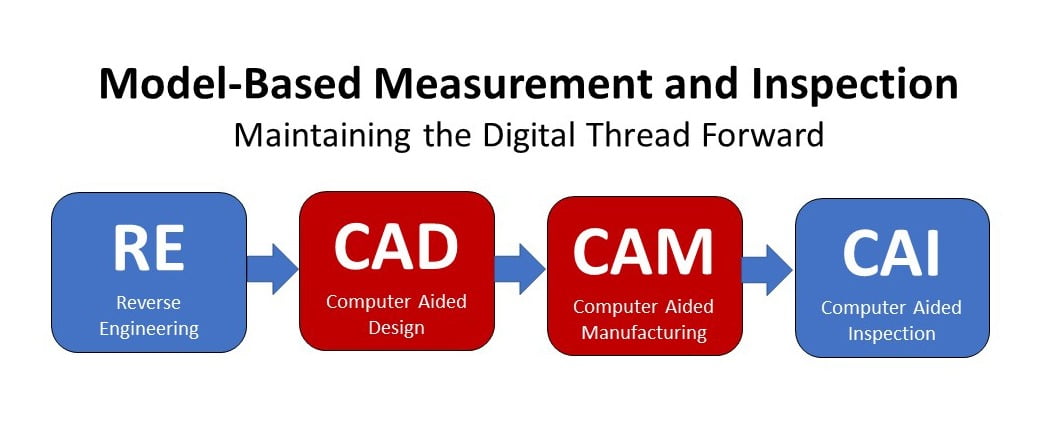
MBD is a pillar of successful Industry 4.0 practices, originally introduced to the PC platform 20 years ago. MBD is a definitive repository of data controlling every aspect of the product or part. MBD maintains digital continuity throughout the design/build process and beyond, driving certain aspects of PLM. When employing an MBD strategy, the CAD model is the tip of the spear and the authority to which all design/build data, including reverse engineered assets, and all inspection nominals are derived. MBD keeps the all-important digital thread intact, closing the loop on reverse engineering to design to manufacturing to inspection and quality reporting.
Should a part need to be manufactured in the future, everything that defines the part exists in a single digital archive, including the intelligent CAD model, machining toolpaths, nominal GD&T data, and a complete inspection plan to verify finished parts. Comprehensive deployment of MBD in manufacturing can go far beyond this example to include all attributes of a product necessary for complete Product Lifecycle Management (PLM) using Digital Product Definition (DPD). However, basic MBD, using model-based metrology, is a good place to start and will provide constant improvement for shops committed to quality processes and lean manufacturing. In fact, many industries including aerospace and automotive are requiring vendors to be MBD compliant to maintain digital continuity across all design and manufacturing assets.
The idea of model-based metrology and its support for MBD integrates several, previously disparate, processes: Reverse Engineering (RE); CAD; CAM; Computer Aided Inspection (CAI). This closes the loop on data continuity and adds significant value as the packet is passed downstream. When you consider reverse engineering as an integrated part of your design/build toolset it becomes much more important than simply designing backwards. In many shops, today, the process of reverse engineering is used more in manufacturing engineering than in design engineering:
- Capturing complex surface profile data
- Recreating missing data for manufacturability
- Best fit applications
- Capturing legacy styling characteristics
- MRO application (missing drawings)
- Tooling design (layup mold tools, fixtures, jigs)

Tools of the Trade
Today’s manufacturers want and need more seamless integration between reverse engineering, design, build, inspection, and reporting. They need a more complete design/build solution. These solutions must be clean with continuity of data and support for downstream applications. When considering your reverse engineering solution be sure to consider this bigger picture. Often an enterprise metrology platform makes the most sense. This way you are standardizing and leveraging all your metrology assets across your manufacturing enterprise. Software can provide integrated reverse engineering, quality inspection, toolmaking, and assembly guidance solutions, all built on a CAD platform. A model-based metrology platform ensures continuity of data throughout each application, supporting MBD.
Hardware Device Compatibility
Beware of potential bottlenecks. The rapid adoption of measurement solutions at a departmental level over the past several years, especially with portable CMMs, has led to metrology bottlenecks, and resource utilization challenges for many shops. This has provided traction for enterprise level thinking as well as companies looking to streamline metrology assets and realize better resource utilization.
Most portable CMMs are compatible with all measurement and inspection software; they are convenient and versatile but not as accurate as the fixed CNC CMM workhorses that are also capable of running automatic inspection routines. The problem with many of the legacy CNC CMMs in use today is they are not an open platform when it comes to compatibility. The software and controllers that run them do not support today's I++ protocol for open standards. For shops utilizing a variety of measurement devices, this usually means they are also using more than one measurement and inspection software, which requires:
- Tribal knowledge of legacy software; usually with dedicated operators for specific CMM types
- Multiple software licenses and annual maintenance agreements
- Added training costs for multiple software
- Added complexity to database management
- Resource management challenges (who within the team knows which software?), which limits a manager’s flexibility to assign resources

Selecting Model-Based Metrology Software
Be sure the model-based metrology software you select is open and offers the necessary level of interoperability to support your current and future application requirements. Questions to consider:
- Is the software model-based on a CAD platform, including 3D modeling?
- Does it have the flexibility and embedded tools to handle the range of inspection data, from manual contact probing to non-contact point clouds?
- Does it import and export all CAD files and models seamlessly?
- Will it import and allow annotation of GD&T data?
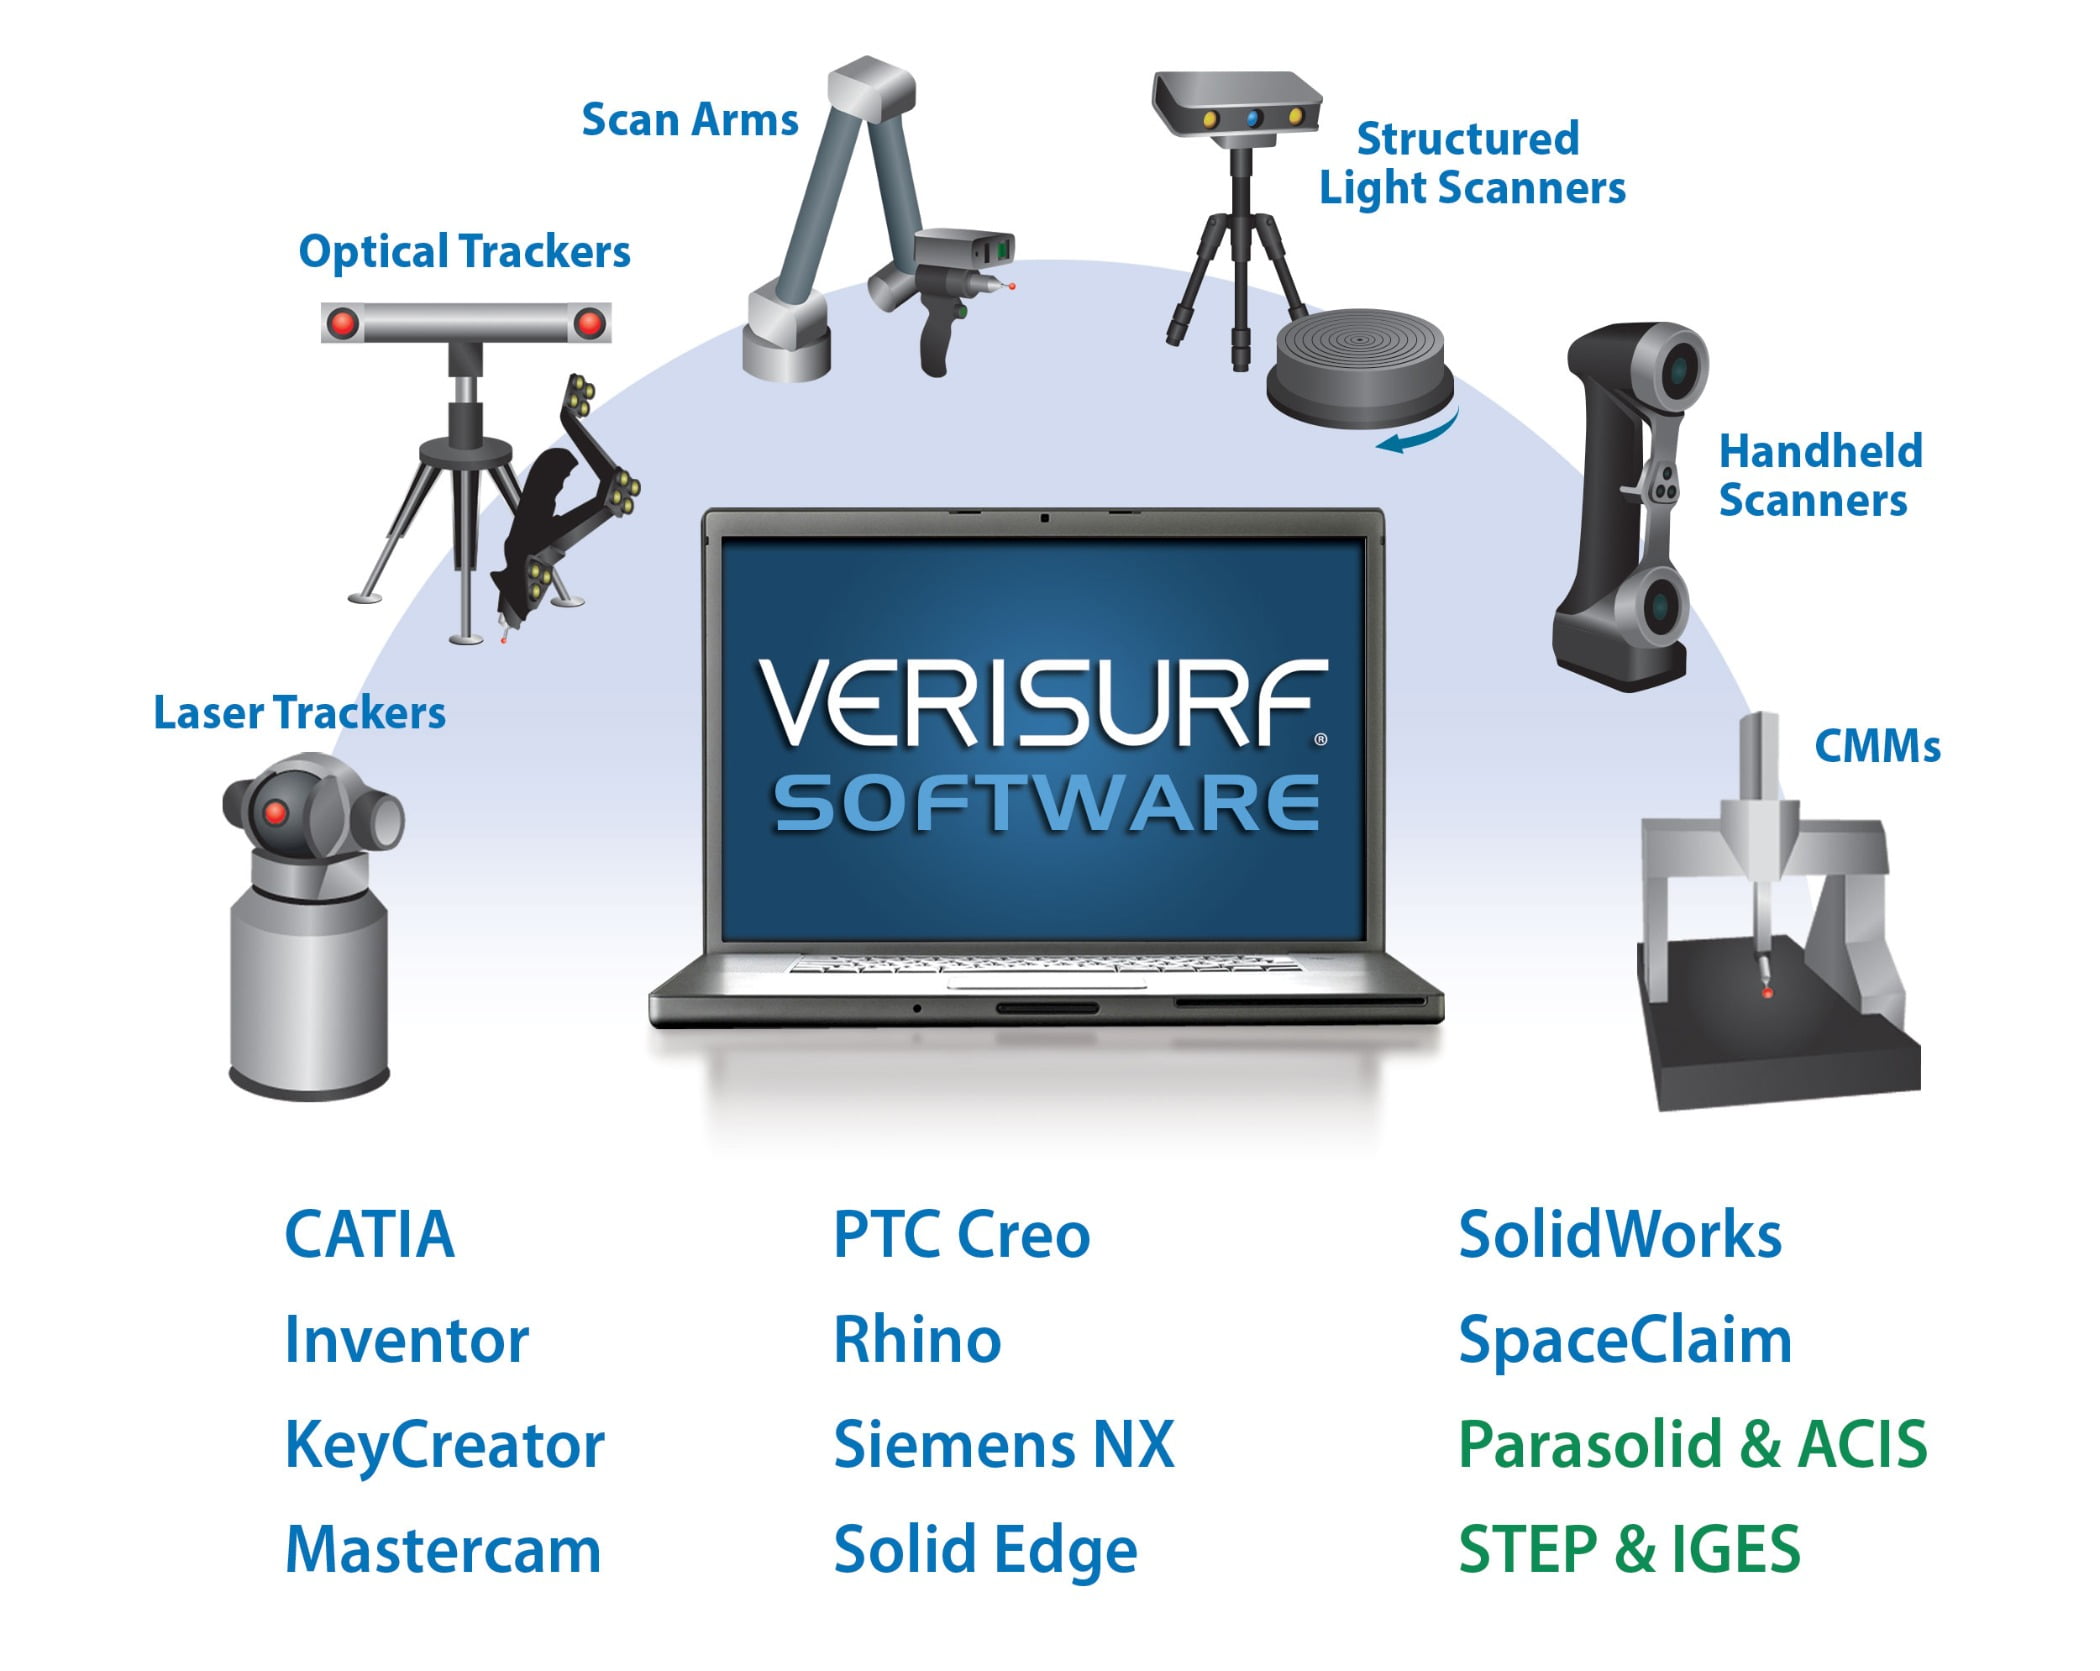
- Is the software capable of controlling all popular digital measuring devices?
- Does the software support new and legacy measuring devices regardless of age, controller type or proprietary software?
With ever-increasing requirements towards manufacturing 4.0 concepts, today’s manufacturers need interoperability between their metrology applications. Scanning, reverse engineering, inspection and reporting, tool building, and assembly guidance are all subsets of model-based metrology and should be considered before jumping into a single point application purchase.
Ernie Husted is president and CEO of Verisurf Software. Verisurf Software, Inc. is a three-dimensional measurement solutions company, committed to delivering advanced computer-aided surface analysis, inspection, tool building, assembly guidance and reverse engineering solutions. Verisurf solutions help manufacturers produce higher quality products in less time and at a lower cost with automated, Model-Based processes. You can learn more about Verisurf at www.verisurf.com.


