Computed Tomography
Inspection
NDT
Solution to Battery Safety Concerns
Computed Tomography’s
A battery is a great example of the value of CT compared to simple radiography.
By Andrew Ramsey
As the products and materials we manufacture become more structurally complex, industrial radiography becomes more and more important. Industrial radiography is a method of nondestructive testing that uses ionizing radiation to inspect internal materials and components and quantify defects and degradation that could lead to the failure of engineering structures. In the past, simple X-ray radiography was sufficient in providing an image needed for this inspection. However, because it views structures in 2D, simple radiography is limited in engineering applications as the objects become more complex. This is where computed tomography (CT) becomes valuable. Known in the medical field to provide detailed 3D images of the body noninvasively for diagnostic purposes, CT scans can also be applied to industrial samples for inspection and diagnosis of quality defects.
With a CT scan, the sample rotates up to 360 degrees while acquiring those X-ray images, producing projection images from every angle, and providing a 3D map of the X-ray absorption throughout the object. These images are then reconstructed into a 3D volume. In as little as five minutes, the CT process can build a complete volumetric representation of an object, producing a highly detailed 3D image of the internal structure and allowing for nondestructive cross-sections of the sample.
Inspecting the Smallest Details
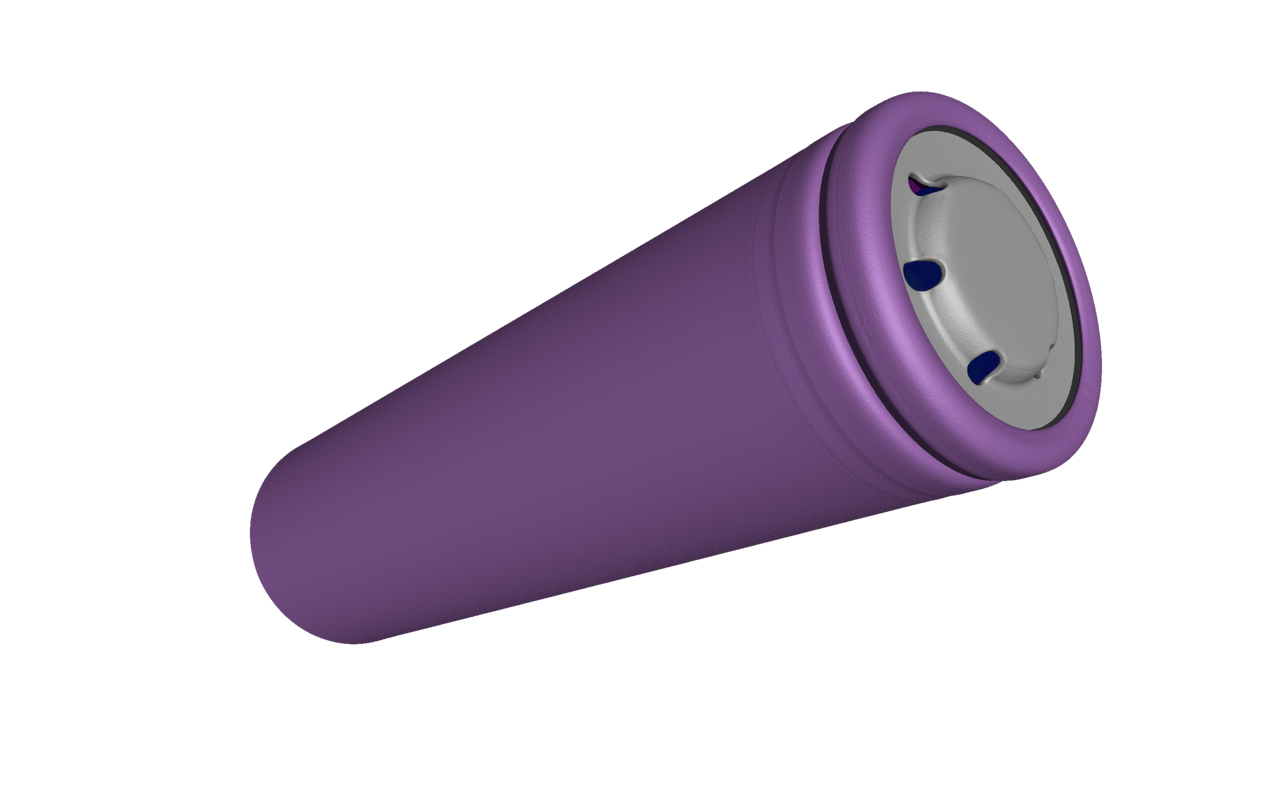
A battery is a great example of the value of CT compared to simple radiography, and this value can be demonstrated through numerous known battery failures from the past decade. Whether found in a cell phone or in an electric vehicle, batteries both large and small are complex structures made up of numerous small yet critical parts. In a 2D projection image, layers become superimposed on top of one another creating a messy and unclear view, making it difficult - if not impossible - to pick up the detail needed for these inspections. 2D images also make it difficult to identify foreign object debris, short circuits and other manufacturing defects that impact the quality and longevity of the battery.
A 3D image produced by CT though is detailed enough to visualize the electrode structure in multiple different planes, providing the ability to capture, visualize and even measure defects in very high resolution and high magnification imaging. CT scans allow an engineer to virtually cut a battery in any orientation and start to see the integrity of the roll inside, and more importantly, they can make out the electrodes, the uniformity, and the integrity of the can and the gasket. This is when resolution is key. In a battery, the higher the level of detail, the higher the chance that critical components, such as electrodes, gaskets, and separators, can be seen. In these instances where the failure of small yet critical parts can potentially cause serious damage or injury, CT provides a valuable way to assure quality control.
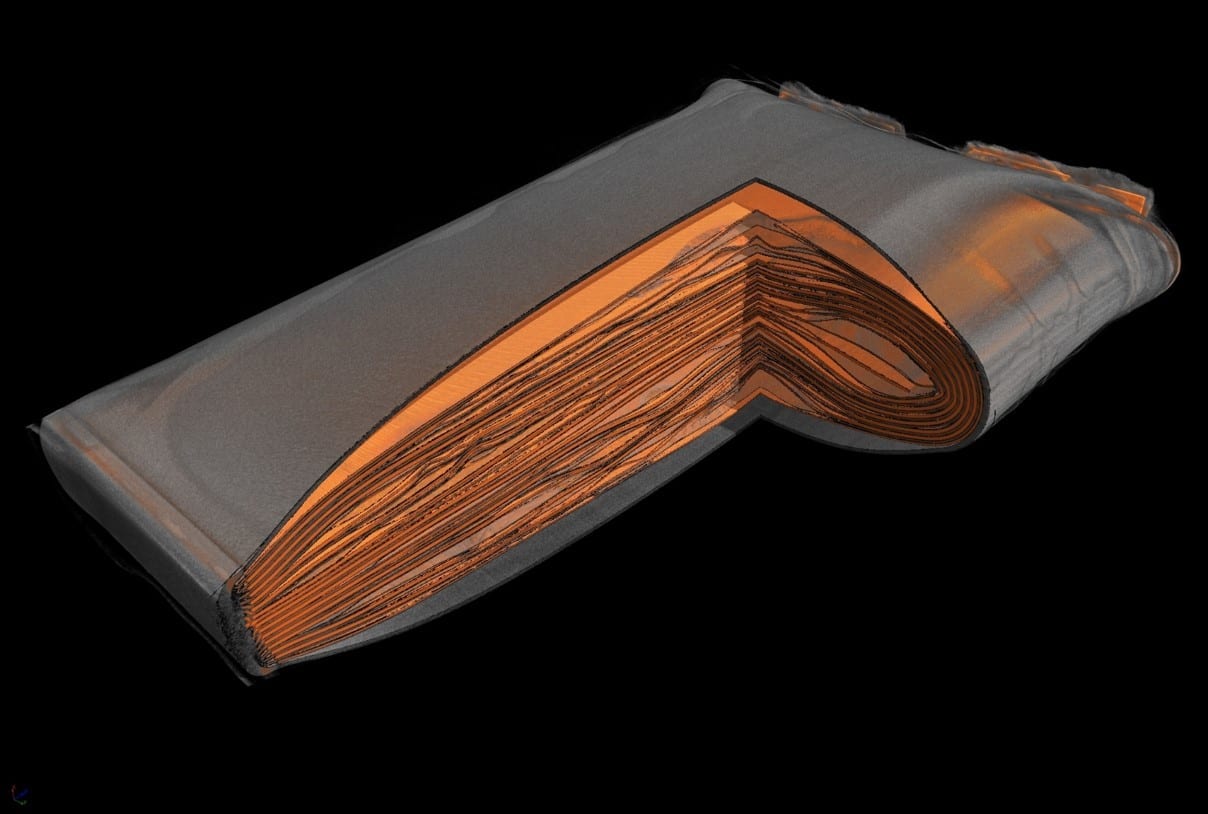
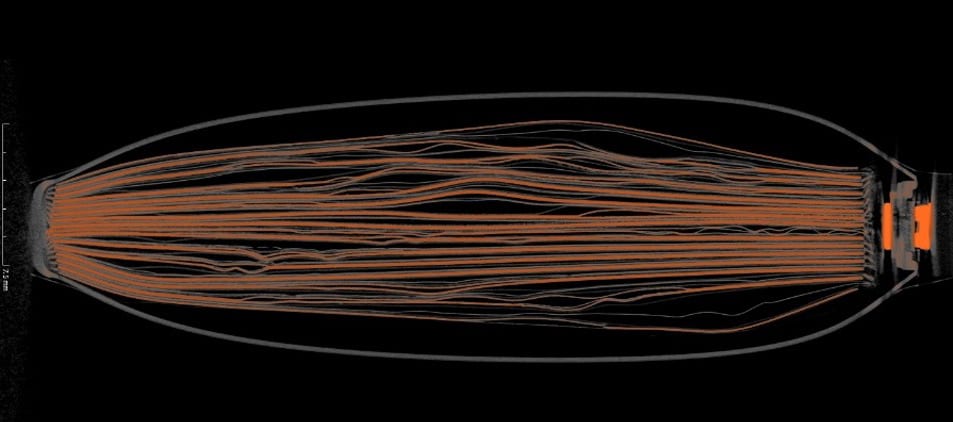
Demonstrating how CT can be used in nondestructive analysis, this scan shows a cellphone battery that experienced a thermal event and inflated significantly.
CT is beneficial in the manufacturing and quality control of parts, but also provides an important first step in failure analysis, giving insight into the specific areas where a failure occurred before any destructive analysis takes place. The CT images, especially when reviewed alongside electrical response or other thermal data, could potentially pinpoint the failure down to a specific cell and guide how the object sample should be taken apart for additional testing. CT allows engineers to create a digital specimen of the failed object, allowing its structural information to be preserved before it is cut apart. This allows them to go back and interrogate the object multiple times throughout the failure analysis, serving as an invaluable resource.
Region of interest scans allow engineers to zoom in on small specific zones and gain higher magnification and resolution. Take the well-known 2017 case of the smartphones that caught fire as an example where the batteries contained a design flaw that made electrodes susceptible to bending. Those bent electrodes then had insufficient insulation which caused excessive heating. With region of interest scans, engineers can increase the resolution enough to where they can visualize some of the separators, identifying potential issues and preventing battery failures that may result in injury.
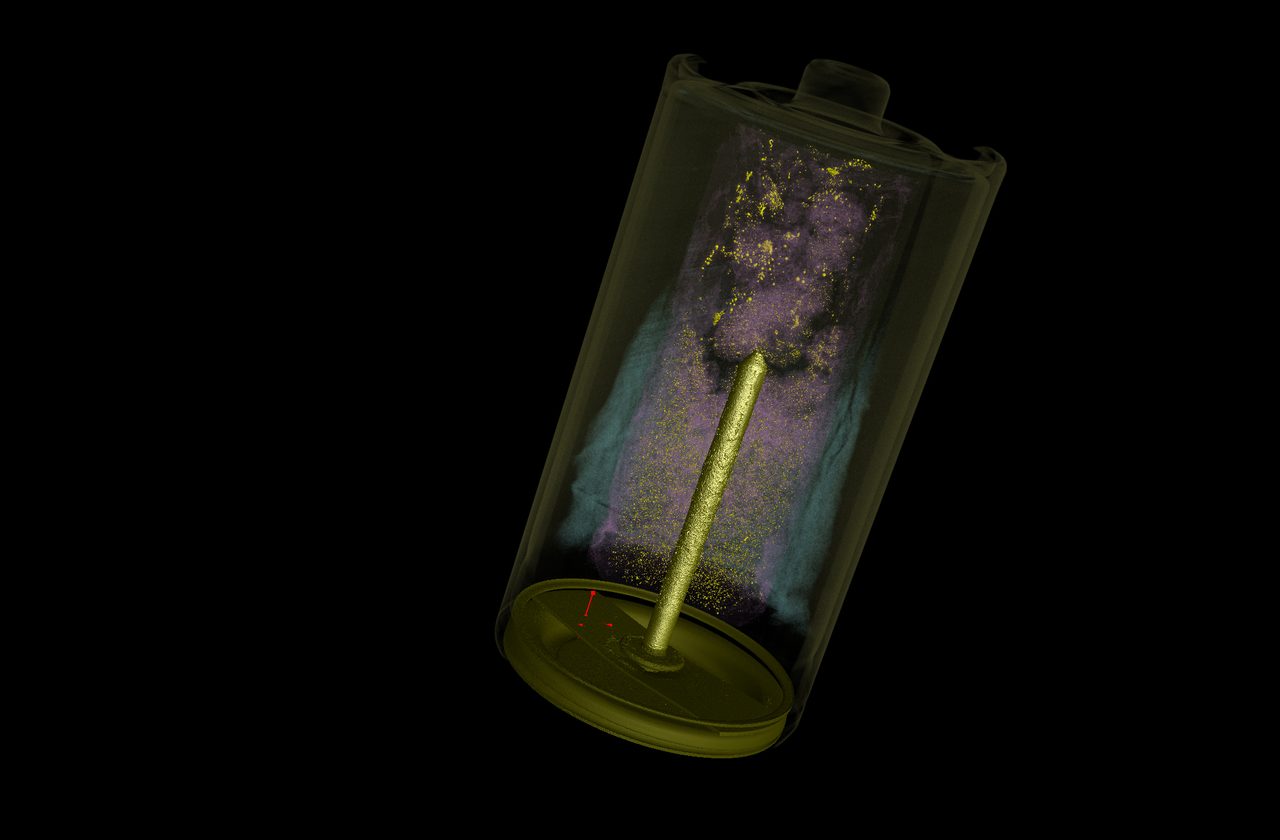
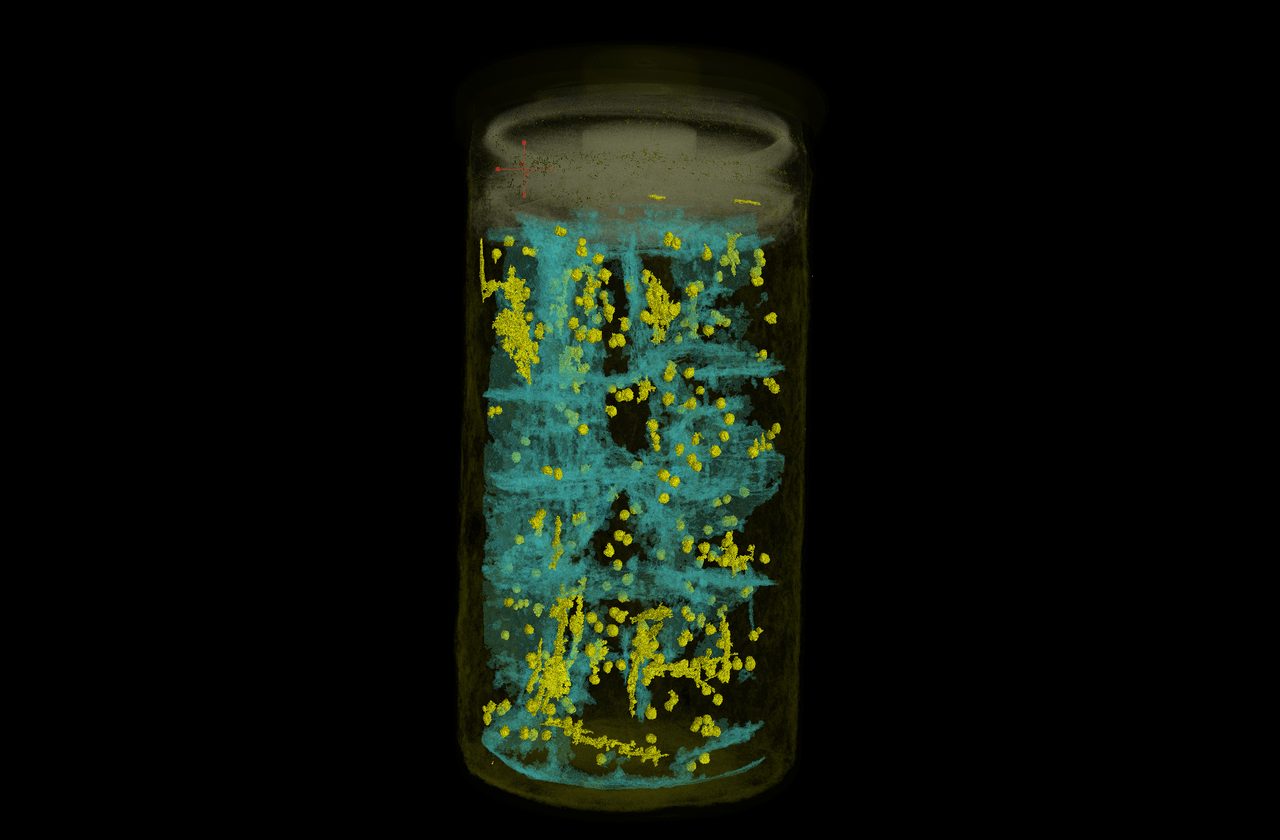
CT scan image of a standard C-cell 1.5v battery
Full battery packs, while larger in form factor, are still very complex in structure and due to their size create a larger threat when quality is an issue. In 2013, batteries in several large, commercial aircraft reportedly experienced thermal events due to a short circuit within one battery cell within one of the plane’s two lithium-ion batteries that led to venting and cell-to-cell propagation causing the battery failure. In one case, a single event failure was said to have spread to multiple adjacent cells, causing smoke to be emitted, in what could have led to a disaster.

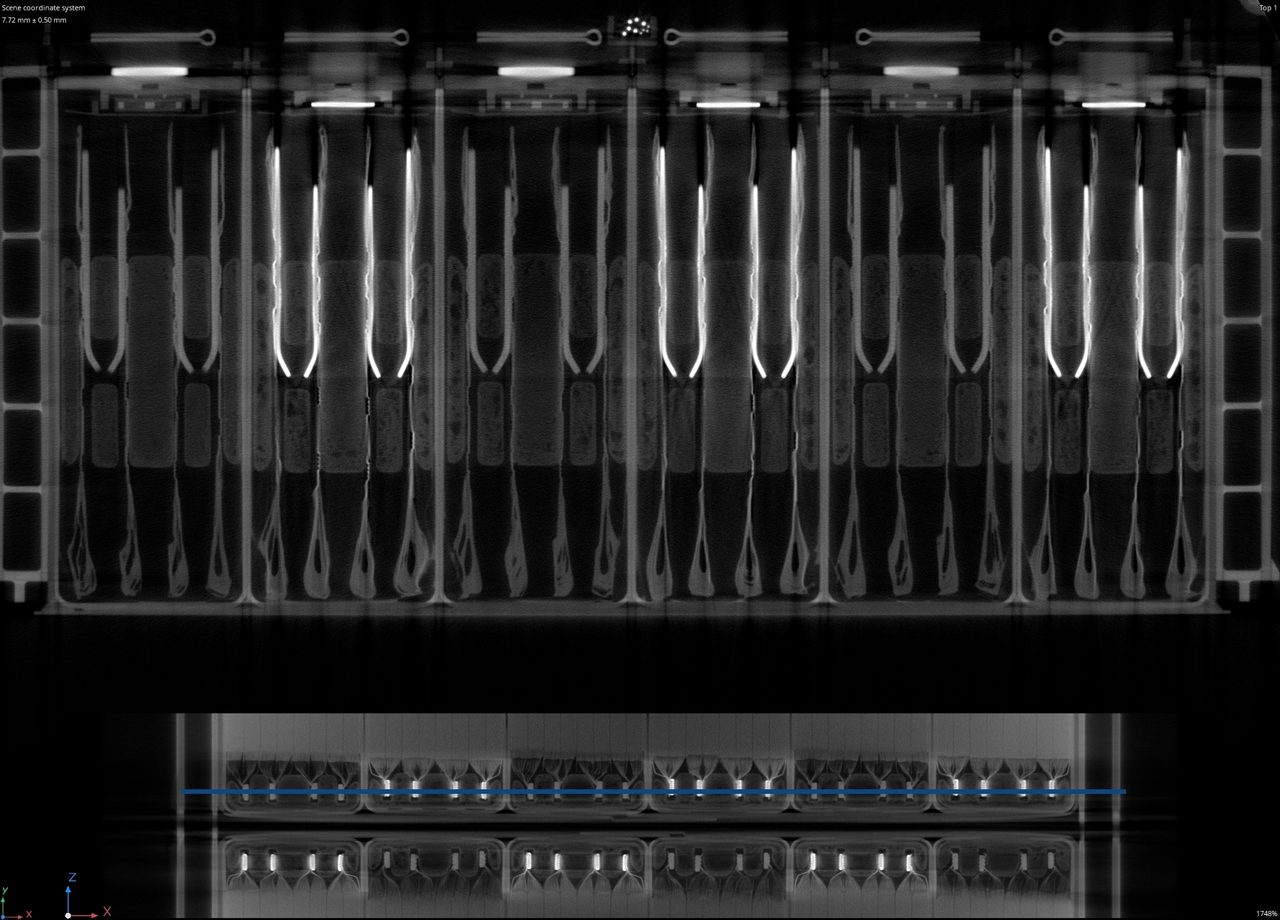
This Offset CT scan shows the central region, including the anode and cathode busbars and the tabs connecting the cells to the busbars of an automotive battery module.
More advanced CT processes can also benefit in the inspection of dense objects, such as metal alloy turbine blades and metal additive manufactured and cast parts. CT systems with a rotating target dissipate heat during the process, allowing a smaller spot size for higher energies and powers, leading to higher resolution, high-contrast images. This allows penetration of high-density parts while achieving micron-accuracy, allowing engineers to visualize, analyze and measure complex geometry, surfaces, and internal components without physical sectioning of the sample. Failure analysis is a critical step in addressing reliability or performance issues within a user’s products. From R&D through production line setup and pre-series trial runs to full production, CT is an indispensable tool that offers many advantages for production applications requiring efficiency, reliability, and accuracy.
CT imaging can assess quality and structural integrity taking into account the multiple connections, anticipated swelling of thermal layers, thermal venting, external insulation, among other things - including ensuring the proper safety structures are in place to prevent a single cell failure from spreading to adjacent cells or modules.
Image source: Nikon Metrology
Ian R. Lazarus is president and CEO of Creato Performance Solutions, providing leadership development, training, and solutions to support operational excellence.
Andrew Ramsey, X-ray CT consultant, Nikon Metrology Inc. For more information, email Andrew.ramsey@nikon.com.
Jim L. Smith has more than 45 years of industry experience in operations, engineering, research & development and quality management.

