H2 Deck By Bold Name
h2 xxxxxx
H1 xxxxxx
h2 xxxxx
Test & INspection


By implementing automation, Hitchiner increased repeatability and speed. By Emily Starinieri
Hitchiner Manufacturing
Overcomes Casting Challenges with Automated Blue Light 3D Scanning Technology
Case Study
H2 Deck Info By Paragraph Style Bold
Headline
Hitchiner Manufacturing is a high-volume producer of complete-to-print, complex thin-wall investment castings and fully finished casting-based subassemblies and components for the automotive, aerospace and defense markets. With locations in the United States, Mexico and France and headquarters in Milford, NH, its history dates back to 1946. In the 1970s, the development of Hitchiner’s exclusive counter-gravity casting techniques contributed to the advancement of casting technology overall, solidifying its industry expertise early. Contributing to its growth and success is the fact that Hitchiner is a proponent of implementing new technology to facilitate continuous improvement.
“This company is by far one of the best companies when it comes to seeing what innovation is out there and considering it,” said Chris Tinker, a layout metrology engineer at Hitchiner.
Hitchiner’s use of coordinate measuring machines (CMMs) began in the 1980s. Over the next 30 years, CMMs were a staple in their metrology department. The company continued to update its CMM equipment to capitalize on the capabilities of the developing technology. Various CMM software innovations supported parametric scripting, first article inspection reports (FAIRs), and even Model Based CMM programming, which Hitchiner adopted in the late 2000s to process FAIR/Delta with customer computer-aided design (CAD) models and to improve its overall process.

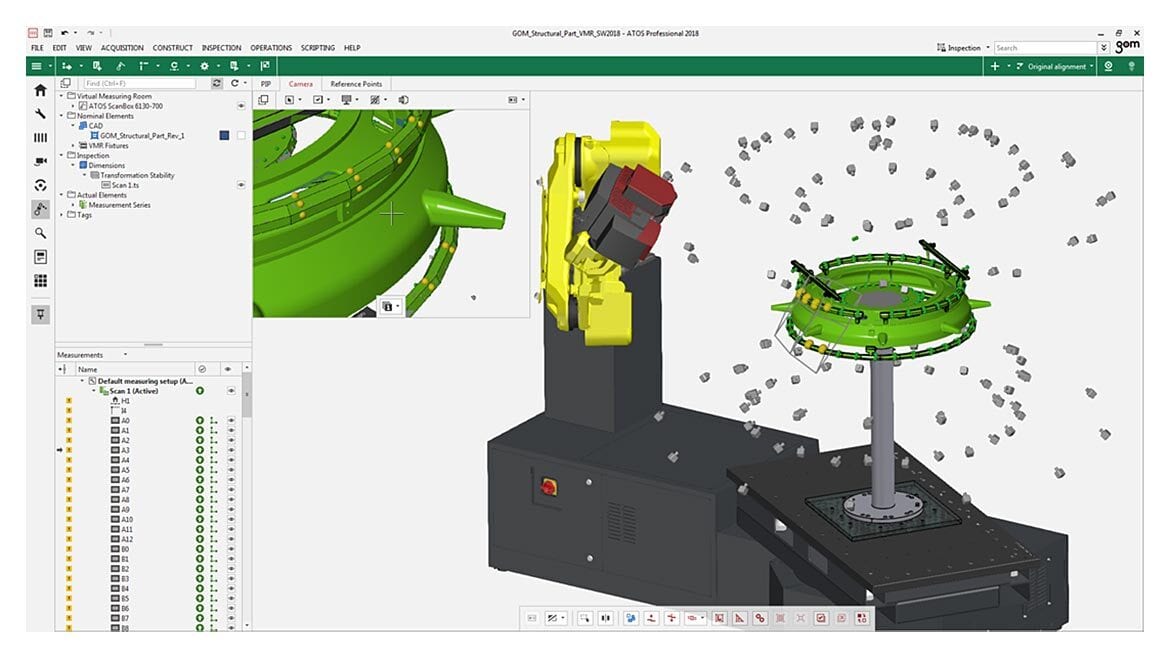
Hitchiner Manufacturing uses the Virtual Measuring Room (VMR) software module to plan, program and execute scanning routines.
Hitting a Wall with CMM Limitations
CMM hardware and software advancements served Hitchiner well until 2010, when the contact nature of the technology posed a dimensional challenge for verifying complex combustor floatwall castings. In this combustor design, thin nickel-based superalloy panels called floatwalls line the combustor walls. Each panel has several hundred small pins on the air channel side that establish the offset distance and act as high surface-area features, improving heat transfer from the panel to the by-pass air and cooling the panel. The cooling air flows across the back pins, increasing in heat, and then flows into the combustor across the front face of the panels, making them critical to the engine’s performance. The pins are approximately 60 thousandths in diameter and height. Verifying pin height is critical because the pins cannot interfere with fit-up when the part is assembled around the gas turbine engine. One pin too high or low would cause an improper fit and inhibit the panel’s performance.
Because floatwall castings could have hundreds of pins at different heights, Hitchiner’s customer wanted the metrology department to check all surfaces to verify the pin height of all pin arrays. This requirement necessitated a noncontact method to quickly and efficiently visualize where the pins lie relative to the base surface.
“A noncontact solution was an absolute must. Anytime you have to contact that many pins or that many features, you’re adding a significant amount of cycle time,” said Tinker.
That year, after comparing various noncontact solutions, including laser, optical and vision systems, Hitchiner purchased a noncontact ATOS white light 3D scanner from CAPTURE 3D. Hitchiner’s metrology department developed an inspection strategy to generate a full deviation color map with actual accurate measurements, resolving the pin height issue and earning customer approval of the inspection method.
“Color maps are very powerful. A color map can show you anything you want to see regarding that part. It’s important because castings are not machined parts. They come out of a tool that typically just constantly produces the same part. You need to make sure that the tool is doing its job of making the correct wax by analyzing those parts. So, if you take a sampling of ten parts, for example, that all came out of the same lot, and analyze the whole part with a color map, it should be relatively the same. If it’s not, then you can see it almost immediately. You could not see enough of a part with traditional contact measurement as you could with noncontact because it gets the entire part, and that’s where the color map comes into play. Our engineering team relies on color maps. If we find a quality issue internally, we immediately scan it with ATOS to generate a color map and see what’s happening. It’s standard procedure at this point. This technology has created a partnership between engineering and metrology that I don’t think we’ve ever had before. Now they lean on us for a lot of NPI data that comes from ATOS,” said Tinker.
After integrating ATOS technology into its FAIR procedure, the metrology department experienced increasing internal inspection demand, including correlation to CMM programs, verification of tool rework, and color map castings for inspection in research and development (R&D). Soon, a second ATOS 3D scanner was needed to meet the demand.

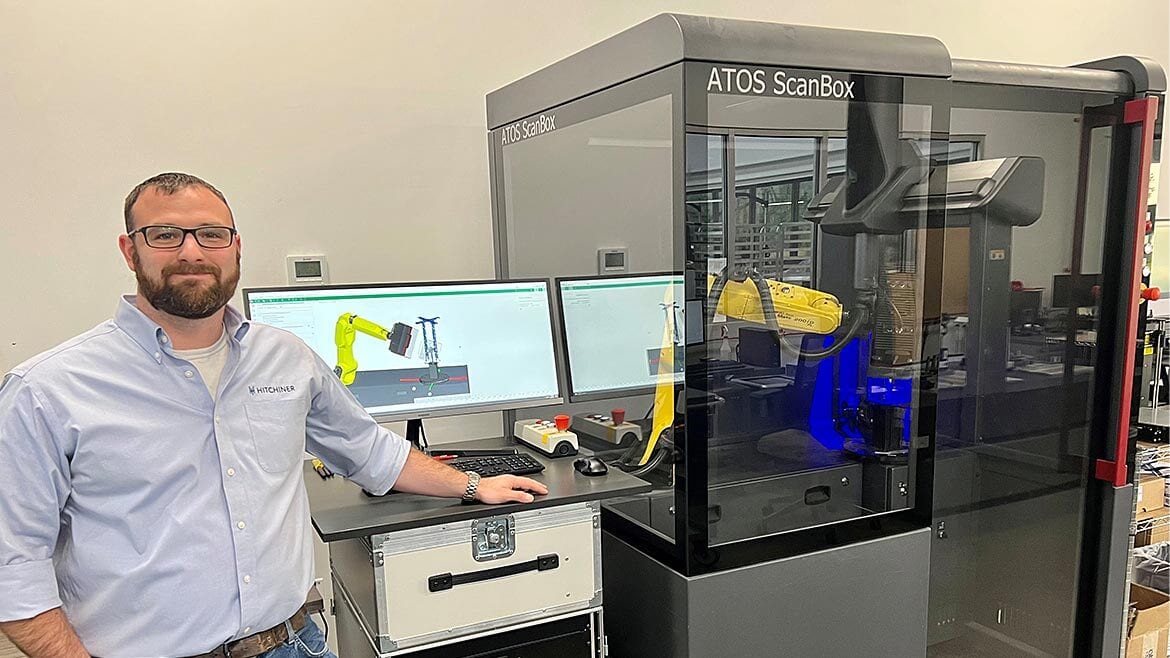
Chris Tinker, a layout metrology engineer at Hitchiner Manufacturing, with their ScanBox 4105 automated blue light 3D scanning solution.
Adopting Advancing Technology to Advance Quality and Capabilities
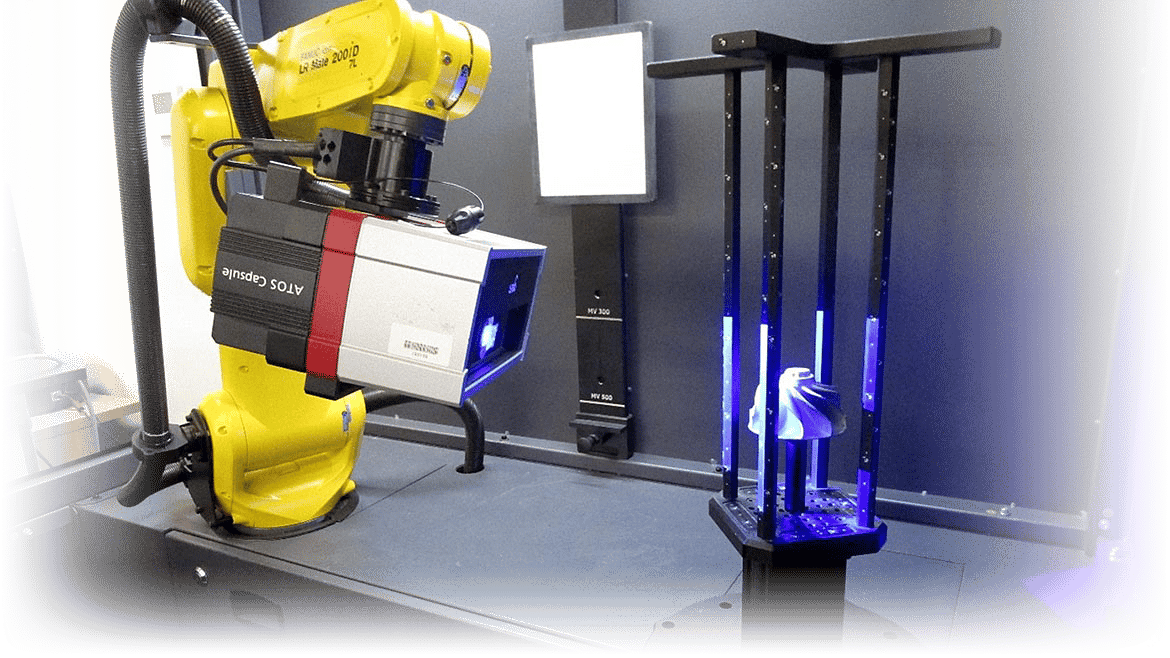
In 2019, Hitchiner Manufacturing upgraded its white light ATOS sensor to a 12-megapixel blue light ATOS Capsule. The narrow wavelength of blue light filters out interference from ambient light better than white light, providing higher quality scanning results. This upgrade resulted in three times more resolution, three times higher point density, more detailed data and more data per scan. Switching to a blue light 3D scanner also resulted in shorter cycle times, especially for one of Hitchiner’s most difficult parts— turbo wheel investment castings.
A turbo wheel investment casting is an automotive part made in large quantities at Hitchiner’s headquarters. The part is a helical shape with fins that wrap around the wheel. The part’s complex geometry can create a defect in the casting process known as non-fill, when the shell does not fill out completely, in this case, at the blade tips.
“It was a major concern for us at one point in time. We started 3D scanning the castings, and almost immediately, with just a simple color map, you could see if the blades were filled out, which helped us do specific studies to nail down the issue. It’s one of the biggest issues in investment castings— making sure that when your wax goes through the casting process, the shell fills with molten metal all the way. When you have parts that are geometrically unfriendly to work with, even geometrically unfriendly to look at, it’s hard to visually inspect them with your eyes, especially after you do 20 or 30, never mind over 100. So, we decided to use the full power of ATOS 3D scanning to tackle this issue, and we did resolve it,” said Tinker.
Moving from a white light 3D scanner to a blue light 3D scanner to inspect these complex turbo wheels reduced cycle time by 29 percent. To increase capacity, Hitchiner purchased a second ATOS Capsule in 2020 and added two rotary tables for semi-automation, decreasing cycle time by 59 percent from where it stood with white light 3D scanning.
Recalling Historical Data to Strengthen Inspections
Hitchiner works primarily with aerospace investment castings. Many parts from the aerospace industry are legacy products several decades old that originated from a standard two-dimensional drawing. Things often change when transitioning to a 3D CAD model, and parts may no longer match the drawing dimensions over time. By scanning these old parts, Hitchiner’s metrology team analyzes and understands their actual dimensions. They also overlay it to a CAD model for comparison or compare it against a current part or a prior scan from years ago.
“One of the major advantages ATOS gives us is the ability to look back at historical data. We’ve kept every single mesh we scanned since 2010. So, 13 years of data collection gives us the ability to go all the way back— and that’s a huge advantage. We’ve had some customers with a design issue internally, and they’ve asked us, ‘Do you guys have any historical data on this product?’ and thanks to ATOS, we do. We’ve had customers ask us for meshes at least six or seven years old, and using those mesh files, they can visualize the three-dimensional product. The advantage also lies in the new product introduction realm. When it’s brand new, we take the wax injection tool, scan it, and archive it so we can recall it later if we need to, and that’s a huge strength,” said Tinker.
Implementing Automation to Meet Increasing Demand
In April 2022, Hitchiner Manufacturing introduced fully automated 3D scanning by installing a ScanBox 4105 in its metrology room. After about one week of training, Hitchiner’s metrology engineers began utilizing it. Less than one month later, they had more than ten scanning routines.
“It’s been a game changer. Right out of the gate, the ScanBox was overworking us by a huge margin. A small part that would take us 15 minutes to scan manually, the ScanBox could do in two or three minutes— and with repeatable accuracy,” said Tinker.
By implementing automation, Hitchiner increased repeatability and speed, resulting in a dramatic decrease in cycle time. Comparing ScanBox technology to Hitchiner’s original white light 3D scanning solution, there was an 81 percent decrease in cycle time. Comparing manual blue light 3D scanning technology showed a 73 percent decrease and moving from semi-automated to fully automated resulted in a 63 percent decrease.
Hitchiner’s metrology engineers use the Virtual Measuring Room (VMR) software module to plan, program and execute scanning routines. They also use the VMR to estimate measurement cycle times before casting a part. The VMR’s ease of use is one of the primary reasons implementing ScanBox technology was an immediate success.
“We immediately saw how user-friendly and incredibly intuitive it is. The VMR makes the ScanBox a very safe automated solution, and it takes the stress out of programming and operating the FANUC robotic arm. We fell in love with it almost immediately, and it was rather surprising how easy it was for us to learn. It’s very nice when you only need software to program a six-axis robotic arm rather than using a teach pendant or overriding any specific code. It’s all done three-dimensionally in the software, and because it’s very intuitive, there are many safety nets. Those safety nets gave us a certain level of comfort to be more efficient with the software. We already knew the software from a dimensional analysis side, and we’ve been manually scanning for so long that we understand what angles to scan from, but the VMR has also shown us angles that are much better than what we, as a human, would choose. So, we’ve learned quite a bit from it,” said Tinker.
Another advantage of ScanBox technology is its ability to increase the efficiency of shrink factor analysis— a challenging but critical task in the casting industry. Hitchiner’s metrology team scans 3D voxel jet patterns, then casts them and scans them again to compare the differences and dimensionally calculate factors from the results with larger datasets and tighter Cpk values.
What’s Next? Automating Production Inspection to Meet Manufacturing Goals
The reduced cycle times with more accurate and repeatable measurements brought by ScanBox technology proved the value of automation. Hitchiner’s team is starting to use ScanBox for production parts to capitalize on the success. Parts that used to be measured on the CMM are now brought to the ScanBox.
“A lot of our new product lines require 100 percent inspection, and parts that take 30 minutes on a CMM only take us five with our ScanBox. So, we’re considering introducing a ScanBox on the production floor in the near future. Our current ScanBox resides in the metrology room, which helps support production if needed. But soon, ATOS technology will be intertwined with production, just like our CMM capabilities,” said Tinker.
“We chose ATOS years ago specifically because of its accuracy— it is far more accurate than the rest of the 3D scanners out there, and the software was the most user-friendly software. It’s one thing to have the system, but it’s another thing to be able to utilize the software as well. CAPTURE 3D had the complete package that Hitchiner was looking for at the time. We continue to stick with ATOS now because we know it’s world-class— it’s the best in the world.”