Quality 101
Quality 101
RAM is a volumetric approach and evaluates the whole part, both for internal and external structural flaws, metallurgical deviations, and consistency. By Greg Weaver
Nondestructive Testing Using the
Resonance Acoustic Method
H2 - Deck info goes here
By Paragraph Style Bolded
Nondestructive Testing Using the Resonance Acoustic Method
The Resonance Acoustic Method (RAM) is a long-standing nondestructive test (NDT) that measures the structural responses of a part. These responses are a set of unique and measurable natural frequency (resonance) data. This data is known as the fingerprint of the component, derived from a part’s unique material properties and geometry. RAM is an NDT technique that collects and measures all the structural characteristics of a part in a single and rapid test.
RAM is a volumetric approach and evaluates the whole part, both for internal and external structural flaws, metallurgical deviations, and consistency. Governed by ASTM E2001, the method is also known as resonant ultrasound spectroscopy (RUS). The results are objective and quantitative and provide either: 1) test results of parts against a control set of known parts to screen for processing differences and/or defects, 2) measuring a population’s statistical variation and assessing individual part positions in relation to said variation, or 3) to verify a part’s actual natural frequencies to compare to or validate a 3D model or digital twin.
Test data is collected using a mechanical impulse, typically a tap or a part drop. This impulse excites all the part’s natural resonant frequencies. Natural resonances are captured with a sensor, usually a broad range focused microphone or an accelerometer. The sensor collects the data, and relays it into a data acquisition software program. The software program then processes the data using a Fast Fourier Transform (FFT) algorithm which provides the individual resonance spectrum output. Testing, analysis, and evaluations are then performed from the acquired data.
Material property differences, geometry variation, and defects adversely affect the structural characteristics of a part. Typical items detected with RAM are cracks, chips, porosity, processing issues, variations in density, hardness, stress, grain structure differences, and machining and heat treatment errors. Traditional NDT techniques may detect flaws as well, but often only RAM can detect ALL of these in a single test, throughout the entire part (including deep sub-surface defects), in an automated and objective fashion.
A key factor with resonance testing is the possible need for process compensation. Process compensation is the measurement and analysis of the resonance frequency patterns to accommodate for known process variations that directly correlate to resonance responses. Variations in mass and temperature are known process variations that require compensation. Various statistical tools identify combinations of resonance patterns influenced by process variations. The RAM testing process uses this data in a compensation solution.
To convey a good understanding of RAM, we describe the three main ways RAM is applied in industry. Starting first with the most used application, testing parts against a control set of known parts to screen for processing differences and/or defects.
The testing of parts against a control set of known parts compares the collected resonance frequency spectrum of the part(s) under test, to the frequency spectrum of the stored resonances, known as a reference set of parts. Objects that are alike will have comparable resonant frequency spectra. Objects that are not alike will have a shift in frequency(s) when compared to the reference data. The reference data should always include known normal and acceptable variation to ensure no false positive results. Differences that fall outside acceptable criteria are an indication of a structural change e.g., defects in parts/or material properties. Frequency differences are driven by any structural change, RAM is used to inspect external, internal, and metallurgical structural flaws or deviations.

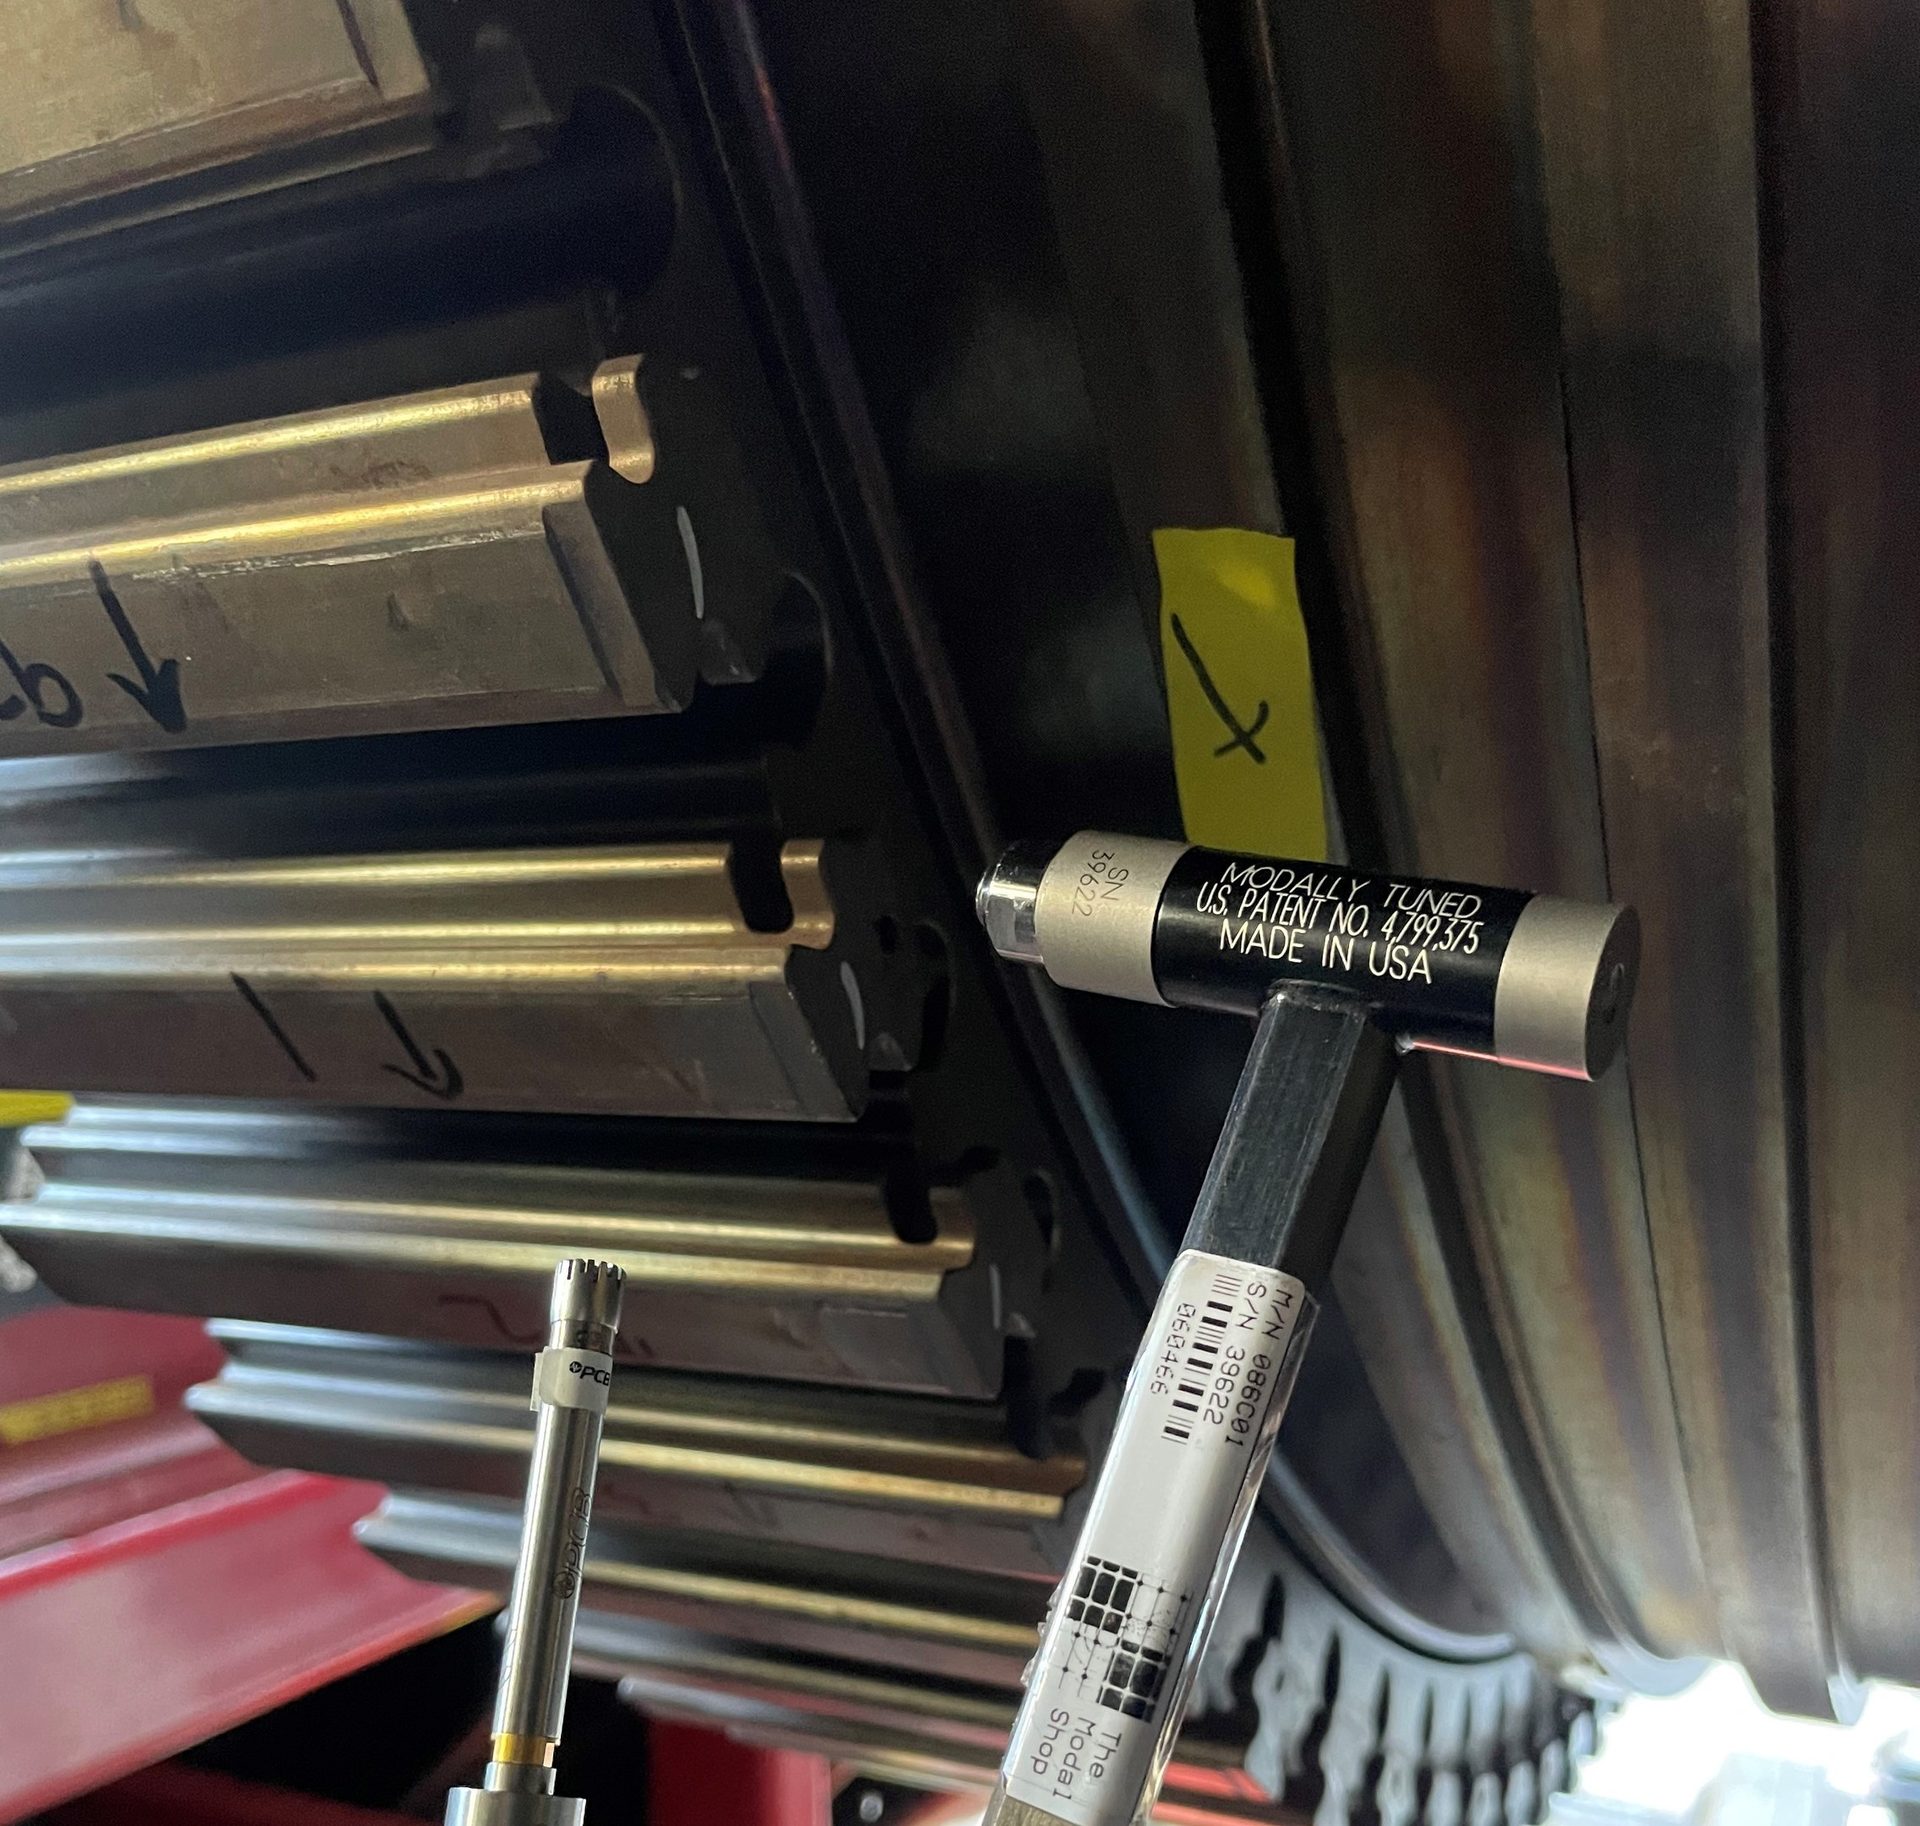
Mobile Resonance Inspection of Turbine Disk Assembly. Source: Weaver NDT
This comparison type testing uses the following process flow:
- Identify repeatable and consistent resonant peaks based on evaluating the reference parts
- If needed, apply Process Compensation
- Select a subset (normally three to five) of resonant peaks that have adequate good/bad part separation within the spectrum of peaks
- Adjust the selected peak ranges to ensure testing reliability and to finalize the testing “criteria”
- Test production parts against the developed criteria to evaluate the quality of the parts under test
Production part testing can begin once the above flow is complete.
Testing times are fast, usually one or two seconds. Part placement and movement are the limiting factors on faster cycle times.
The second RAM application in industry is measuring a population’s statistical variation and assessing individual parts positions in relation to said variation.

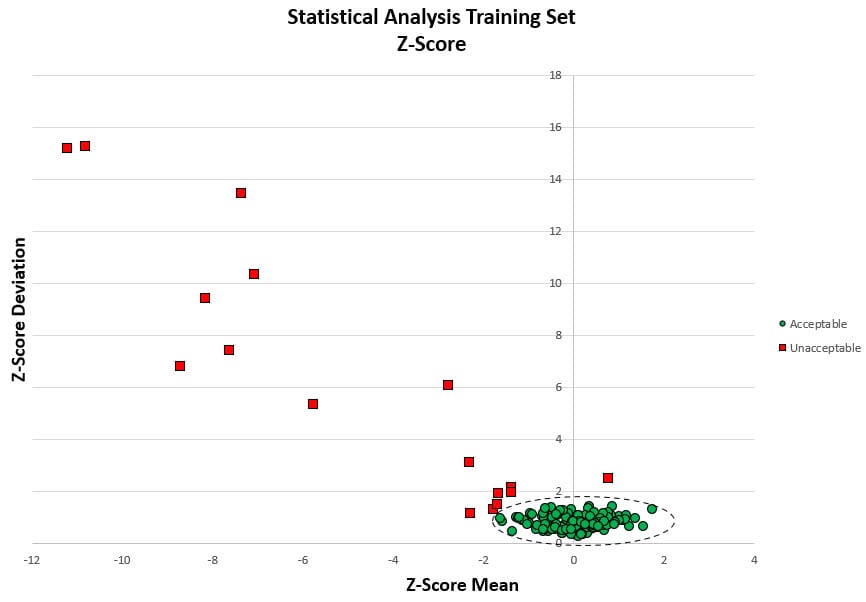
Z-Score Analysis of Resonance Data Results. Source: Weaver NDT
RAM captures the raw frequency responses and during a statistical evaluation all, or a subset of the frequency responses, can be used. The most common statistical evaluation for this type of data is standard deviation Z-score for normal populations or median absolute deviation (MAD) Z-score for when the population data has skewness or if it has under thirty samples.
Z Score = (frequency - column average)/column standard deviation
MAD Z score = (frequency - column median)/column median absolute deviation
Both calculations are a measure of a component’s location within a given population.
This data can be particularly useful to understand the consistency of the product. This sets inspection limits without the need for known rejectable parts and provides a part’s location and its position in relation to the population.
The final RAM application is the inspection to verify a part’s actual natural frequencies to compare to or validate a 3D model or “digital twin.”
All modern components use a 3D model or digital twin to either create the part tooling for casting, forging, stamping, injecting, machining, or other manufacturing processes. The “twin” is a virtual representation of a physical object for design and parameter building. These predict a product’s natural resonance frequencies and provide a means to evaluate the actual resonances collected by RAM.
For conventionally manufactured parts, modelled predicted frequencies have historically determined testing parameters for RAM in a multitude of industries. In more recent years, additive manufacturing has been utilizing the digital twin to set similar testing criteria.
In summary, RAM is a widely implemented and trusted method. It allows for process variations by adding compensation if appropriate. RAM is also extremely fast and most importantly, has a long, proven history of providing industry with accurate and efficient structural integrity inspections.
