Products
the latest products to help you improve your manufacturing process
Olympus App for Portable, Fast Weld Inspection of Complex, Oversized Parts
The new WeldSight™ Remote Connect app for the OmniScan™ X3 phased array flaw detector streamlines the weld inspection workflow by enabling users to perform every step via WeldSight software on a PC or laptop. Combined with Olympus scanners and probes, this phased array ultrasonic testing (PAUT) solution minimizes manufacturing delays caused by inefficient nondestructive testing (NDT) methods.
Manufacturers of oversized metal parts, from pressure vessels to wind turbine blades, must validate new-fabrication welds according to stringent international standards. Inspection bottlenecks can slow down production, with delays stretching into months.
With the WeldSight Remote Connect app downloaded on an OmniScan X3 flaw detector, the user can control the unit using WeldSight software on a connected computer. Thanks to this remote-control capability, the flaw detector and software combine to become an efficient, high-performance, portable inspection solution that is also cost effective. It provides manufacturers the flexibility to create customized equipment setups optimized for new weld inspections in oversized parts as well as complex configurations using multiple groups and probes, scanners and monitors to maximize the flaw detection coverage and visualization.
Time is saved from acquisition to analysis since the OmniScan X3 data is transferred instantly to the WeldSight computer. WeldSight software is equipped with specialized weld analysis tools and customizable data displays to optimize indication validation.
To ease flaw characterization and orientation, particularly for welds in large parts with complex geometries, WeldSight software provides a comprehensive image of the weld, enabling inspectors to merge distinct scan files and view the indication in detail from all sides. For additional scan plan flexibility, WeldSight software also offers an integrated ES BeamTool option, incorporating parameters for fabrication codes and a wide range of weld and part characteristics.
The WeldSight Remote Connect app paves the way for high-productivity, off-the-shelf weld inspection solutions for manufacturers, exploiting the powerful PA, UT and TOFD data acquisition of the OmniScan X3 flaw detector and the advanced functionalities and customizable user interface of WeldSight software. The solution enables manufacturers to comply with international standards governing new-fabrication welds while keeping pace with production.
Olympus
www.Olympus-IMS.com
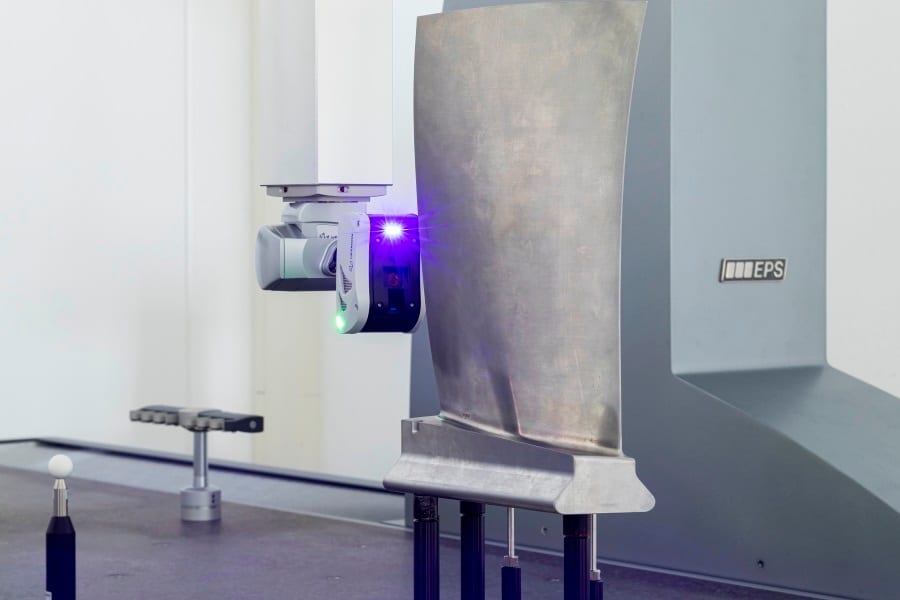
Hexagon HP-L-10.10 Laser Scanner
Hexagon’s Manufacturing Intelligence division announced the HP-L-10.10, a non-contact laser sensor for Coordinate Measuring Machines (CMMs) that offers manufacturers the ability to perform dimensional measurements at comparable accuracy to tactile probing and inspect almost any surface in a fraction of the time. Manufacturers using CMMs for critical part measurements have become accustomed to trading speed for accuracy. The HP-L-10.10 sensor utilizes Hexagon’s latest cross-platform laser line scanning technology to offer similar repeatability and performance compared to tactile measurements executed on the same CMM. Furthermore, it can measure 600,000 individual points per second with a probing form error of just 8μm, rapidly capturing a complete high-resolution digital representation of a part that is valid for both surface and detailed feature inspection. While laser scanning has been possible on CMMs, the HP-L-10.10 is 7 times faster than its predecessor and introduces high precision scanning.

The new sensor employs Hexagon’s unique SHINE (Systematic High-Intelligence Noise Elimination) technology, making it possible to scan almost any part surface or finish at maximum speed and accuracy without user intervention.
The HP-L-10.10 complements Hexagon’s extensive offering of sensor solutions for CMMs, providing manufacturers greater flexibility projects with confidence that their CMM investment can take on the broadest range of measurement applications from larger sheet-metal parts to intricate electric vehicle components. Available for the GLOBAL S productivity line and GLOBAL Advantage CMMs.
Developed in close collaboration with the device, Hexagon’s PC-DMIS inspection software enables users to automatically produce efficient laser-scanning paths by automatically generating the tips, scans, and motions needed for measurement. The software can capture a single point cloud with variable point cloud density within one motion that is valid for both surface and detailed feature inspection. Users can easily visualize surface imperfections, fully exploiting the scanner’s multi-faceted capabilities to identify perceived quality issues, imperfections to feed continuous process improvement.
When measuring large parts or remotely programming the CMM, the user’s experience is greatly enhanced by an integrated Overview Camera (OVC) that provides a clear view of the work area with visible guides on the part that indicate the measurement range. The visible guides help to warn the quality technician when the measurement range is exceeded, allowing for easier routine creation and inspection through PC-DMIS software. The overview camera also improves productivity and collaboration during inspection, for example photographing a part surface that is out of tolerance to so the operator and production colleagues can quickly locate the problem.
The HP-L-10.10 laser-line scanner is now available worldwide. Visit Hexagon’s new Can I Measure It? micro site for resources explaining how measurement challenges are overcome with effective strategies and the best use of CMM and sensor technologies.
Hexagon
www.hexagonmi.com
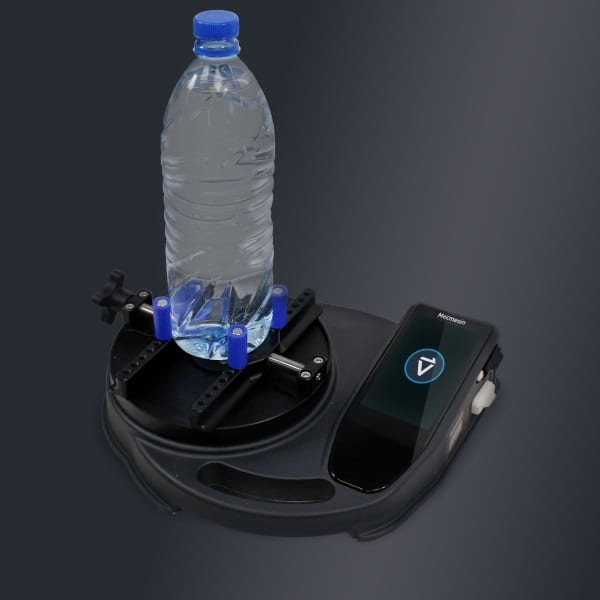
Mecmesin VTG Tornado Digital Torque Tester
Mecmesin announced the launch of its VTG digital torque tester, combining a highly responsive, capacitive 5-in. color touchscreen with sophisticated torque measurement features driven by the power of Mecmesin’s Vector OS.
The VTG Tornado is packed full of innovative features, accessible via a touchscreen interface that sets it apart from other torque testers. It is easy to navigate, just swipe or press-and-hold to access menus, toolbars, and settings.

Vector OS is the technology platform at the heart of the VTG Tornado enabling operators to customize the touchscreen interface, configure the tester to their requirements and analyze test results quickly in the field.
Representing a major step forward in portable torque testing, the VTG Tornado boasts an array of advanced capabilities. It includes a dual zone display with the upper zone clearly showing the peak readings in N.cm, lbf.in and other common units of measurement.
The lower zone provides a live graphical plot of the torque applied so that critical events can be easily identified. For example, when testing plastic closures the key parameters, such as the release torque, bridge-breaking of a TE band and strip torque, are all clearly shown. Alternatively, the lower zone can be allocated to a statistical overview, which calculates the Max, Min, Average and Standard Deviation from the peak readings captured and stored in the VTG's memory.
A configurable first-peak function, coupled with the standard maximum reading, ensures that both the initial slip torque and the secondary break torque are captured. This is particularly valuable when measuring the performance of plastic and metal tamper-evident closures (e.g., ROPP), where a maximum reading alone is insufficient to determine both characteristics.
Individual results can be transmitted immediately via RS232 to a PC or printer for analysis. Additionally, an internal memory of over 500 peak results is also available for mass storage when batch testing. An external SD memory card captures all the individual data-points for each test in .csv format so that they can be exported to Excel and other software packages.
The VTG Tornado also features a configurable alarm setting to alert an operator with red & green lights during testing when the torque reading falls within or outside the tolerance limit.
To avoid the risk of operators inadvertently changing units of measurement or the operating mode, there is a password-protected lock function. This is particularly useful when the instrument is being used over several shifts by operators of differing skill levels.
Equally at home in the laboratory or at the point of production, the compact and portable VTG Tornado features a tough, water-resistant casing (rated to IP54), fabricated in non-painted polypropylene, making it suitable for use in pharmaceutical environments.
Four models are available with capacities ranging from 1.5N.m for delicate assessments, to the 3N.m, 6N.m and 10N.m versions for increasingly robust applications.
A calibration certificate traceable to national standards is included at no extra charge, ensuring full compliance during external audits.
Mecmesin
www.mecmesin.com
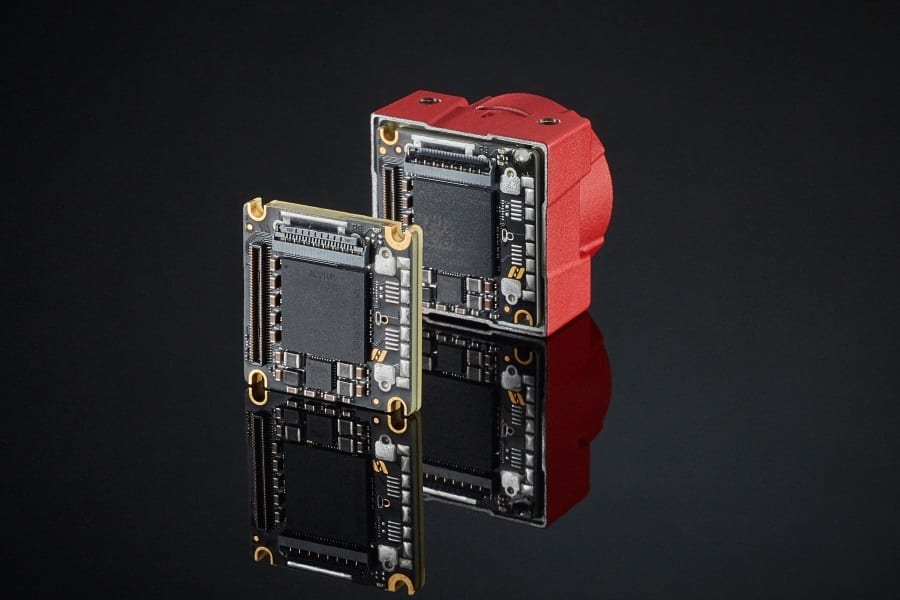
Alvium 1800 USB3 Vision, CSI-2 Models with Sony SenSWIR Sensors
Allied Vision presented its new Alvium 1800 SWIR camera models with Sony SenSWIR sensors for the first time at VISION Stuttgart. The Alvium SWIR cameras are the smallest industrial grade low-power uncooled short-wave infrared (SWIR) core modules on the market ideally suitable to build compact OEM systems used in embedded and machine vision applications.

Sony SenSWIR sensor technology
The four new models of the 1800-series incorporate innovative Sony SenSWIR InGaAs sensors supporting a wide spectral range from 400 nm to 1700 nm at high quantum efficiency. This allows users to image in the visible and SWIR spectrum with a single camera to lower overall system costs. Available with either USB3 Vision or MIPI CSI-2 interface with GenIcam compliant feature control, industrial grade hardware, and drivers, Alvium SWIR core modules provide a plug & play feeling whenever setting up a machine vision applications beyond the visible, regardless if it’s based on a PC or an embedded system.
Allied Vision - The SWIR camera expert
Allied Vision has many years of experience in the development of short-wave infrared cameras with InGaAs sensor technology. The existing product portfolio includes Goldeye SWIR models with QVGA, VGA, and SXGA resolution with and without thermoelectric sensor cooling. For scientific applications, cameras with two-stage thermoelectric sensor cooling (TEC2) equipped with a nitrogen cooling chamber and fan are also available, which enables low-noise image acquisition with long exposure times. With this comprehensive expertise, Allied Vision provides optimized cameras with outstanding image quality in terms of homogeneity, dynamics, and linearity for a wide range of applications.
Now Allied Vision is expanding its portfolio of SWIR cameras with the smallest industrial grade low-power uncooled short-wave infrared (SWIR) core modules on the market, underlining once again the innovative strength and technological excellence in the field of SWIR imaging.
Allied Vision
www.alliedvision.com
