H2 Deck By Bold Name
h2 xxxxxx
H1 xxxxxx
h2 xxxxx

Test & INspection
Metal additive manufacturing is a transformational technology that brings together advanced design concepts with new materials science. By Ed Herderick and David Scannapieco
Test Methods in Combination Advance Quality for Metal Additive Manufacturing
Test & INspection
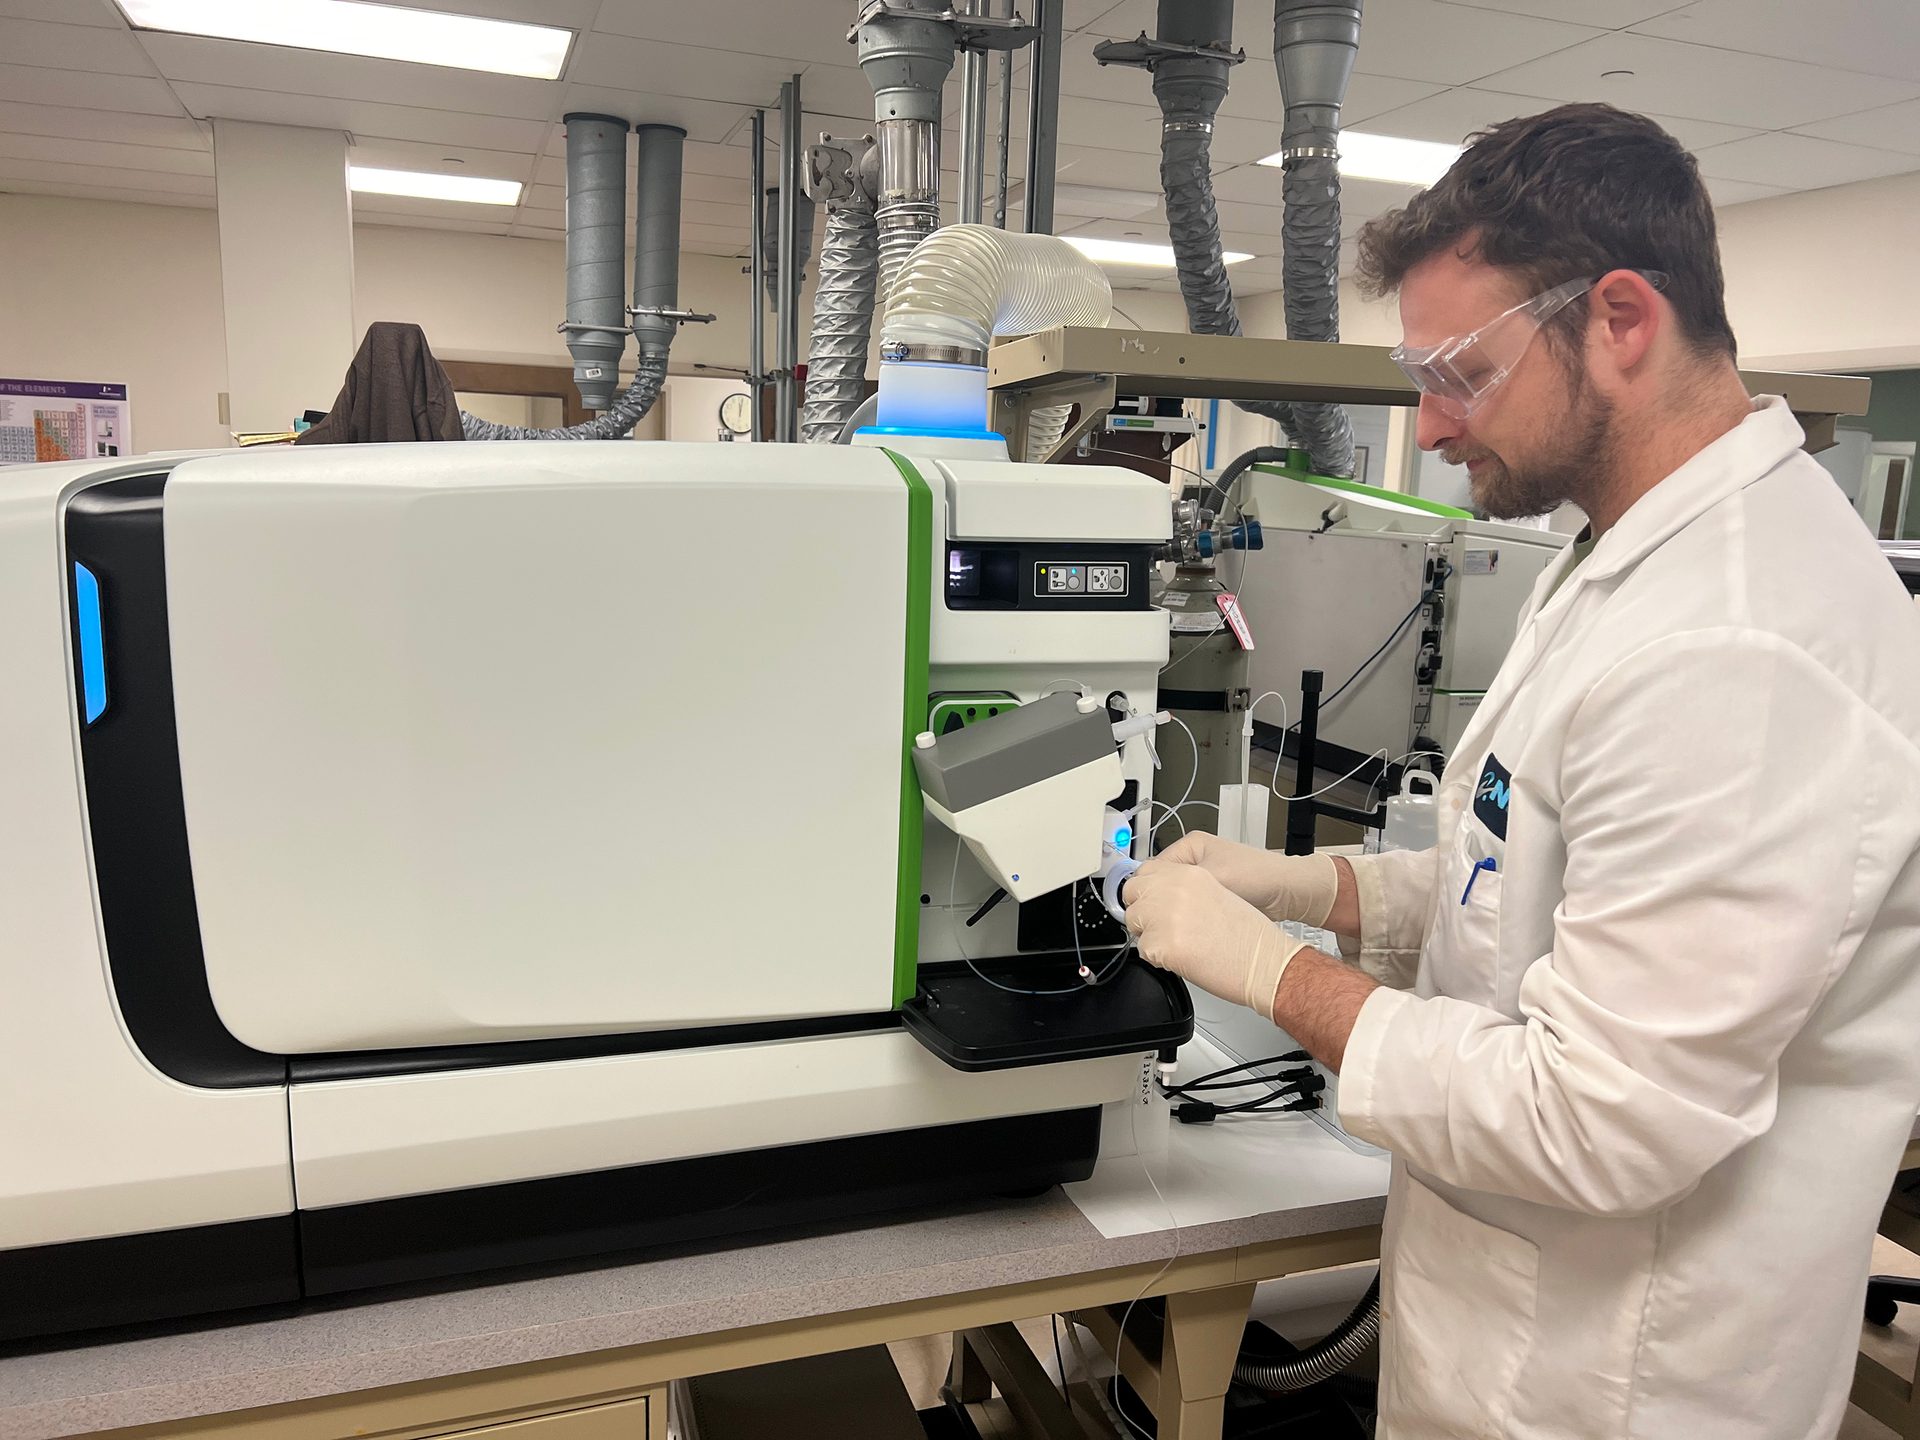
Figure 1: ICP Mass Spectrometer used for chemistry testing of metal powders for additive manufacturing.
Metal additive manufacturing is a transformational technology that brings together advanced design concepts with new materials science. By Ed Herderick and David Scannapieco
Test Methods in Combination Advance Quality for Metal Additive Manufacturing
Test & INspection

Figure 1: ICP Mass Spectrometer used for chemistry testing of metal powders for additive manufacturing.
H2 Deck Info By Paragraph Style Bold
Headline
This article is an introduction to materials testing for metal powder and parts made using metal additive manufacturing. It includes an overview of the current state of the art and then moves into the different types of testing types and their objectives for characterizing printed metal. It is meant as an introduction for the non-expert who is new to metal printing and testing.
Current state of the art for metal printing
Metal additive manufacturing productivity has improved by orders of magnitude in 25 years of industrial use. It is going through an exponential development cycle with new applications being introduced in rockets1, defense2, and aerospace3 among many others.
Taken together a new phase of industrial application expansion of its use is happening. The key to unlocking this potential is increasing the confidence and speed of deployment for new process and alloy combinations. The foundation for doing that is creation of materials data sets that inform the use of AM printed metals for specific applications.
To ensure the required quality standards are met for industrial deployment of metal printed parts, multiple testing techniques are used to evaluate both input feedstocks and printed metal including alloy chemistry, powder characteristics, microstructure, and mechanical testing.
Alloy Chemistry Testing
Inductively Coupled Plasma (ICP) is the most broadly applicable and is an analytical chemistry method used to detect and measure elemental composition in a wide range of materials. It covers approximately 70 elements ranging from lithium to bismuth. The metal to be measured is first dissolved into a liquid that is then analyzed for chemical composition using the ICP instrument. Figure 1 shows an image of an ICP mass spectrometer used for chemistry composition testing.

Figure 1: ICP Mass Spectrometer used for chemistry testing of metal powders for additive manufacturing.
Two other methods are used for light elements like oxygen, carbon, nitrogen, sulfur, or hydrogen. Combustion analysis rapidly decomposes the material in an oxygen-rich gas to measure the carbon and sulfur contents. Inert gas fusion uses a noble gas during heating of a sample to collect the dissolved oxygen, nitrogen, and hydrogen for detection.
By combining the ICP, combustion analysis, and inert gas fusion a full chemistry for metal additive parts and feedstocks can be determined. This analysis can reach detection levels of parts per million, and lower in some cases, for elements like titanium, nickel, niobium, or copper as well as light elements such as oxygen, carbon, hydrogen, or nitrogen.
Physical properties of metal powders
A major branch of metal printing uses metal powder as feedstock including powder bed fusion, directed energy deposition, and cold spray. The physical properties of the powder feedstock are defined by specification and are important for both new and recycled feedstocks. The physical properties of the powders define how well they pack in each additive layer and how evenly the powder spreads over the build plate. Each of these properties has a direct correlation to improve build quality and efficiency.
Particle size distribution is a histogram of values showing the diameter size by count. Laser diffraction measures particle size distributions by measuring the angular variation in intensity of light scattered as a laser beam passes through a dispersed particulate sample. Large particles scatter light at small angles relative to the laser beam and small particles scatter light at large angles. Laser diffraction is the most widely used technique for particle size analysis. The methods have developed considerably over the years and is easily applied to a broad range of powders from ceramics to metals. Manufacturers and end users of powdered materials depend upon these accurate, reproducible, high resolution light scattering measurements to ensure full characterization of the particle size distribution of their sample.
Caption
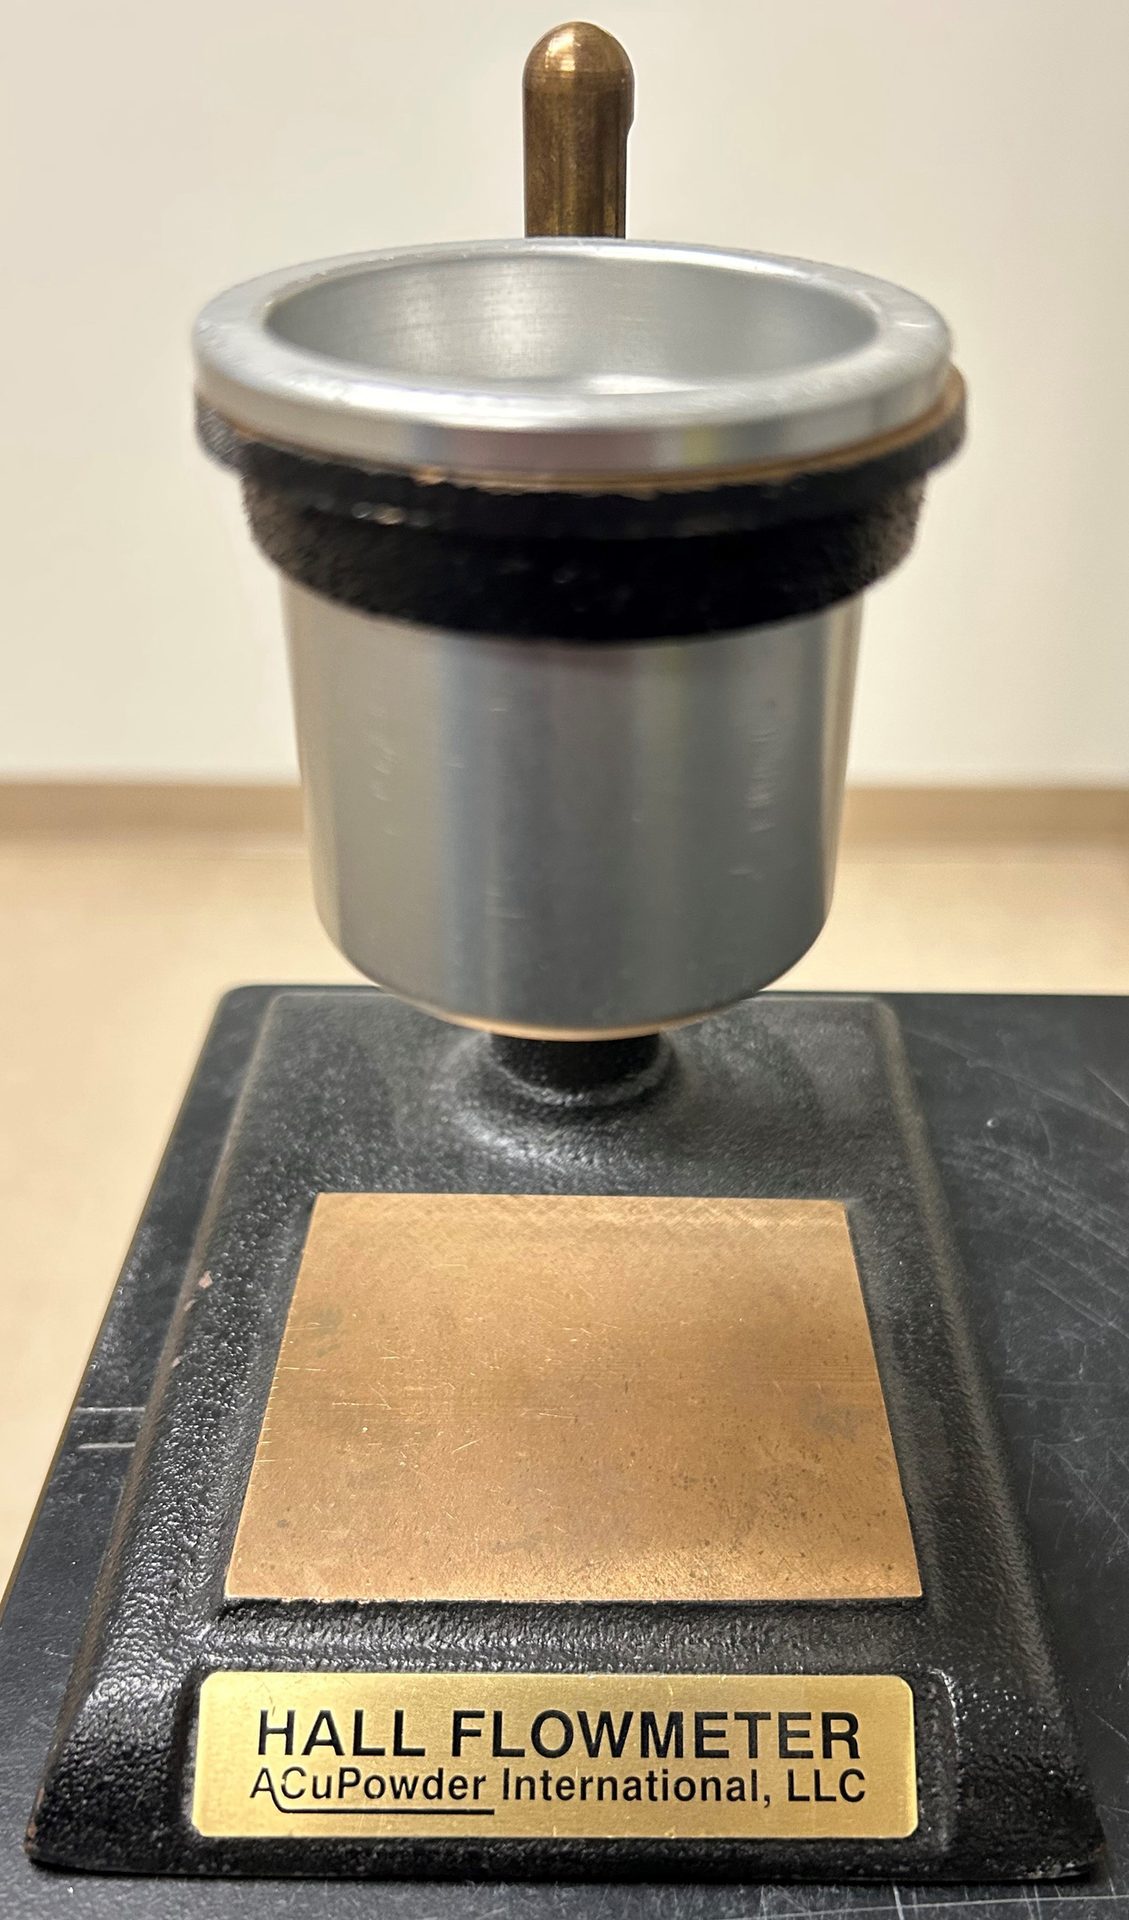
Flow rate and flowability is important because it determines how well the additive powders will consistently move through additive printers. The simplest flow rate measurement is the Hall flow rate test. In the Hall flow test, the powder is measured on how quickly a standardized volume of material passes through an orifice, much like an hourglass. Figure 2 shows an image of a Hall Flowmeter, the silver cup at the top is the metal funnel.
This is one of several conventional static funnel flow techniques and a standard test for powder flowability. Additionally, several dynamic avalanche rheometry techniques are growing in popularity and have ongoing working groups with ASTM B09 committee to develop into standard techniques. These tests come in a few forms with the most common being the rotating transparent drum that observes the avalanching behavior of the powder being tested. These dynamic powder testing techniques can generate highly reproducible data that correlates very well with various metal powder properties.
Other properties that determine how metal powders perform in additive manufacturing include packing density, surface area, and adsorbed moisture to the surface of the powder.

Figure 2: The Hall Flowmeter is used to measure how much powder flows through an orifice in a standard amount of time.
Surface area is measured by a method using the multipoint equation of Brunauer, Emmett, and Teller (BET) that utilizes nitrogen or krypton inert gas to encapsulate the particles and determine their surface area. Surface area is important because it impacts flow properties, for example sorting spherical vs. sharp features of powders. The sharp features would have more surface area and impact flow properties that can be measured using BET. Figure 3 is an image of a BET surface area analyzer instrument:

Figure 3: BET surface area analyzer used for measuring metal powders.
Moisture can be measured in powders using Karl Fischer Titration. Moisture increases the sticking forces between each powder particle similar to wet sand, and therefore is also an informative measurement for the physical properties of metal powder.
Characterization and Metallurgical Testing of Printed Materials
To characterize metal powders or part microstructures, both scanning electron microscopy (SEM) or light microscopy can be used. Both techniques can evaluate the shape of the powder particles, the microstructure of the metal, or even the porosity in a printed metal part. Optical microscopy can get to 10s of micrometers in resolution, meanwhile scanning electron microscopy can get below 1 micrometer in resolution which enables the evaluation of fine features in the examined material.
Tension testing is the most common method for testing the strength, stiffness, and ductility of metals for all applications. In conventional manufacturing, tension tests have been proven to be highly repeatable and reliable making them ideal for qualification and production monitoring for metal additive manufacturing processes. One advantage of metal printing is that the witness samples can be printed alongside the part itself, which simplifies the production and testing of samples like tension tests.
The Charpy impact test is a high strain rate test that determines the amount of energy absorbed by a material during fracture. This provides information on the malleability of materials, which helps determine the shock-absorptive properties of a material.
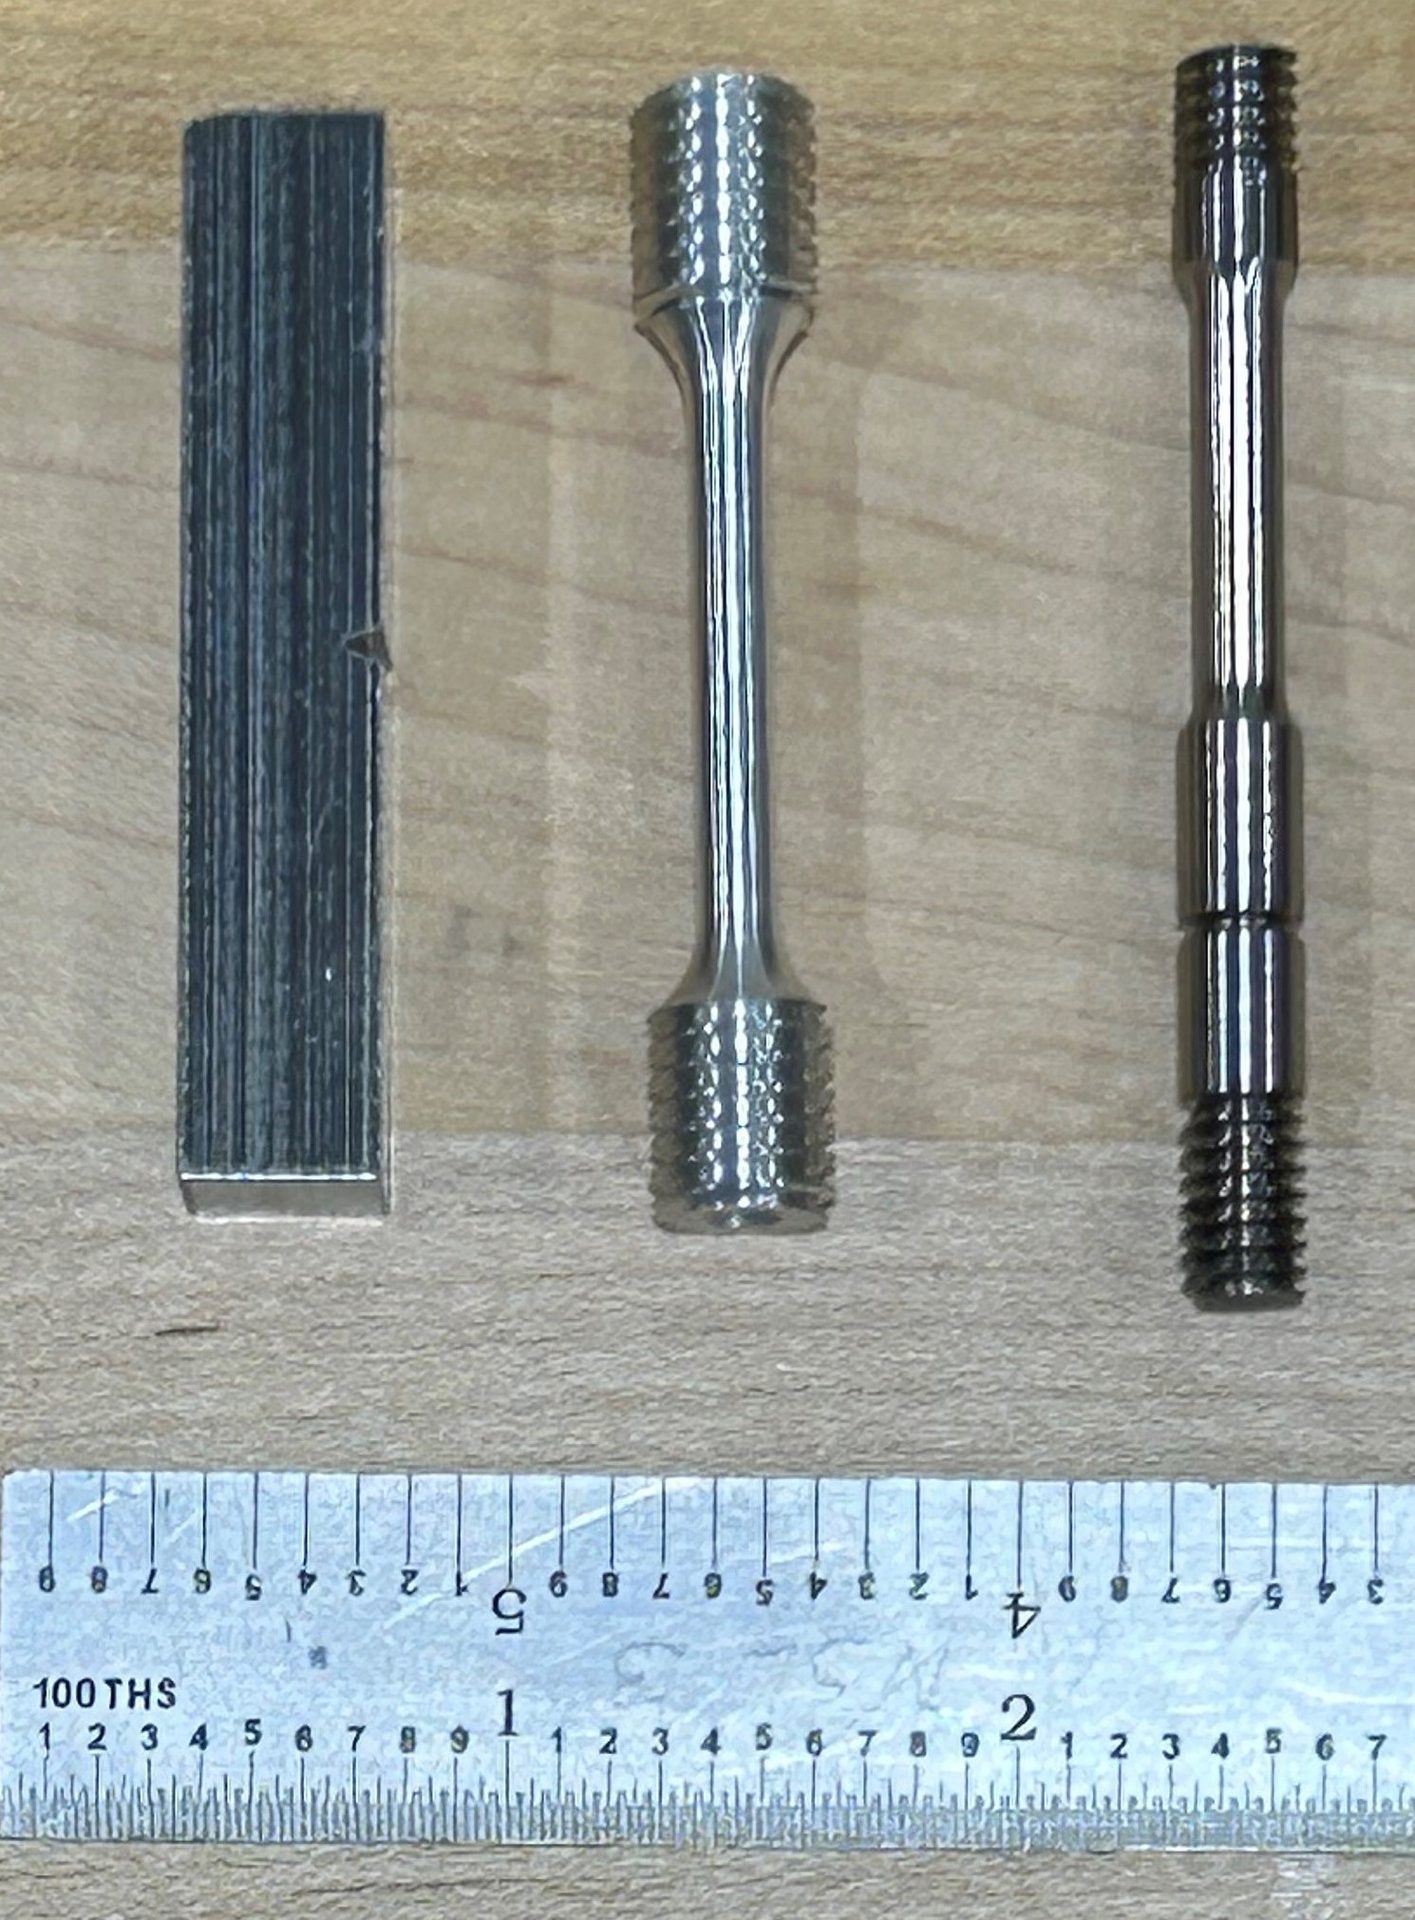
Figure 4: Examples of standard mechanical testing samples used for metal additive manufacturing testing including Charpy impact testing (left) round bar tensile testing (center) and combination notched stress rupture testing (right)
Elevated temperature testing for mechanical properties is critical for aerospace applications. The stress rupture test can be completed in a furnace with various configurations and loading methodologies. This includes smooth round bar tensile specimens and notches that provide information on the lifetime of a material at elevated temperatures and high stresses, like the blades of a rotating engine. Figure 4 is an image showing examples of mechanical testing for metal additive samples including Charpy impact testing, round bar tensile testing, and combination notched stress rupture testing.
NASA standard 6030 additive manufacturing for spaceflight systems includes tables detailing testing requirements that include both metallographic and mechanical testing witness coupons4 and is illustrative of the types of testing required by other standards and manufacturer specifications.
Summary and Standards Development
Metal additive manufacturing is a transformational technology that brings together advanced design concepts with new materials science.

Figure 4: Examples of standard mechanical testing samples used for metal additive manufacturing testing including Charpy impact testing (left) round bar tensile testing (center) and combination notched stress rupture testing (right) |
There are many specified methods for testing chemistry, microstructure, and properties of metal additive parts. Combinations of the standard test methods are used by engineering and quality teams to confirm that the feedstock or printed alloys will meet the demanding in-service requirements for aerospace applications. The development of additive manufacturing specific standards is an active working effort in the technical community. The primary challenge is determining what testing methods need to be written in a new form and what can be adopted from previously proven methodologies.
All Images Source: NSL
Ed Herderick, VP Science and Technology Development, and David Scannapieco, Science and Technology Development Manager, NSL Analytical Services, Inc. (Cleveland, OH).
NSL Analytical Services, Inc. is actively contributing to the growth of the AM industry through our foundational understanding of materials testing and qualification. This includes serving as an America Makes member and participating in a project supporting Delta Qualification5, which is the science around how to qualify new metal printers with existing materials. Other activities include working groups supporting standards such as ASTM F426 and the ASTM consortium for materials data and standardization7.
For more information, email eherderick@nslanalytical.com or visit nslanalytical.com.
References:
- https://ntrs.nasa.gov/api/citations/20190030433/downloads/20190030433.pdf
- https://www.defenseone.com/technology/2023/10/only-3d-printing-can-get-navys-submarine-plan-back-track-admiral-says/391556/#:~:text=U.S.%20cannot%20build%20and%20support,without%20going%20to%20additive%20manufacturing.%E2%80%9D&text=The%20U.S.%20Navy%20must%203D,top%20program%20manager%20said%20Wednesday.
- https://www.sciencedirect.com/science/article/pii/S0264127521005633
- https://standards.nasa.gov/standard/NASA/NASA-STD-6030
- https://www.nslanalytical.com/news/nsl-analytical-offers-delta-qualification-to-speed-up-parts-production-through-additive-manufacturing
- https://www.astm.org/committee-f42
