“Industrial Quality Solutions” Signifies More than Just a Name Change for Zeiss
Carl Zeiss Industrial Metrology, LLC, will change its legal name to Carl Zeiss Industrial Quality Solutions, LLC on July 1, 2022, to reflect the growth and development of the company. According to the company, with the acquisition of several companies in recent years and the continued development of advanced technologies, the name expresses the vast expertise and inspection solutions now available to customers.
Zeiss said it is focused on supporting their customers, with a commitment that remains their highest priority. Everything from sales to service, including new system purchases, measuring services, maintenance, and repair (including CALYPSO SMAs and ZEISS Care), is now organized under the new company. With that change, they are able to provide even better sales, service, and support.
Zeiss customers also will now benefit from significantly expanded expertise and product portfolio with recent acquisitions of Bosello, GOM, and CAPTURE 3D. The new legal name, Carl Zeiss Industrial Quality Solutions, LLC, embodies the growth, expanded product range and solutions they offer—including coordinate measuring machines, optical and multisensor systems, microscopes for industrial quality assurance, 3D surface scanning and testing technology, and X-ray inspection.
For more information, visit www.zeiss.com/metrology.
Jenoptik Industrial Metrology is now Hommel-Etamic
Jenoptik announced that the company’s industrial metrology portfolio will now be presented under the familiar brand name Hommel-Etamic, with a new market appearance, enabling a more focused customer approach.
Hommel-Etamic manufactures metrology solutions for your industrial manufacturing processes, which include high-precision production metrology for inspecting roughness, contour, form, and dimensional part features in every phase of the production process, as well as in the measuring room. The primary product brands utilize tactile, optical and pneumatic technologies and are known in the marketplace as:
- Visionline for optical surface inspection
- Formline for form and roughness measurement
- Waveline for roughness and contour measurement
- Gageline for dimensional measurements
- Opticline for non-contact measurement of complex workpieces
According to the company, it is dedicated to maintaining and increasing the quality of innovation, support, and service you have come to expect from Hommel-Etamic, and together looks forward to continuing our successful collaboration. All operations, staff, and contacts will remain the same.
For more information, e-mail automotive.info@jenoptik.com.
MSI-Viking Gage Acquires Inspec, Inc.
MSI-Viking Gage, LLC, announced its recent acquisition of Inspec, Inc., of Canton, MI.
With the completion of this transaction Inspec is now a wholly owned subsidiary of MSI Viking.
MSI Viking’s acquisition of Inspec advances its growing service and sales capabilities in the Midwest region. According to Dan Carter, president of MSI Viking, “MSI Viking has been servicing manufacturers in this region for some time now. Inspec is a highly respected metrology company with strong calibration and inspection capabilities that also shares our customer-focused business principles. We are pleased that Inspec’s dedicated and capable staff has become part of the MSI Viking team.” The Michigan operation will continue to be led by Rob Farr, general manager.
Inspec owner, Dale Robenault, stated, “We are delighted with this transaction which instantly enhances our service and product offerings to our current customers, and positions us for significant growth. It is our goal to quickly integrate our businesses, as this is a positive alliance for our customers and our employees.”
“Combining our strengths, knowledge, and service capabilities with Inspec demonstrates MSI Viking’s commitment to manufacturing in the region, states Carter. We are dedicated to developing meaningful relationships with customers, and their turn-key solutions approach to meet the needs of manufacturing customers with a high level of service and integrity makes Inspec a perfect fit to the MSI Viking team.
MSI Viking represents the world’s foremost manufacturers of precision measurement equipment, as well as a vast offering of In-Lab and On-Site Calibration services, Repair, and Contract Inspection services accredited to A2LA 17025 and ISO 9001. MSI Viking provides tremendous depth with a frequently growing portfolio of metrology products and scope of calibration capabilities to meet market demand. The company’s mission is to offer customers the convenience of having all their metrology product, calibration, and inspection needs met by one company.
The Canton, Michigan, operation will be integrated as MSI Viking in the coming months. Its offices at 7282 North Haggerty Road, and contact information will remain the same.
For more information, visit www.MSI-Viking.com.
Verisurf Software Supports Latest Hexagon Laser Tracker
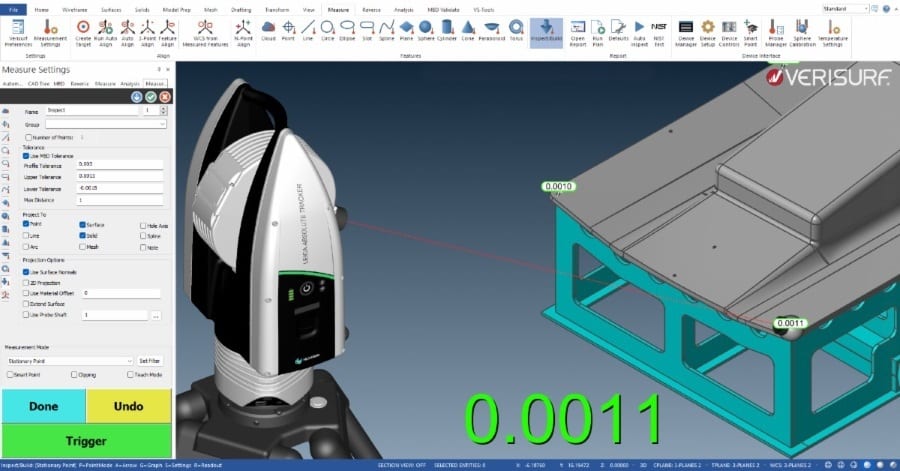
Verisurf Software, Inc. announces support for the new Hexagon, Leica AT500, and B-Probe plus CMM. Verisurf interfaces with Leica Laser Tracker Systems for data collection and 3D measurement workflows, including alignments, inspection, tool building, assembly, scanning, analysis, reporting, automation, and reverse engineering.
Verisurf Software is the leader in the development and support of metrology software solutions rooted in Model-Based Definition (MBD). At the heart of MBD is the intelligent CAD Model, the absolute authority to define a part or entire product by supplying a defined 3D data set, including all necessary GD&T annotations.
“Verisurf is a long-standing Hexagon/Leica partner developing model-based measurement solutions for virtually every model of Leica Laser Tracker for the last 25 years,” said Ernie Husted, President & CEO. “We value our partnership and look forward to supporting new product developments,” added Husted. Learn more about Verisurf support for Leica Laser Trackers here: Hexagon/Leica Verisurf Software Page
The Leica AT500 is portable, easy to set up and use, and flexible, making it a good match for the quality lab, shop floor, or in the field, with reflector measurements capable of up to 160 meters from the tracker. When paired with the wireless B-Probe plus, the AT500 can measure objects with an otherwise obstructed line of sight.
“The AT500’s enhanced measurement speed and increased pitch angle, combined with the working range of B-Probe plus make it a fantastic match for Verisurf’s industry-known 'Build Mode' to achieve real-time tolerance condition feedback,” says Nick Merrell, Executive Vice President of Verisurf. “Our latest Verisurf Device Interface (VDI) also includes a digital bubble level to support using the AT500 for level and plumb operations.”
Verisurf customers can download the latest Verisurf Device Interface with support for the new Leica AT500 here: Verisurf Device Interface
For more information, visit www.verisurf.com.

Creaform Celebrates 20th Anniversary
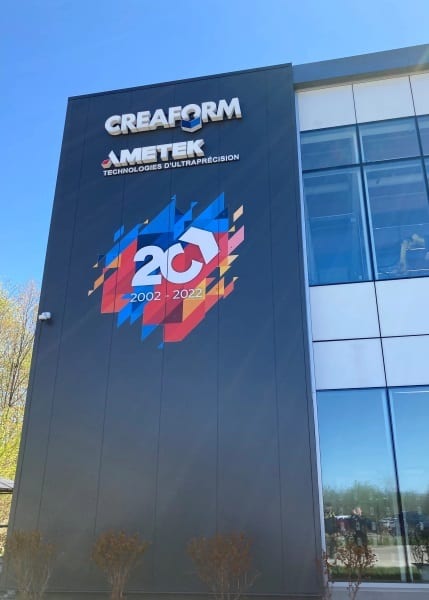
Creaform, a business unit of AMETEK, Inc., celebrated its 20th anniversary. A unique microsite has been put together to highlight the uninterrupted innovation and disruptive technology the company has strived to put forward throughout the years.
Established in 2002 in Canada, Creaform was born out of the need to change the status quo. What started as a metrology and engineering consulting firm turned into a global leader in portable and automated dimensional metrology solutions. Now, 20 years later—the company continues to redefine the boundaries of 3D metrology and engineering services by constantly pushing back the limits of innovation.
Thanks to its 3D scanners’ portability, ease of use, powerful dynamic referencing algorithms and the metrology-grade attribute of its dimensional measurement devices, Creaform brings measurement capabilities out of metrology labs and enables manufacturers around the world to accurately measure anything, anywhere.
Global manufacturers from several industries continue to gain tangible benefits from using Creaform’s 3D measurement hardware and software, such as enhanced, safer, and more robust designs, shortened product development and accelerated time to market; improved manufacturing processes, better collaboration amongst colleagues, suppliers, and customers; and the optimisation of maintenance and repair assessments.
“It would be easy to illustrate our success by the number of employees, offices, and distributor-partners on which Creaform has relied through its 20-year history,” commented Fanny Truchon, President and Business Unit Manager at Creaform. “In fact, none of this really matters if we lose sight of ‘why’ we exist: solving the industry’s most complex 3D measurement challenges. So, our 20th anniversary is also about what’s ahead, because we know that in our fast-changing world, we can’t rely on historic accomplishments to define our future.”
“Never Stop Innovating” seeks to inspire everyone so that Creaform can continue to create a better tomorrow and deliver extraordinary value for their customers, employees and partners for the next 20 years.
For more information, visit https://20.creaform3d.com.

NIMS Offers Innovative Teaching Technique to Make GDT a “Native Tongue”
The National Institute for Metalworking Skills (NIMS) announced that it has developed a new methodology to learn, retain, and transfer knowledge for Geometric Tolerancing & Dimensioning (GDT) across an organization. NIMS offers the training in a day and a half workshop.
Conventionally, most people are taught print reading with drawings annotated with limit dimensioning and all its flaws. Lessons in limit dimensioning are further applied in engineering or manufacturing activities. Students or employees are then exposed to GDT – the international standard with symbols to describe parts in a language that is clearly understood by any manufacturer. This traditional approach usually results in limit dimensioning being the first language, or “native tongue”, and GDT being the second. Going back and forth between the two is a struggle for many and they rely on craftmanship to produce parts. This approach may eventually lead to producing parts within the specifications but, according to NIMS, that approach is inconsistent and wastes time.
“GDT is the best way for manufacturers to ensure parts are absolutely within specifications,” said NIMS Executive Director Montez King. “It gives designers, engineers, and machinists a common language to communicate not only for manufacturing, but how those parts fit into its final assembly.”
However, like any language, it only works if everyone agrees to speak it and fully understands it. And that’s where NIMS comes in.
According to King the optimal way to learn GDT is to teach employees and students how GDT works rather than its applications. Teaching GDT applications restricts understanding and only relays a process or procedure. But when GDT is understood, as though it’s the person’s native tongue, every application makes sense. In fact, when GDT is well understood, it’s retained, and applications can be improved continuously.
NIMS helps organizations transfer GDT knowledge and skills much the same way children learn their native language. Further, NIMS teaches an organization how to embed GDT across all lines of communication within the enterprise. By the end of NIMS GDT training, the staff will be able to understand and use GDT in all stages of design and production.
For more information, visit www.nims-skills.org.

Bromsgrove 3D Scanning Company Sponsors Local Motorbike Trials For Children
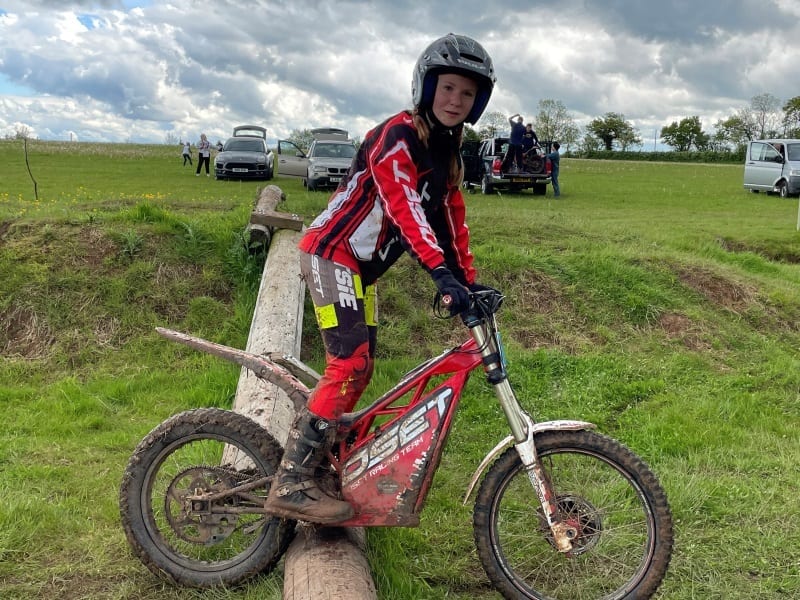
Central Scanning sponsored the Droitwich Youth Trials Club Midlands Oset Cup. This is a series of 6 motorbike trails for kids from age 4 to 15 years.
The motorbike trials primarily use electric bikes. As children become more experienced they have the opportunity to progress from a 12.5 bike to 16.0 to 20.0 to 24.0. So there is a lot of scope for improvement!
Being electric means that children can practice in many places that are not as available with petrol bikes, such as in the garden. During lockdown in the Covid-19 pandemic, the Oset and other electric bikes became very popular because of this.
Managing Director, Nick Godfrey, said “It’s great seeing so many kids really enjoying themselves in the countryside, with their trials mates and the progression is remarkable.”
The DYTC also sees many girls riding trials, with the number growing all the time. In the last trial, there were over 40 riders of which 25% were girls from 4 to 15 years old. Many of them also ride in the British Championship!
Nick said, “I ride trials and have done off and on for 40 years and it’s a great thing to be able to do with my daughter and to give something back via sponsorship.”
The Droitwich Youth Trials Club is run by a local company MK-OFFROAD which is a husband and wife, Andy and Caz, and their 2 kids, Jack and Kayleigh.
Central Scanning sponsors these motorbike trials as a way to be able to provide support to the local community and help people put on events like this. It is a great way to bring people together and encourage more to participate in the sport. After the trials, there is also normally a football kick around because the kids always seem to have some energy left!
For more information on the Droitwich Youth Trials Club, https://www.mkoffroad.co.uk/dytc. For more on Central Scanning, visit https://www.central-scanning.co.uk/.

Trescal Acquires Three Companies
Trescal, a global leader in calibration services, announced the acquisition of Cincinnati Precision Instruments (CPI) in Ohio, CRT Cleanroom-Technology in Germany, and Switzerland and Electronica Industrial de Alverca (EIA) in Portugal. These three companies add €16 million in total sales. Acquisitions since OMERS invested now total 42.
Established in 1962, Cincinnati Precision Instruments provides calibration services in nine accredited domains, with strong capabilities in humidity, hardness and pressure. CPI mainly serves the automotive and aerospace industries. This acquisition allows Trescal to extend its geographic coverage to southern Ohio, Indiana and Kentucky.
CRT Cleanroom-Technology operates two laboratories in Alsdorf, Germany, and Stein, Switzerland, to provide qualification and calibration services for cleanroom operators. This acquisition strengthens Trescal’s existing life sciences expertise in Central Europe. CRT Cleanroom-Technology offers extensive capabilities in airborne particle counters, microbial air samplers, thermal process qualification and flow visualization to pharmaceutical and biopharmaceutical clients.
Founded in 1989, EIA comprises two accredited laboratories in Lisbon and Porto, serving mainly the life science and food and beverage industries. EIA’s comprehensive set of accreditations expands Trescal’s calibration, testing and legal metrology scopes in the Iberian peninsula. With this acquisition, Trescal becomes the leading provider of calibration and qualification services in Portugal.
“These acquisitions embody our will to further develop our services for life science and food and beverage clients." Guillaume Caroit, Trescal CEO says, "Together, these industries will represent close to 25% of our sales by the end of 2022.”
For more information, visit www.trescal.us.


