Materials Analysis
Inspection
NDT
Analyze and Grade Carbon in Small Parts On-site with Handheld LIBS
A comprehensive material verification program includes testing weld wire, round bar, small bore pipe and bolting. Handheld LIBS analyzers can optimize access to such parts, providing a comprehensive, on-site solution for QA programs.
By James Terrell
Maintaining the integrity of pressure equipment is an ongoing reality of any owner/operator. The owner/operators of equipment such as vessels, furnaces, boilers, exchangers, tanks, and associated piping and instruments rely on an integrity management program designed to assess the reliability and protect the integrity of the equipment for safe and efficient operation. Various nondestructive techniques are often used to monitor the critical components, as understanding the correct metallurgy of these components is crucial to their reliability and safe operation. If the wrong material type is used, it could lead to catastrophic consequences.
Testing some of these components—for example, small parts or piping components—for carbon analysis and material grade can be a challenge due to geometry or size. These parts are often left out of the positive material identification (PMI) program due to the difficulty in analyzing the material. But you simply cannot ignore any critical part, including the primary small-bore piping. Smaller components that fail in a critical system produce the same effect as the failure of larger components. The consequences of the failure may be smaller, but the result could be the same: fires, process unit shutdown, and injuries.
The ability to do the required carbon testing on 100 percent of all components in the field is a large void in the industry that has recently been filled, as laser-induced breakdown spectroscopy (LIBS) has migrated from a laboratory analysis method to a mainstream field analytical technique. This handheld technology allows the owner/operator to reliably and accurately test these components for material process compliance and provides a comprehensive solution for in-field materials verification that includes carbon analysis.
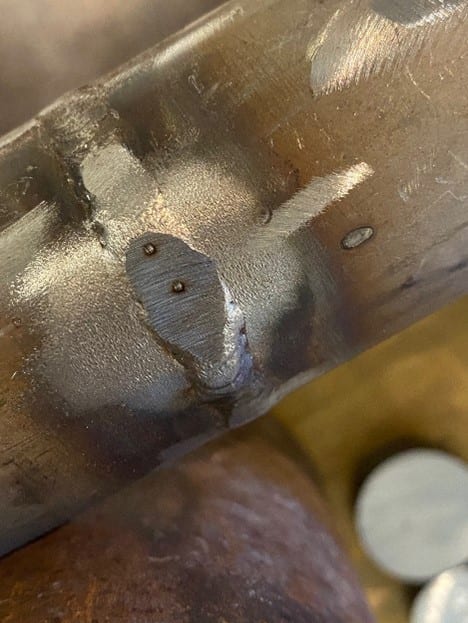
Fig. 1. SciAps Z-902 Carbon analysis of ER308L weld ¼” in width

LIBS is an optical emissions technique that utilizes a pulsed laser to ablate the surface of the material and create a plasma. An on-board spectrometer performs a qualitative measurement of the light from the plasma, separates the individual wavelengths to reveal elemental content, which is then quantified with the on-board calibration. With the recent innovations in handheld LIBS analyzers, which include a very small exit aperture, an inert argon atmosphere is achieved without requiring a seal to curved surfaces or small parts, allowing the technician to test the parts regardless of their size or geometry. The technician prepares the surface, uses the internal camera to line up on the test location, and performs the analysis. With the test area measuring approximately 50 microns, this will allow the technician to measure any size part, including very small parts all without adapters, collecting shavings, or sending sacrificial components to a laboratory.
There are several manufacturers that produce a handheld LIBS analyzer that are commercially available to the marketplace. When searching for the right analyzer for your application, the user needs to keep in mind that not all handheld LIBS analyzers are the same. Several models of LIBS analyzers on the market can perform material identification, but do not include carbon content. However, in applications where the grade of the material needs to be identified, carbon is measured and, depending on the carbon amount, dictates the grade of the material. Therefore, carbon is essential to a comprehensive integrity management program.
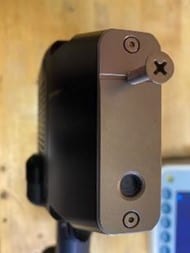
Fig. 2. SciAps Z-902 Carbon analysis of ¼” machine screw, 316H material
For example, 1030 carbon steel is identified by the amount of carbon in the material, and the last two numbers in this material’s name identify the nominal carbon content—the 0.30 percent carbon content is the nominal carbon in 1030 carbon steel. This applies to other carbon steels also such as 1040, 1050 carbon steels, etc. Or if you were grading 300 series stainless steel, the carbon content is the essential element needed to identify the L or H grade of the material like 316L or 316H material. Without measuring carbon, you are simply identifying the material type and not the grade of material.
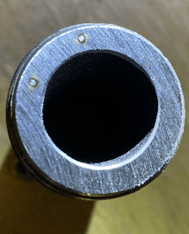
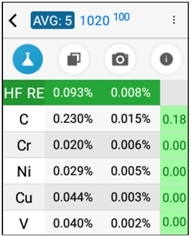
Fig. 3. SciAps Z-902 Carbon analysis of 1” s/160 A106 pipe nipple for HF Alkylation service
LIBS analyzers that don’t have the capabilities to measure carbon will only identify the material, similar to an X-ray Fluorescence (XRF) instrument. However, there are a couple of manufacturers that produce a handheld LIBS carbon analyzer capable of measuring carbon content. There are a few fundamental differences within the analyzers such as size, weight, number of calibrations available, sample interface for sealed versus non-sealed surfaces, and small parts access for analysis. LIBS analyzers with small exit apertures that do not require an argon seal for testing will not require the small parts adapters that other LIBS analyzers or OES units need to test small parts. The advantage of this technology is that it will allow the technician the ability to test any part in the PMI program without the use of special adapters. The user will need to research the various capabilities of the analyzer to determine if the instrument can meet the needs of the intended application, especially if the application requires 100 percent PMI.
The capabilities available in a handheld LIBS instrument are changing the way field analysis will be managed. These instruments provide an efficient and cost-effective solution to any asset integrity program by providing the owner/operator a way to analyze incoming material, in service/retro PMI material, welds, welding consumables, and any critical component in their PMI program without the added labor or cost of buying sacrificial parts or collecting shavings and sending them to a lab and waiting on results. These portable handheld LIBS analyzers give the user additional capabilities that were nonexistent just a couple of years ago.
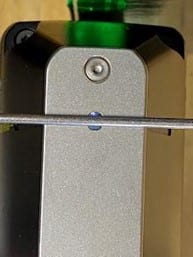
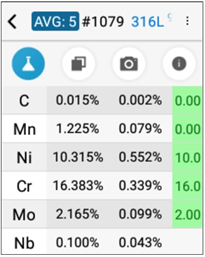
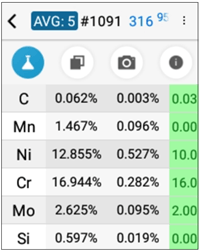
Fig. 4. SciAps Z-902 Carbon analysis of 1/8” wire, 316L material
Asset reliability includes a comprehensive material verification program, and that can now be achieved wholly in the field to verify the compliance and the safe and efficient operation of the equipment. With a little research on the appropriate analyzer and an understanding of the application, the owner/operator can now reliably analyze and grade any equipment in their asset integrity program regardless of geometry or size, and get real time analysis. Critical small-bore components can now be instantly analyzed, with confidence and accuracy providing the owner/user with the necessary data to make the crucial decisions to protect the integrity of the equipment.
This innovative technology allows the owner/operators to maintain a high level of integrity and reliability in their equipment by filling the void for carbon field analysis.
Image source: SciApskkk
Ian R. Lazarus is president and CEO of Creato Performance Solutions, providing leadership development, training, and solutions to support operational excellence.
Jim L. Smith has more than 45 years of industry experience in operations, engineering, research & development and quality management.

