Probe Technology and Laser Trackers Can Enhance your Business
Six Degrees of
Freedom
Six Ways
Test & INspection
In general, 6DoF probes meet the dynamic measurement, speed, and accuracy requirements of the most challenging industrial applications.
By Leo Martinez
If January is the month of resolutions, April is the month of renewals, a time of spring cleaning. Like people, businesses of all sizes undergo a similar ritual. Instead of tackling overstuffed closets, C-suite executives update their quarterly economic forecasts and prepare for the second half of the year.
As the world enters its second “Covid spring,” identifying new efficiencies while streamlining costs is more important than ever as manufacturers look to prepare to return to normal and match pent-up demand. For industries that deal in large-scale assembly – aerospace, automotive, shipbuilding, rail, and others – precision measurement is key.
Today, the most efficient way to achieve large-scale precision combines two solutions: laser trackers and six degrees of freedom (6DoF) probe technology. Combined, they allow operators to accurately measure without requiring direct line of sight and with fewer tracker moves.
Staying on Track
Traditionally, industries requiring this type of work faced limited, accuracy-strained options, especially for critical parts: a variety of old school tools for measuring, e.g., tape measures, levels, calipers, theodolites, and total stations – and a team of engineers to not only take the measurements, but ensure proper data entry without error – or a fixed coordinate measuring machine (CMM). As with the former method, here too there are drawbacks. Namely, the physical challenge of moving a 40-50-meter part (the average size of a typical commercial airline wing or the length of a luxurious superyacht’s fiberglass hull) and placing it on the CMM, a process that at best could take hours to days, or at worst, be impossible. Adding to the challenge is the skill required to reposition the part on the assembly once the measurements are complete.
By contrast, laser trackers represent a quantum leap in technological advancement. They work by measuring two angles, plus a distance. The tracker emits a laser to a retroreflective target (commonly a spherically mounted retro reflector, or SMR) that’s held against the object being measured. The light reflected traces its own path back to the tracker.
As the light re-enters the tracker, a distance meter in the tracker calculates the distance from the tracker to the retroreflector and precision encoders measure the angle of the beam. The distance and angles are transferred to metrology software to establish the X, Y and Z coordinates for the point measured. The software then uses the collected points to model the physical asset and to compare it to the original design. This allows for measurements of a component as accurate as .000”, but because it requires line of sight the operator may need to move the tracker to measure some features and may not be able to measure some hard-to-reach areas.
To improve efficiency of laser tracker inspections, they can be used with a six degree of freedom probe. Six degrees of freedom (6DoF) is an engineering and robotics term that addresses the pose of an object in three-dimensional space. The pose is broken down into two subcategories:
- Position – defined as the location along the X, Y, Z axis
- Orientation – defined as the rotation around the X, Y, and Z axis referred to as: i, j, and k or as pitch, yaw, and roll
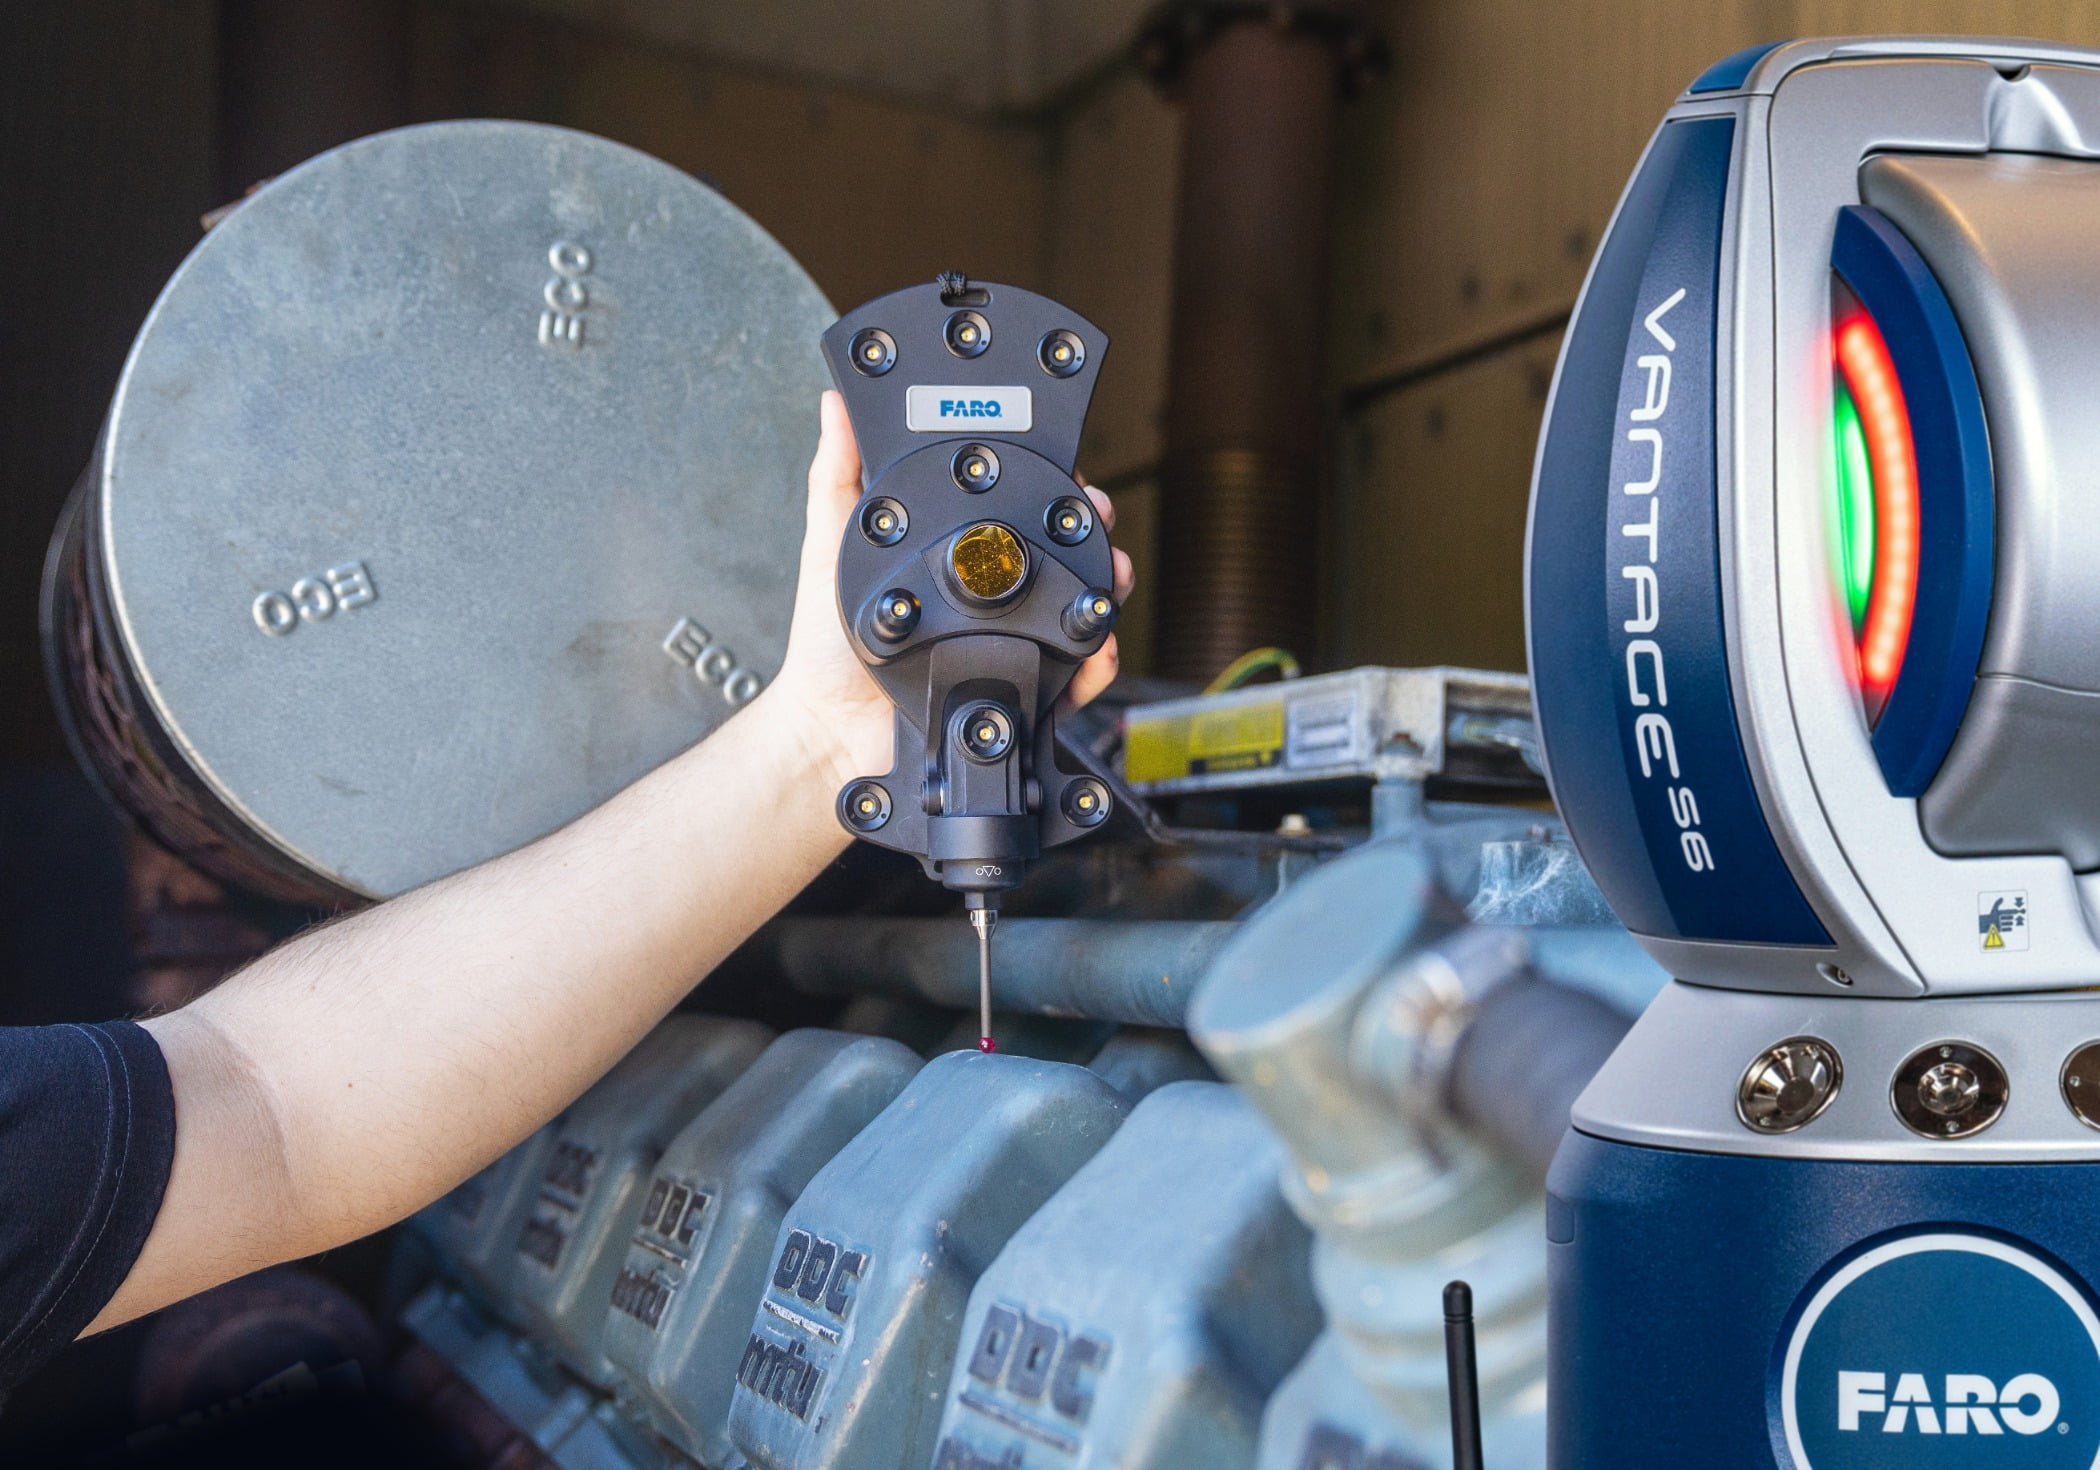
The laser tracker measures the position and the orientation of the 6DoF probe, and calculates the exact location of the probe tip for measurement. When a 6DoF probe is used in concert with a laser tracker, it enables the user to measure points that are beyond the line of sight, reducing device moves and to inspect small, tight, hard-to-reach areas. Above all, they offer exceptional portability and enable users to build, inspect and measure products faster and with greater accuracy than ever before.
In general 6DoF probes meet the dynamic measurement, speed, and accuracy requirements of the most challenging industrial applications.
And with kinematic self-identifying styli, provided it’s available in a particular probe with 6DoF capability, users can swap probing tips quickly and measure without any recalibration. The result is an advanced tool designed to enhance productivity and efficiency, saving typical users at least 60 minutes of time on any given workday, improving measurement consistency and reliability in a variety of working environments.

Today, the most efficient way to achieve large-scale precision combines two solutions: laser trackers and six degrees of freedom (6DoF) probe technology.
The Freedom to Choose What’s Right for you
Of course, when making the jump from traditional measurement tools, or a fixed CMM, or even a 6DoF probe, there are variables to consider, including expense, ease of use, and return on investment. For quality managers, these concerns are real. And if they are the ones with ultimate purchasing power, the buck stops with them.
In addition, quality managers are also responsible for maintaining consistency and efficiency by catching errors earlier in the manufacturing process in order to deliver parts and products without defects, and to improve existing processes without disrupting normal workflows or necessitating future workarounds. Last, it is incumbent on them to reduce the amount of costly human error throughout the process, leading to significant, consistent savings in both time and money. A laser tracker/6DoF probe could be the 3D metrology solution they’ve been looking for – without even knowing it.
While specific systems will vary in price, a rough estimate for the total cost of a laser tracker and probe is comparable to a luxury sedan. In a still-struggling economy in the first half of 2021 (Morgan Stanley projects 5.9% U.S. GDP growth and 6.4% for the globe for the year with emerging markets taking an early lead over developed economies) quality managers and others with purchasing power may be risk averse. Why spend that much on an unproven technology, the argument goes?
Except that it’s not an unproven technology. Not by a long shot. The first laser trackers came on the market in the early 1990s. And the first 6DoF probes about a decade later. With proper training and use, a 6DoF probe/tracker combo could pay for itself in as little as one to two years.
When purchasing a 6DoF probe/tracker, the greatest wiggle room in price comes down to how the device acquires an object’s 3D spatial orientation. Trackers with built-in cameras can take an instant snapshot of the probe, using a retroreflector and the orientation of LED’s on the probe to determine the pose with high accuracy. Other probes use a retroreflector and a gyroscope (level sensors) to determine the pose, which can produce a high accuracy measurement but can be susceptible to small vibrations that affect repeatability. Again, this is a decision best left to quality managers and similar person/s with project management and budget authority.
Spring into Action
Once you’ve made your choice, it’s time to act. The bottom line is that when discussing laser trackers and 6DoF probes, no other precision measurement device on the market today provides the range, accuracy, ease-of-use, and portability that these products deliver.
To summarize, here are the six ways 6DoF probe technology and laser trackers can enhance your business.
- Precision measurement and range, better than traditional measurement tools, devoid of human error
- Reduced labor hours (20% reduction) with no need to move parts to a CMM and back and reset on the assembly line, minimizing measurement mistakes and eliminating risk of physical injury
- Tracker and 6DoF technology combined reduces tracker moves needed to take multiple measurements with a tracker alone, saving time and effort
- Kinematic self-identifying styli means users can change probe tips quickly without wasting time recalibrating
- Increased efficiency and a per project overall time savings of at least 15%
- Rapid ROI with about one to two years with faster returns (and more consistent results) than gyroscopic-based alternatives
So this spring, as your large-scale assembly manufacturing business goes through its annual housekeeping rituals, dusting off its 2021 Q3 and Q4 playbooks, be sure to give laser trackers and 6DoF probes a first – or second – look.
T.S. Eliot may have called April the “cruelest month.” But when you’re equipped with the latest precision portable measurement technology, saving time and money, you might find, to quote American author Hal Borland, that “April is a promise that May is bound to keep.”


