Special Gage Solutions
Special
Gage Solutions
Measurement
Optimize Measurement for Many Unique Applications
Discover gaging solutions for manufacturers in the automotive, aerospace, power generation, food and medical industries.
By The L.S. Starrett Company Special Gage Division
Even with the availability of hundreds of standard precision tools and gages, sometimes measuring challenges are best solved with a specially made gage. It is critical to work hand-in-hand with engineers who are dedicated to making sure that an accurate and easy-to-use custom-made solution can be attained for specific application requirements.
Engineers involved with designing and manufacturing dimensional measuring gages have unique problem-solving skills which encompass adhering to strict quality control standards, all while providing the most accurate and cost-effective solution. Special gage repairs and calibration can also be performed by these same skilled engineers.
Some manufacturers may try to use gages developed in-house for their application challenges. However, these gages are often error-prone with inconsistent, inaccurate results and the gages’ success is highly dependent on operator skill. Unreliable measurement data will cause more parts to be scrapped with increased production downtime.
Custom gages specially made by highly skilled, knowledgeable engineers committed to minimizing the variables that influence the measurement will save costs and increase accuracy and productivity. Special gages are designed to be lightweight, easily maneuvered and produce accurate, repeatable results.
Measuring applications have varied gaging requirements due to the industries they serve. Here we’ll discuss some intriguing gaging solutions for manufacturers in the automotive/ racing, aerospace, power generation, food and medical industries.
Automotive/ Racing
The inside diameter (ID) of an engine cylinder needed to be measured, presenting an access challenge. The requirement was to design a gage small enough to fit through a spark plug hole, as well as having the ability to expand enough to measure the inside diameter of the cylinder. In order to reach the ID area, a specially designed bore gage was created to collapse down to feed through the small diameter and then expand to measure the cylinder. The custom bore gage is a comparative gage in which the user marks the spot where the gage opens up, and then collapses the gage again to remove it from the engine. A micrometer is used to check the size.
For similar applications, inside diameter double-turret gages are designed to fit through a diameter much smaller than the one to be gaged. A double-turret gage can check an ID up to two times larger than the hole it will pass through. Single-turret gages can be designed for IDs up to one and one-half times larger than the hole it will pass through. Accurate gages have been supplied that will reach up to 36" deep.
For those in the racing industry, optimizing chassis ride height is a top priority. Ride height is the amount of space between the base of an automobile tire and the lowest point of the car chassis. Having a good chassis ride height will enable the driver to best respond to track conditions. A gage was needed to precisely set the ride height of race cars to minimize air flow and still allow for suspension movement, without bottoming out the body of the car. Also, the gage needed to be easy to use and able to reach specific points on the undercarriage.
To accomplish this, a specially designed gage uses two height gages with special contacts to get accurate readings on the height of the car. The main body of the gage rests on a lift duplicating the ground.
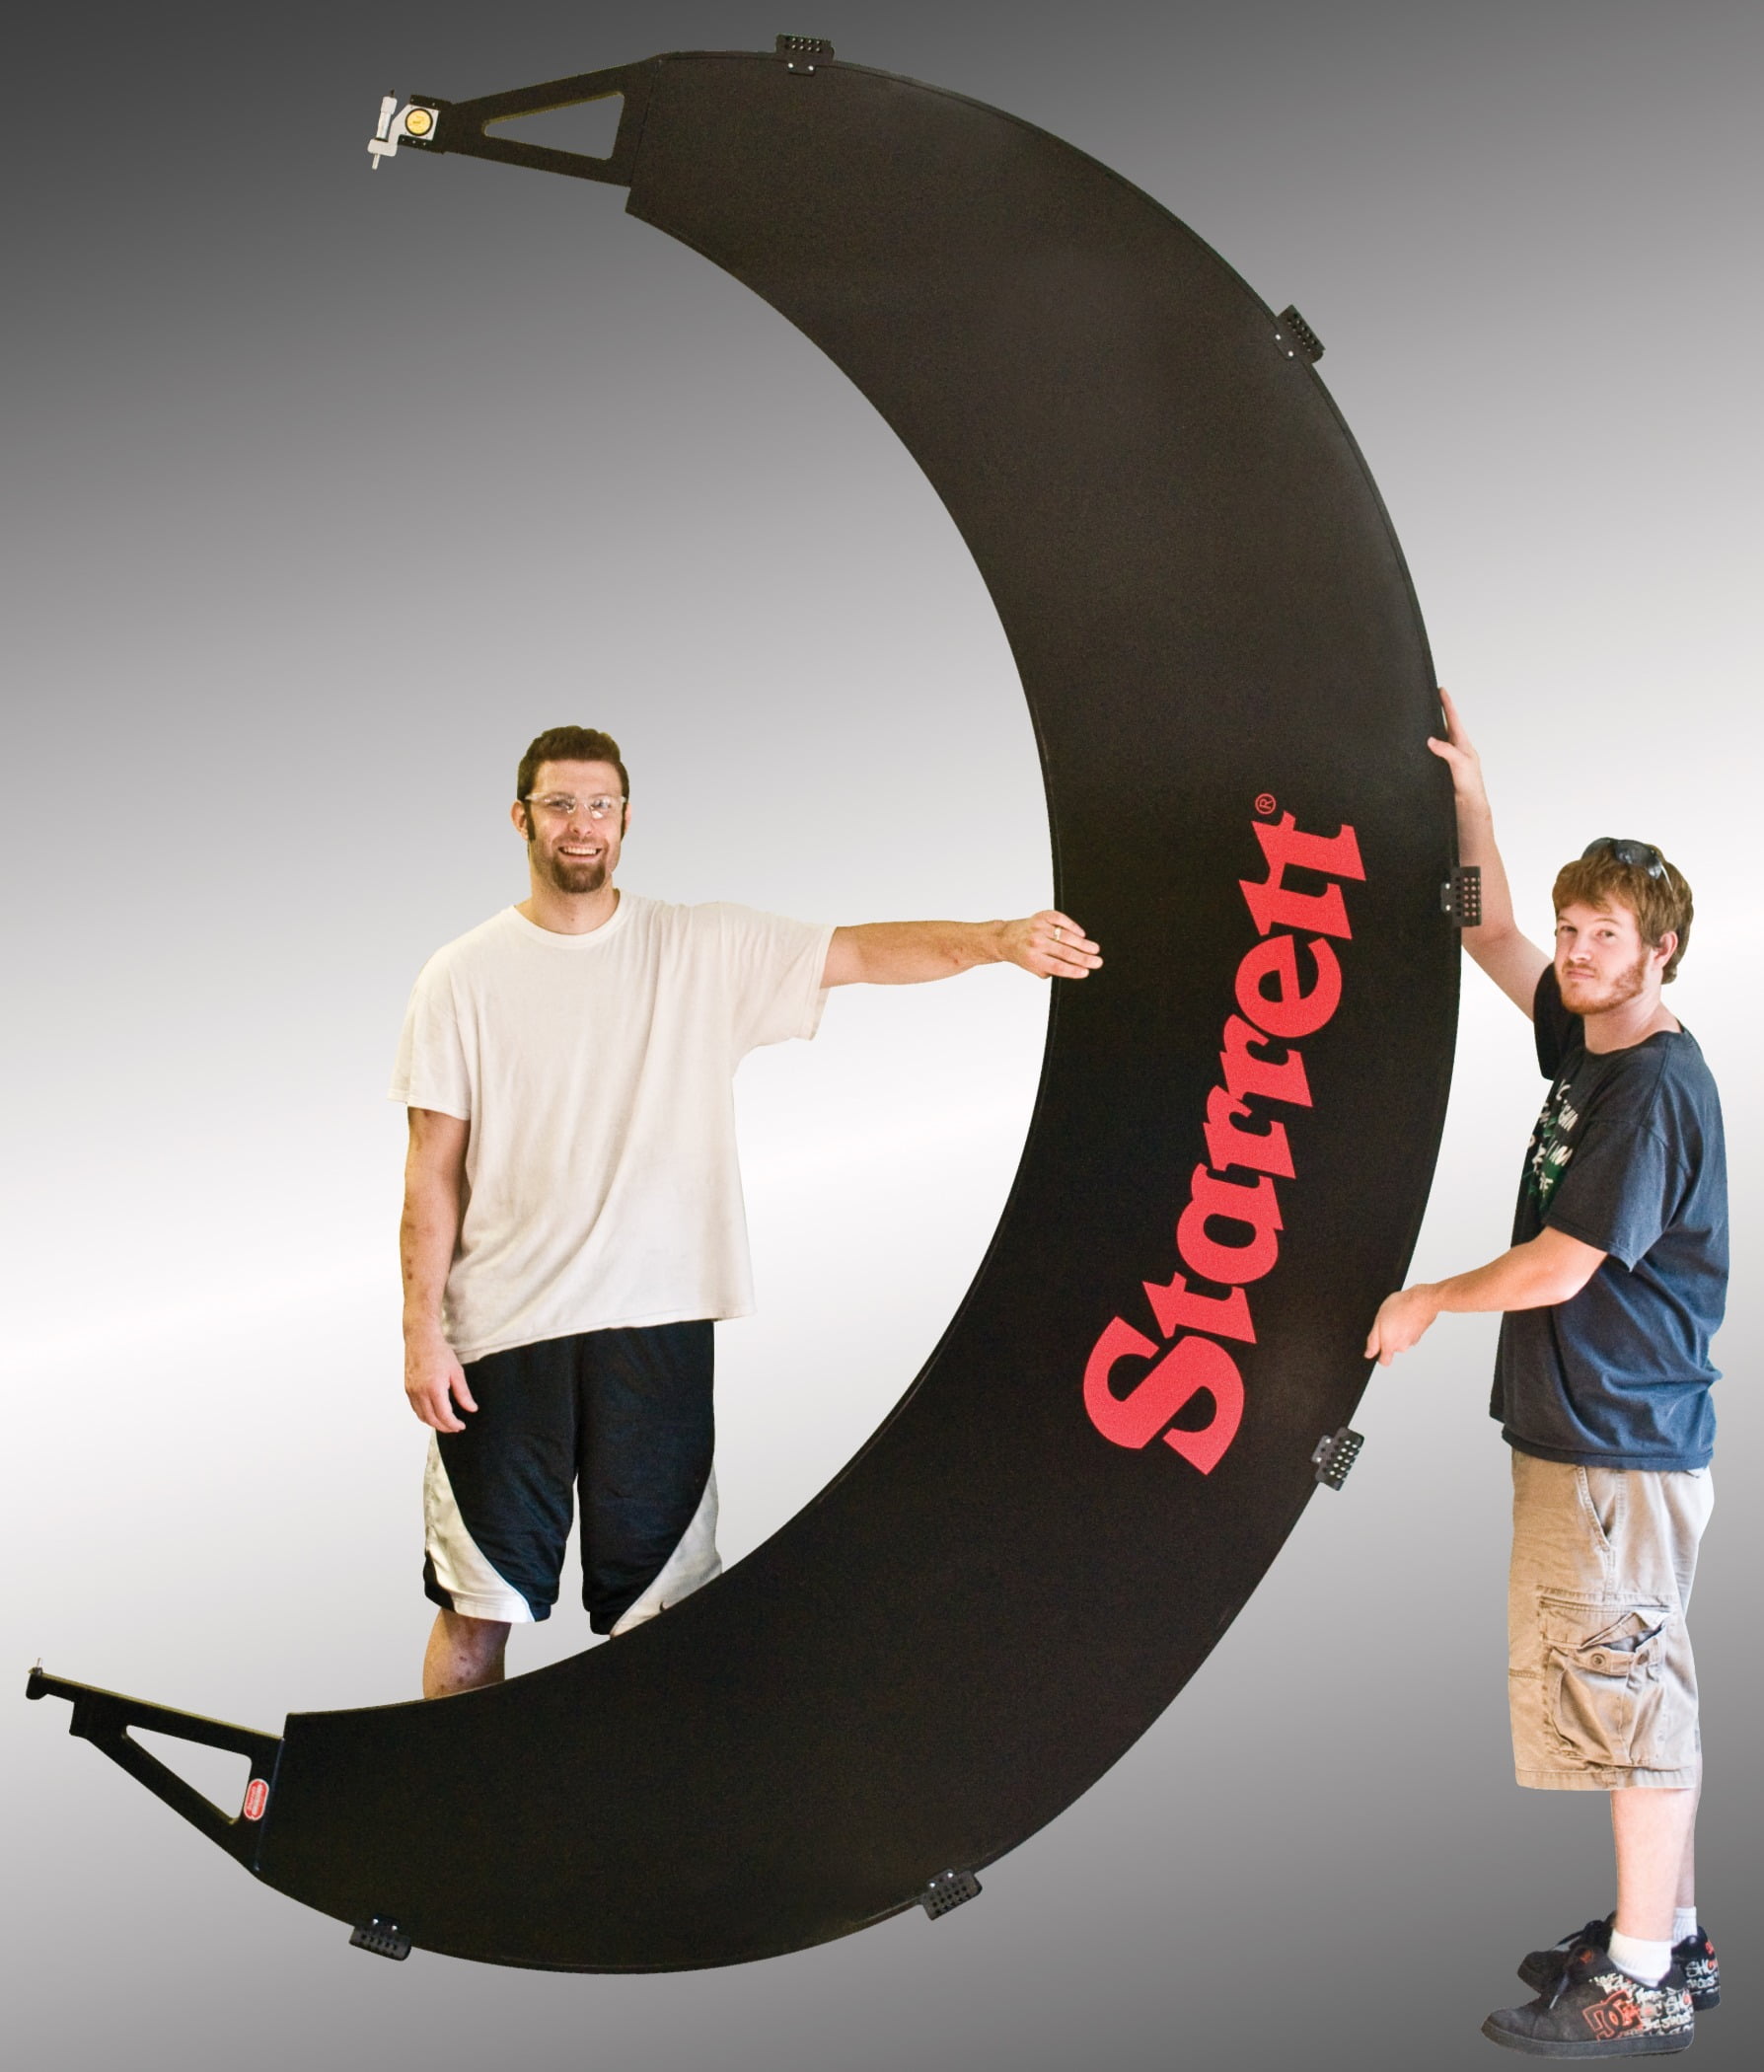
Enormous power generation turbines demand exceptionally large measuring gages.
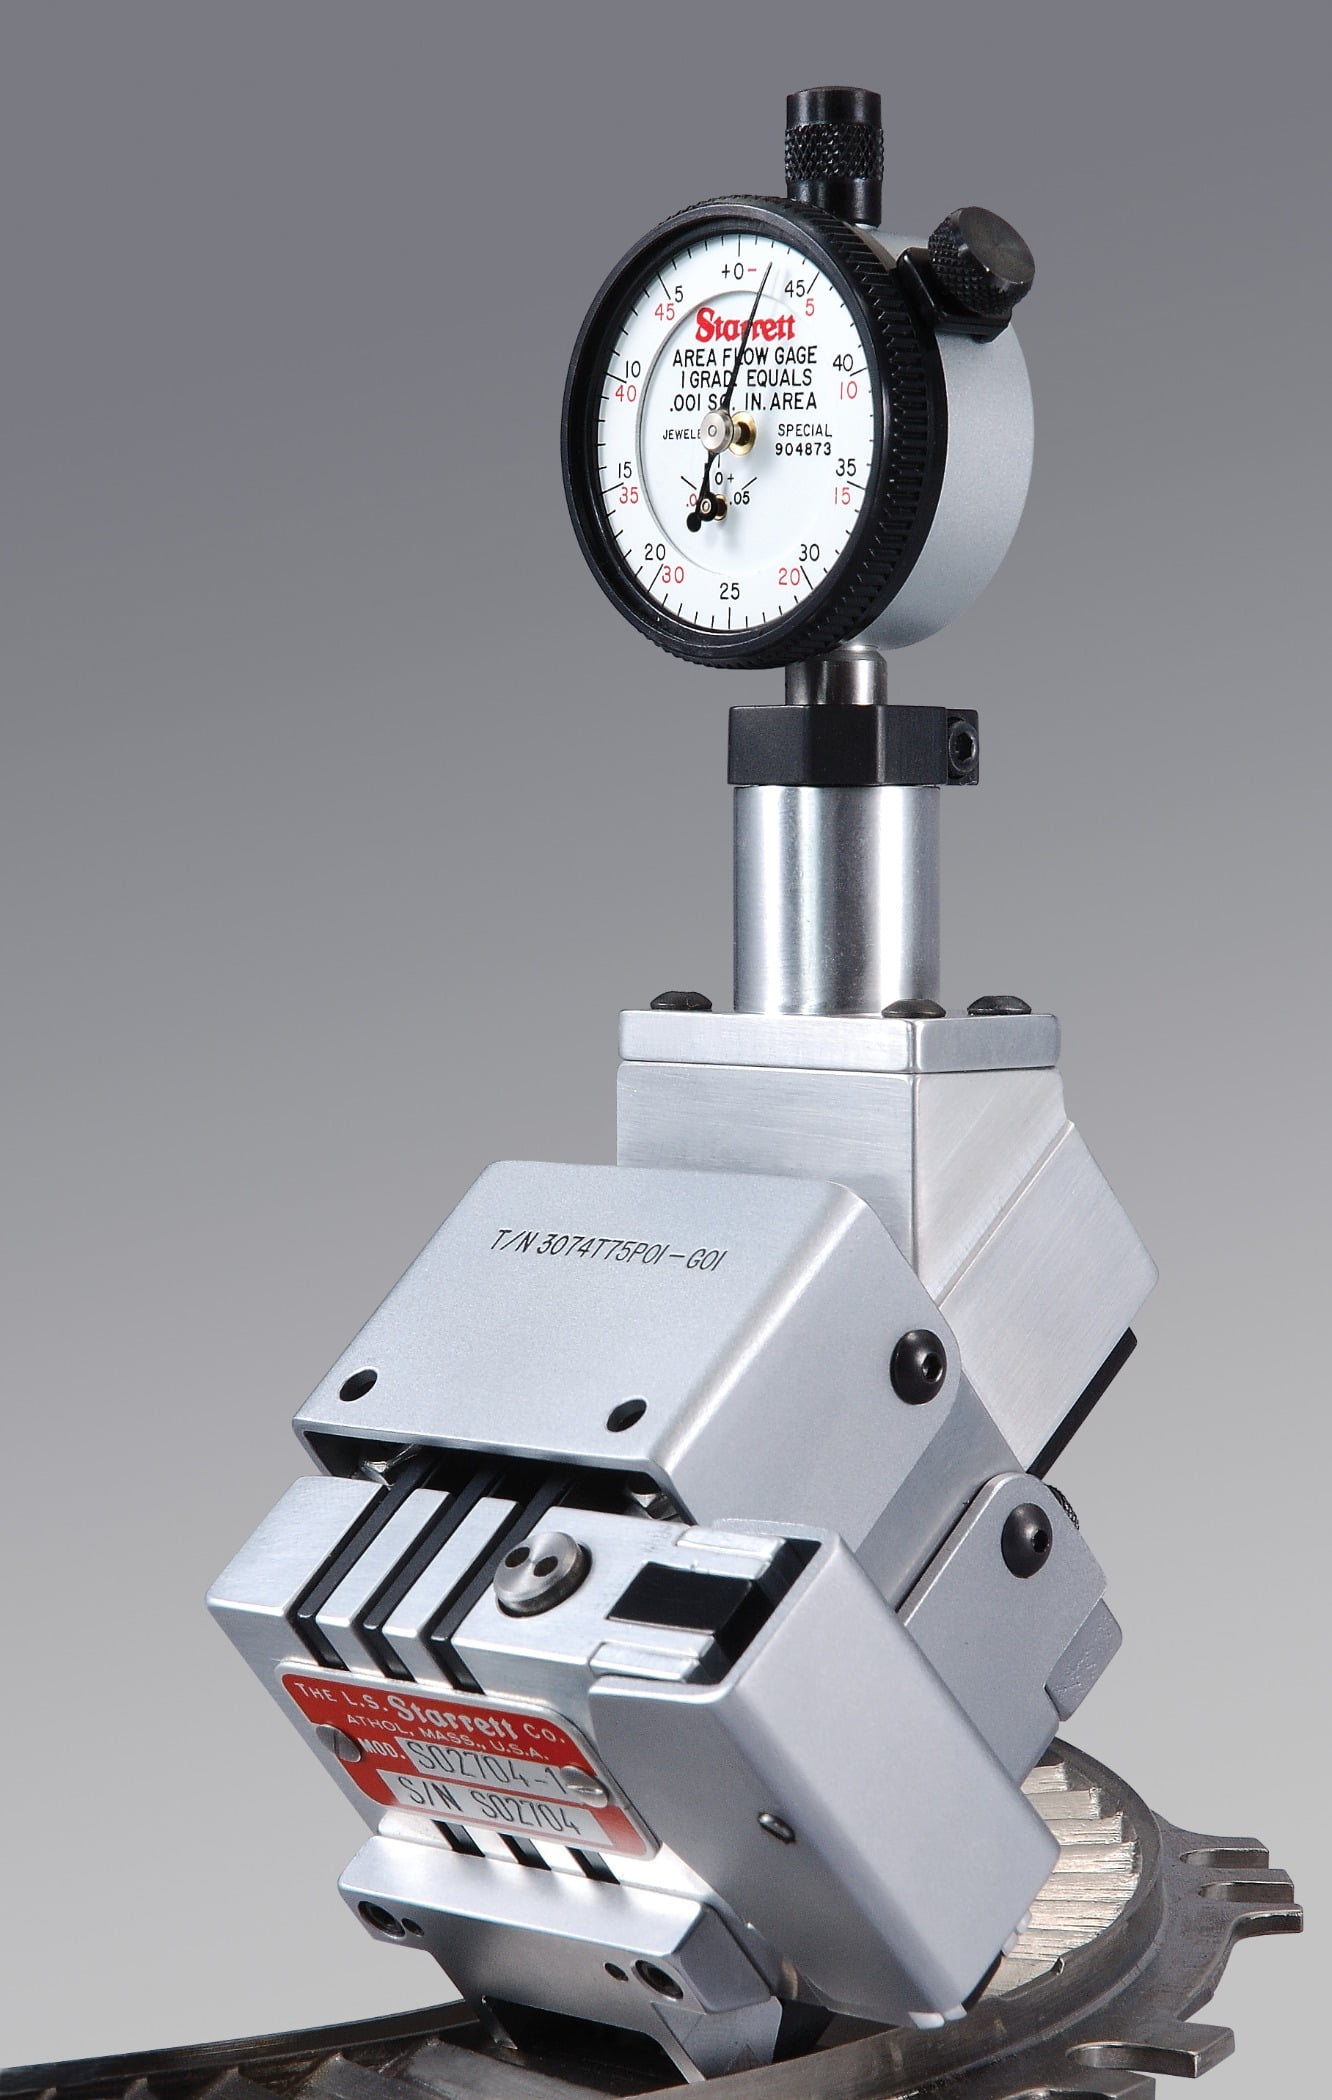
Area flow gages measure the minimum opening of turbine engine nozzles.
Aerospace
When building a special gage to measure torque on a helicopter drive shaft, the heavy weight of the part presented a significant influence on the design of the special gage. To ensure that the measurement readings and results are accurate, a long gage was designed for checking wall thickness and runout along the shaft. A short gage is used for checking perpendicularity to a specific section of the shaft.
Special gages for aerospace applications include “Christmas tree” types that measure the groves that the blades on a turbine engine’s spinning inner assembly fit into. This application has complex geometry and space requirements. To meet the requirements, a rotating gage was designed and produced to expand when entered into the slot and make contact on the correct locations with minimal user influence or error.
Area flow gages measure the minimum area openings of turbine engine nozzles. Area readings are in .001 square inch resolution. The area flow gage uses eight or more contacts that reach into the throat of the turbine nozzle openings. The recorded measurements are transferred via hydraulic cylinders to a dial indicator. Using mechanical linkage and hydraulics, the algebraic area is transferred to the indicator or electronic probe at the top of the gage. Openings of segments are matched and located opposite one another on the engine circumference to provide a balanced air flow. Gages are custom designed for each stage of the turbine. This gaging is critical to proper engine performance and operation.
Power Generation
Enormous power generation turbines demand exceptionally large measuring gages. For easier handling while maintaining accuracy, special honeycomb micrometers that are light weight can be an excellent measuring solution.
Ultra-light honeycomb deep throat and large diameter gages feature the structural properties of honeycomb aluminum established according to standards covering the selection and use of this lightweight material. The results are long-range measurement to close tolerances in handheld gages of many configurations, all combining great rigidity with lightweight and ease of handling. These gages have been made up to 96” between contacts and are a fraction of the weight of other gages.
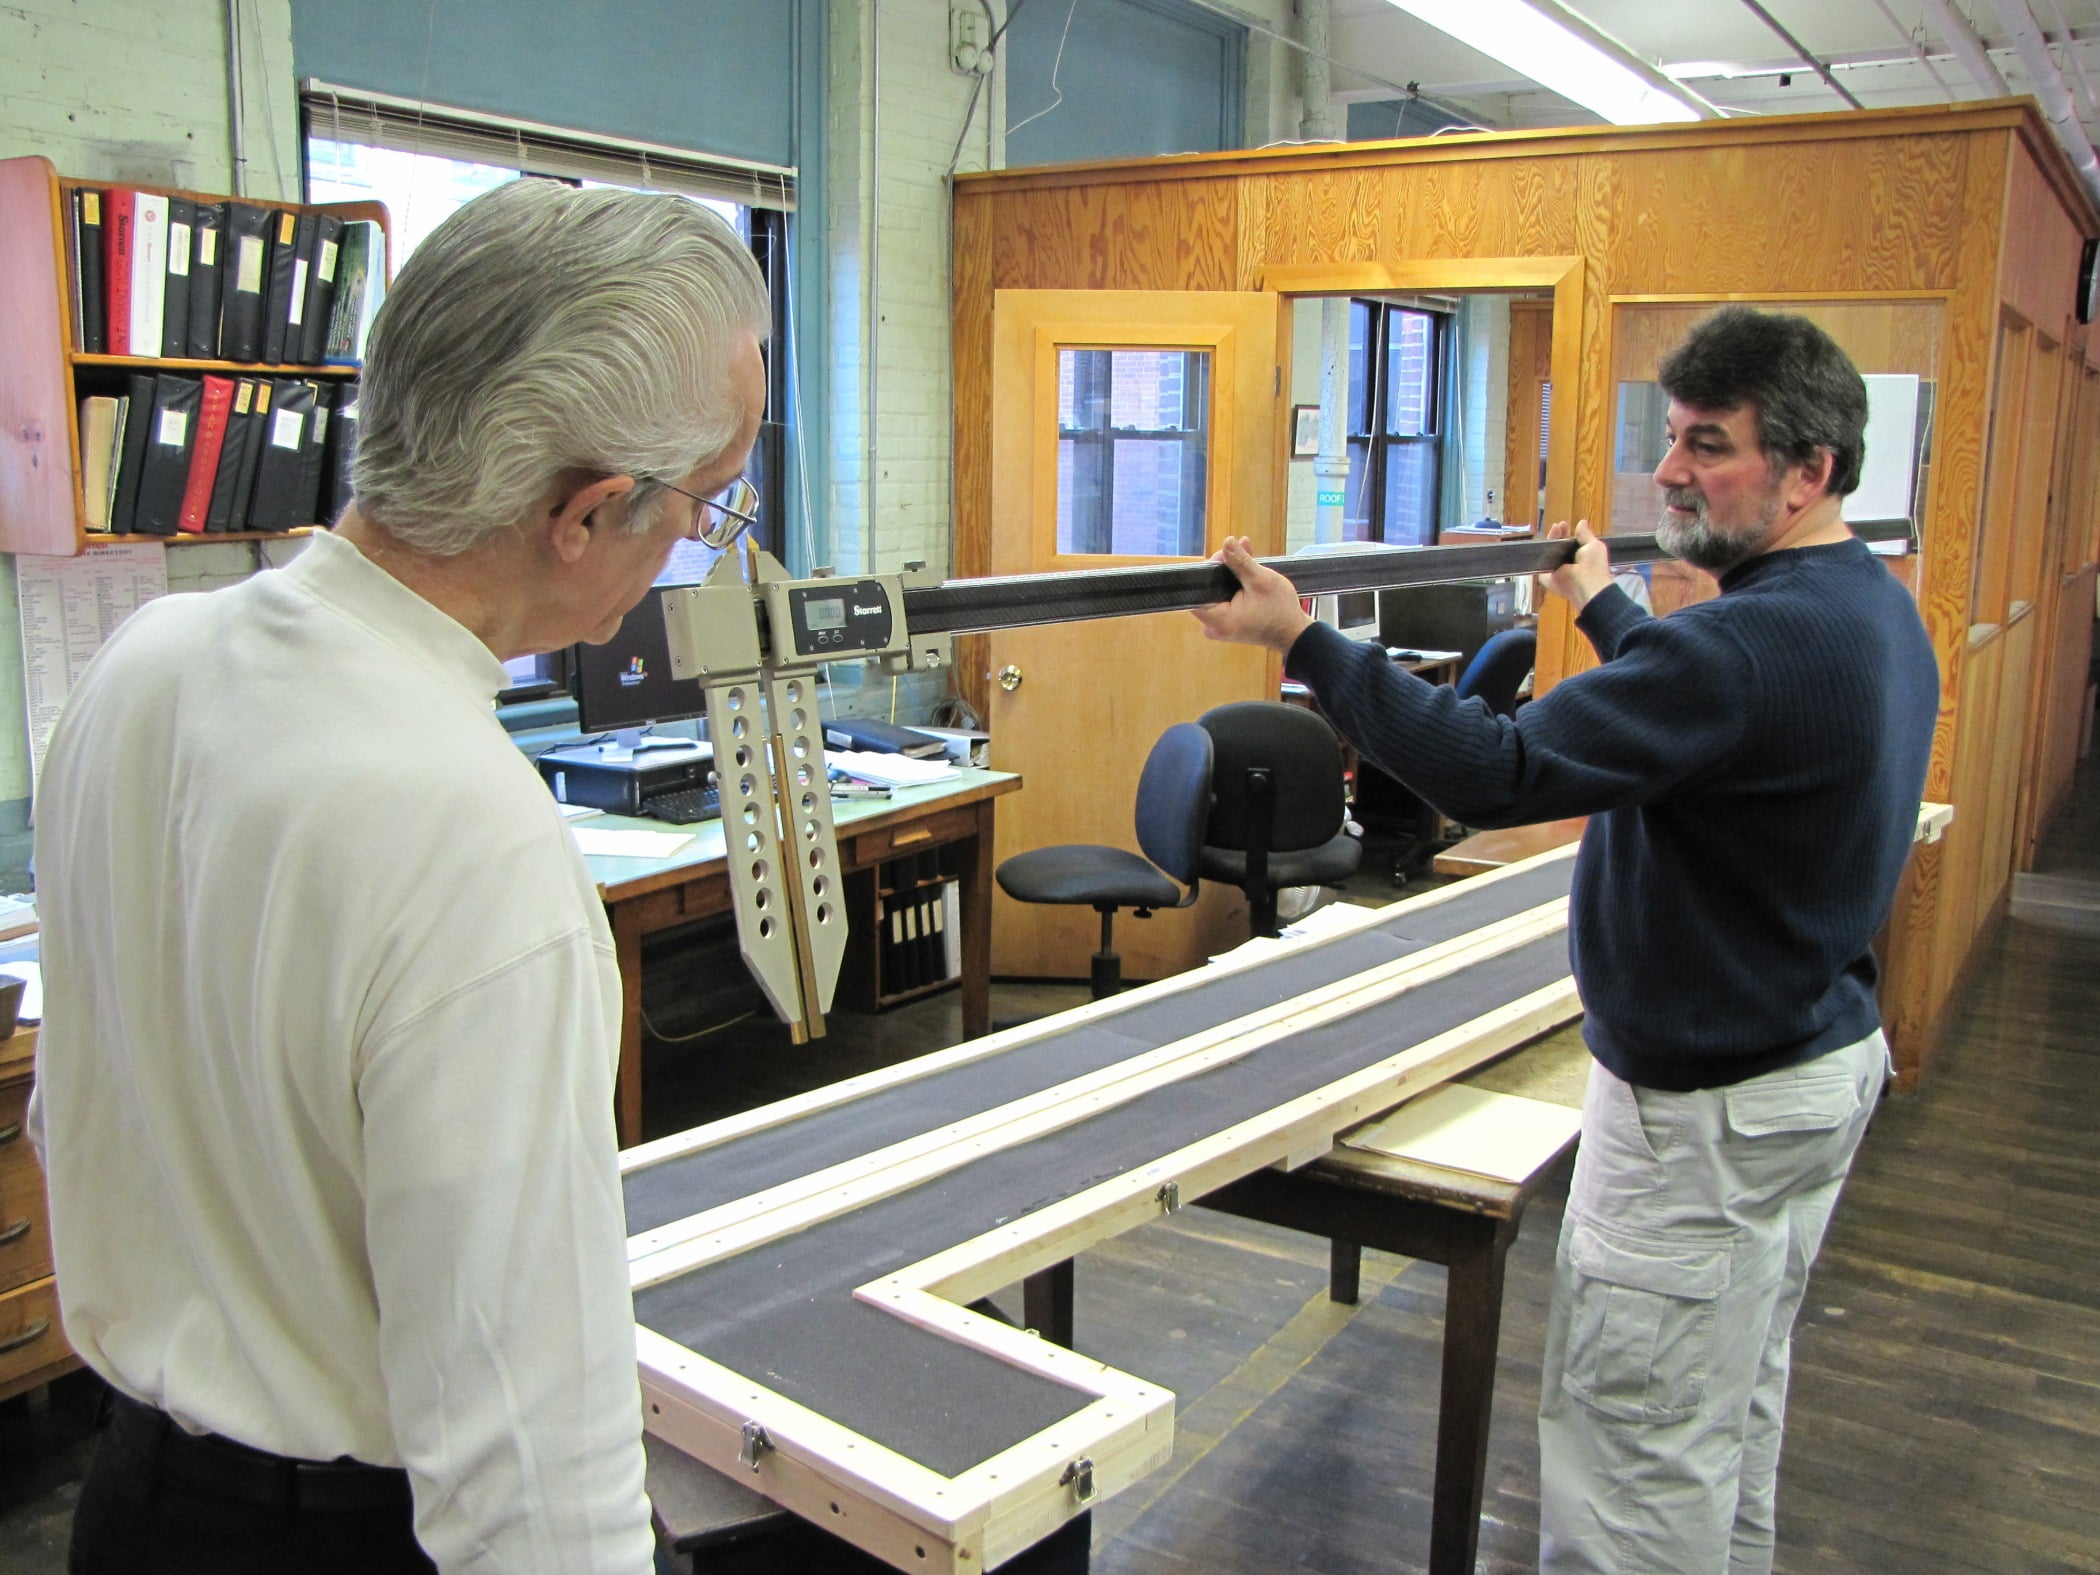
Carbon fiber calipers can be designed and manufactured up to 16 feet long and are light enough for two people. This made a job that originally required five people to hold a gage become a two person job.
Adjustable range snap gages can offer manufacturers in power generation and other industries with a specialized measuring solution that features a lightweight aluminum frame and low-friction ball bushing motion transfer. The indicator can be rotated and locked for easy viewing in any position. Ball contacts or contacts for grooves are also available. They are also available with electronic indicators. These gages have simple and rugged construction, including sturdy dovetail slides for range adjustment. This is a proven low maintenance gage with a long trouble-free life.
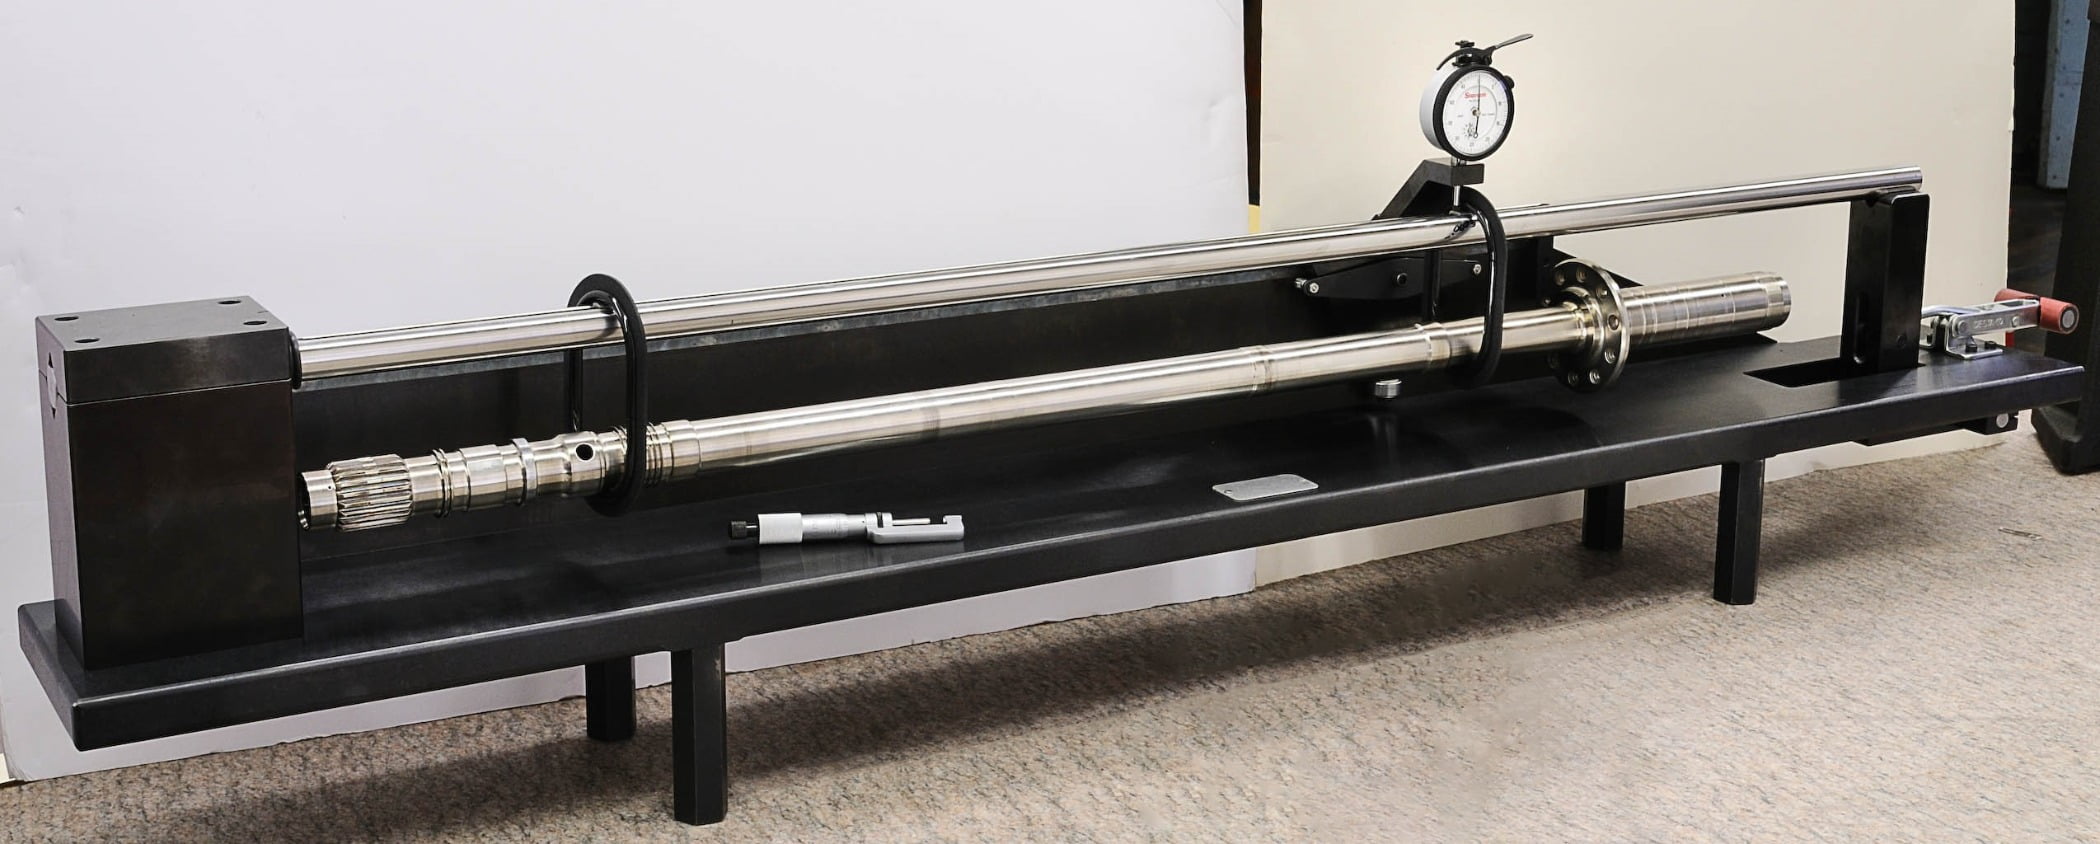
This gage measures torque.
Food
This type of special gage can measure width, length, and height of food trays. Full part length contacts ensure the correct dimensions for every measured parameter. The gage utilizes a system of pneumatics to withdraw probes for the quick, easy loading and unloading of trays. A steel master is used to replicate a perfect part. The electronic indicators are then set to their mean values. The result is a reliable and accurate system with fast throughput to measure a specialized, complex part.
A specially designed PI-Gage ensures container quality requirements with an easy-to-use gage system. With either electronic indicators (with data collection capability), or dial indicators, this gage measures flexible product diameters to .001” accuracy. Each gage from the 2” to 4” range through the 10” to 12” range is set to zero with the master. The button on the indicator is pushed to insert a part and then the button is released to gage a part within ±.025” diameter range from the master size. The gages provide quick changes from size-to-size and ease of use, and .001” accuracy will ensure process control.
Carbon fiber calipers can be designed and manufactured up to 16 feet long and are light enough for two people.
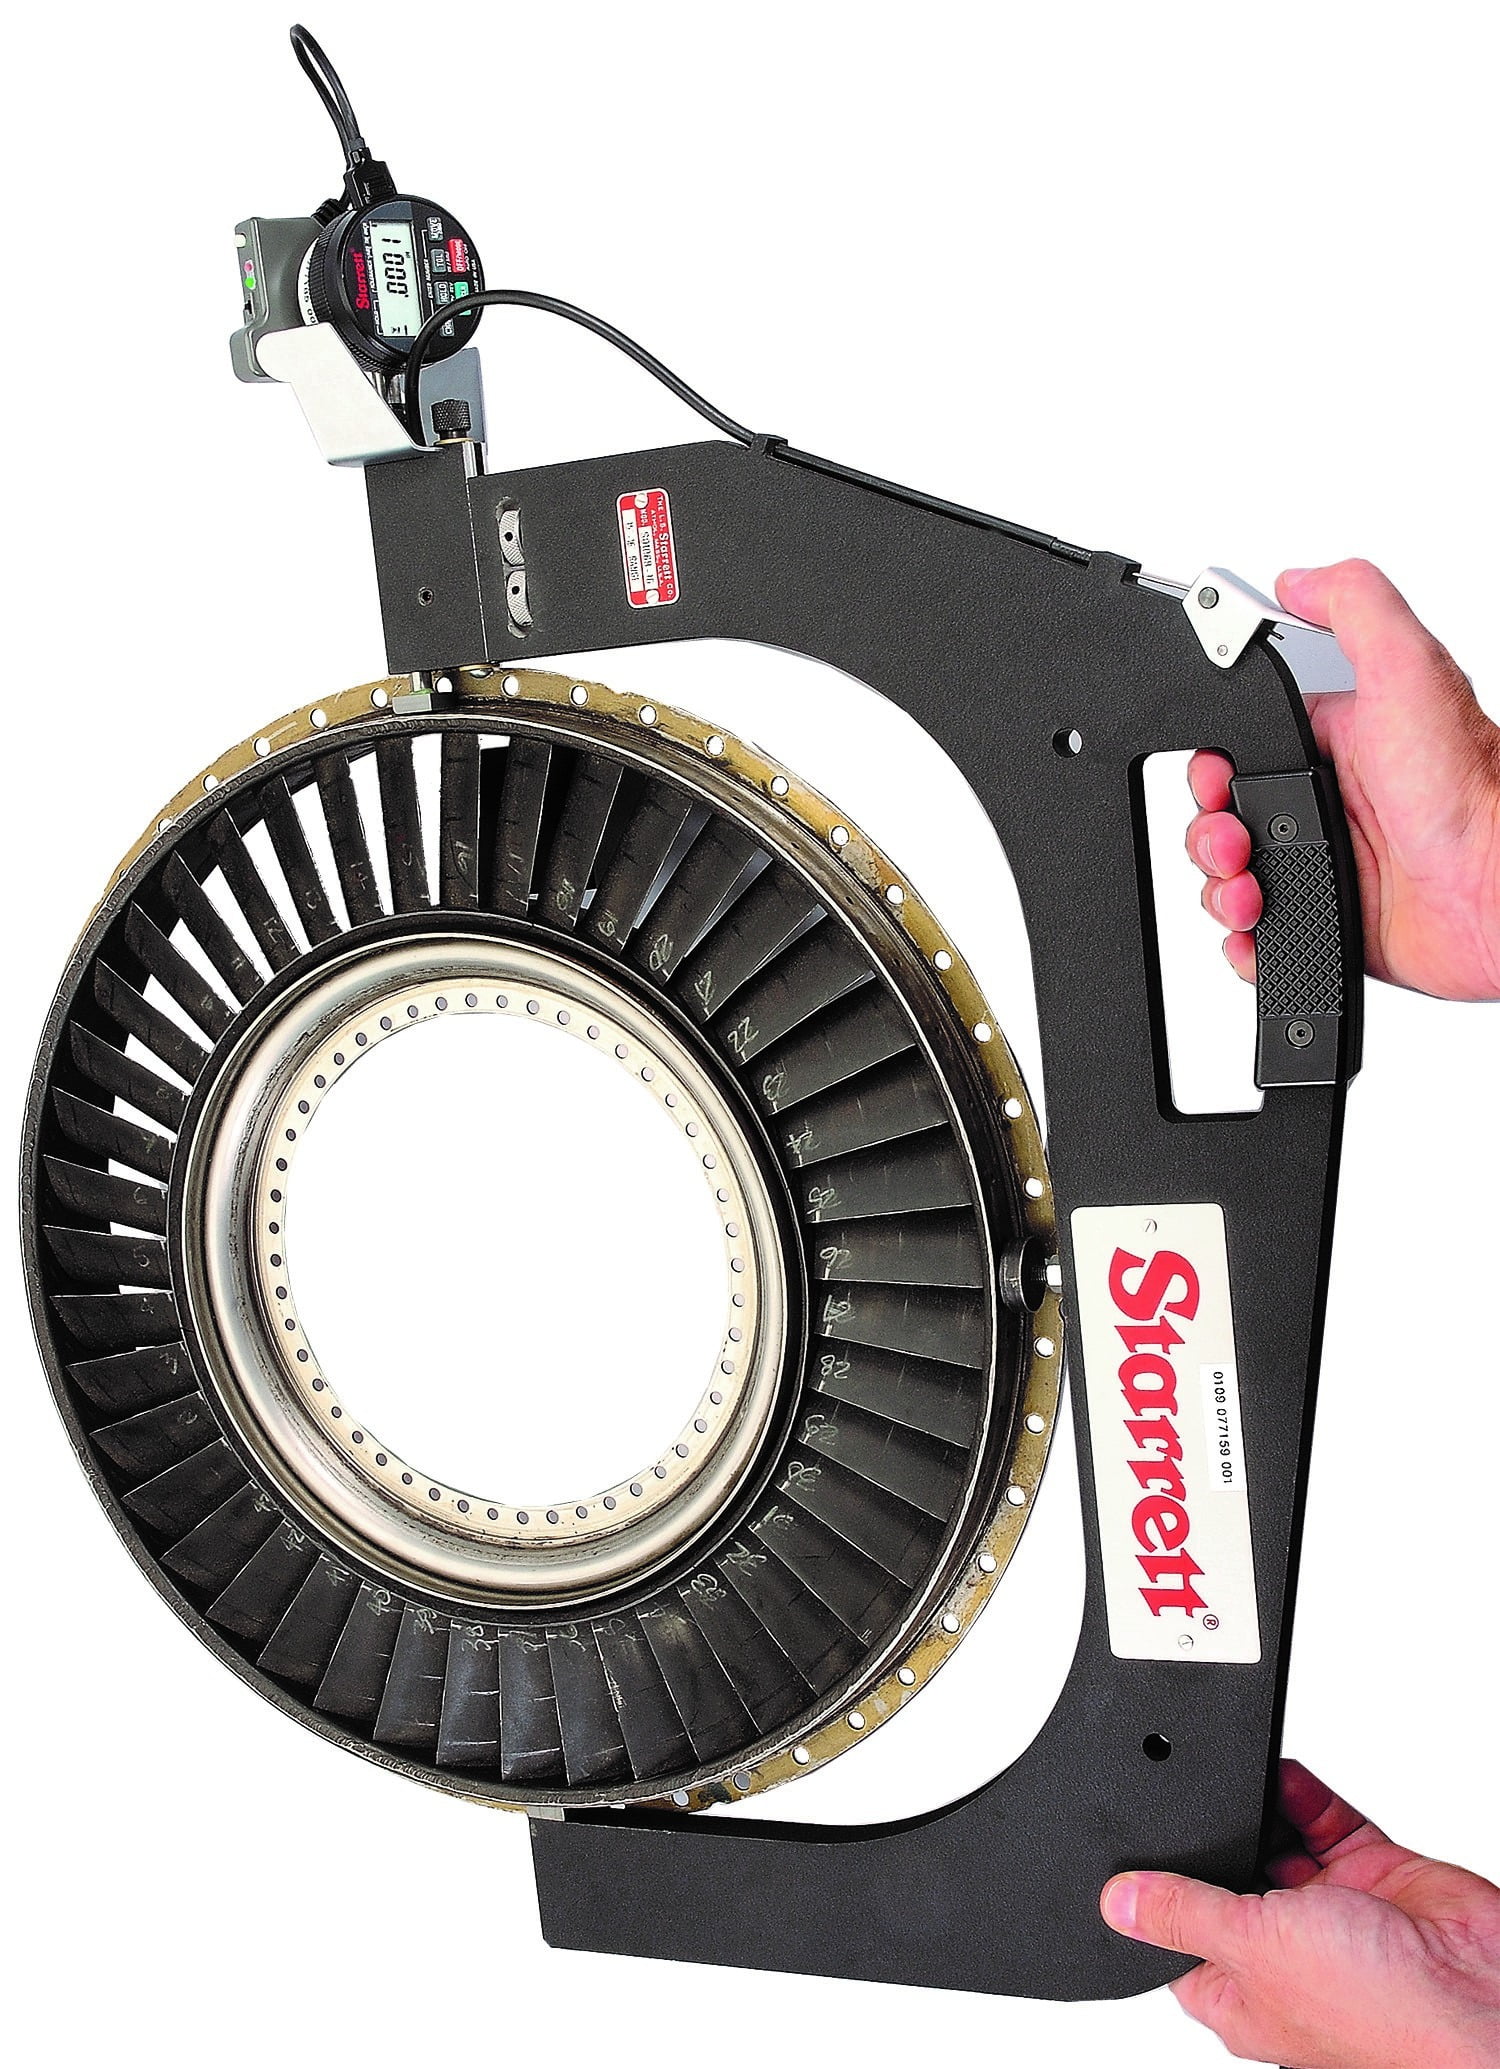
Outside Diameter Snap Gage for measuring a turbine component. This special gage takes quick accurate measurements of a diameter, and has standard accuracy to .0001". It can also be designed for accuracy to .000050".
Medical
We have developed gaging methods to check the ball on a hip replacement. The ball has a few angled internal locking rings that are used to hold the tapered pin from the hip bone replacement part. These are complicated and hard to reach, so the special gage design enables accessing the small opening and taking an accurate diameter of the internal angles. This was applied to many different sized hip joints ranging from small child-sized up to full adult. We have designed gages to measure the taper of hip replacement parts as well.
Wide Range of Appeal
Outside and inside diameter “bar” gages can be individually designed and built for the application at hand. The gages enable dedicated measurements and have a specific diameter or drop that they are always measuring to. Designed for consistency and repeatability regardless of operator skill, these gages have a low-friction ball bushing direct-transfer mechanism and will repeat within one graduation. They are made of aluminum for light weight and to preserve the proper “feel.” Gage contacts and rest feet are carbide for long wear. A steel tube master has carbide rests and pads for accuracy and wear control. For large power generation applications, a crane might need to be used to position a sizable gage into a turbine.
